


50 Undo the two screws securing the contact
switch and withdraw it from its tailgate
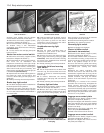
location.
51 Unclip and disconnect the switch multi-
plug, and disconnect the earth wiring.
Remove the switch.
52 Refit in the reverse order of removal.
Make sure that the pins and their contacts are
clean. On completion, check the operation of
the rear wipers, courtesy light, heated rear
window and the tailgate release/central
locking system.
Electric window switches
(1992 models onward)
53 On later models the electric window
switches are located in the upper surfaces of
the door stowage pockets. Removal and
refitting is the same as for the earlier centre
console mounted switches described
previously in this Section.
5 Bulbs (exterior lights) -
renewal
1
Note: Ensure that all exterior lights are
switched off before disconnecting the wiring
connectors to any exterior light bulbs. Note
that if a bulb fails, and has just been in use, it
will still be extremely hot, particularly in the
case of a headlight bulb.
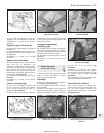
Headlight
1 From within the engine compartment,
disconnect the multi-plug from the back of the
headlight.
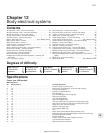
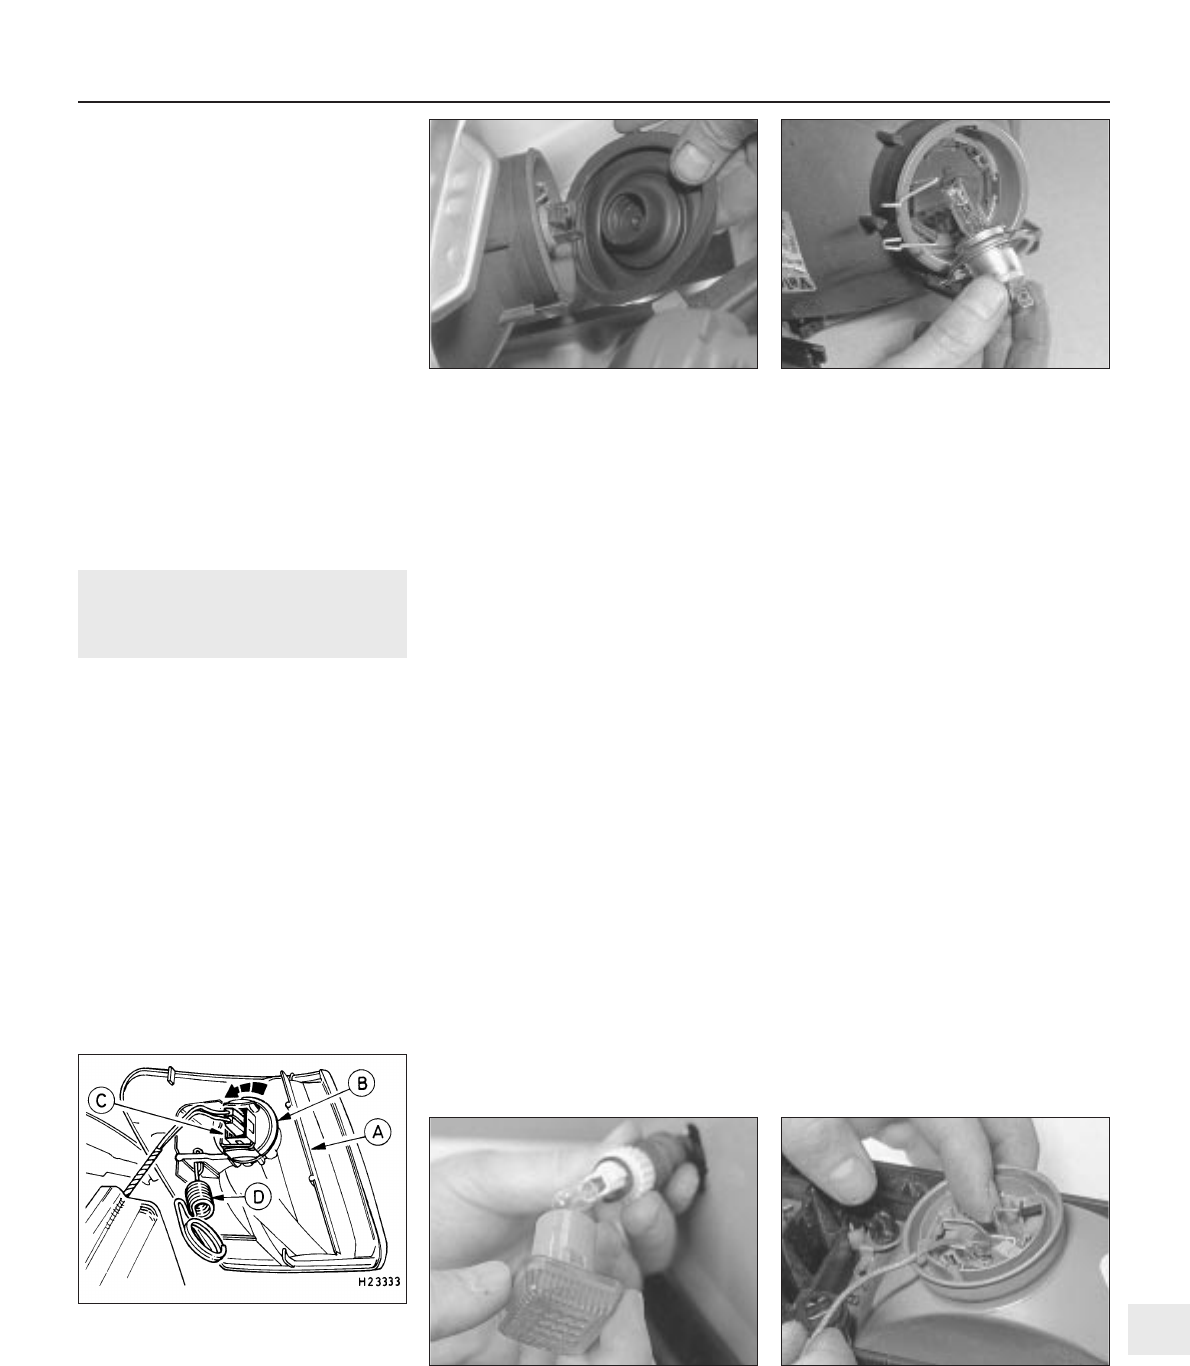
2 Remove the rubber bulb protective cap,
then unlock the bulb retaining spring clip or
retaining ring (according to type) and
withdraw the bulb (see illustrations).
Caution: Take care not to touch the bulb
glass with your fingers - if accidentally
touched, clean the bulb with methylated
spirit.
3 Refitting is a reversal of the removal
procedure.
Front sidelight
4 The bulbholder is located on the side of the
headlight unit, and is removed by twisting
anti-clockwise and withdrawing from within
the engine compartment.
5 Withdraw the push-fit bulb from its holder.
6 Refitting is a reversal of the removal
procedure.
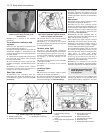
Front direction indicator
7 Remove the direction indicator light unit by
releasing the retaining spring from its body
location, then pulling the light assembly
forwards. Disconnect its multi-plug as it is
withdrawn.
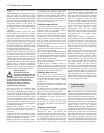
8 Turn the bulbholder anti-clockwise and
remove it (see illustration). The bulb is a
bayonet type fitting in its holder.
9 Refitting is a reversal of the removal
procedure.
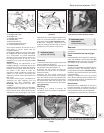
Front direction indicator side
repeater
10 Remove the appropriate front wheel arch
liner as described in Chapter 11.
11 Remove the appropriate sill scuff plate as
described in Chapter 11, and release the clip
securing the insulation to the panel forward of
the lower A-pillar.
12 Disconnect the supply lead connector and
the earth lead, then release their grommet
from its panel location.
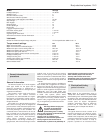
13 From outside the vehicle, twist the light
assembly to release it, then withdraw it and its
leads (see illustration).
14 Refitting is a reversal of the removal
procedure, ensuring that the grommet is
seated correctly in its panel location.
Auxiliary lights
S models
15 Undo the screw at the base of the light,
then withdraw the lens and reflector assembly
from the light housing.
16 Disconnect the wiring then release the
bulb retainer and remove the bulb.
17 Refitting is a reversal of the removal
procedure.
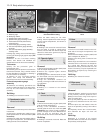
XR2i models
18 Remove the auxiliary light assembly from
its bumper location, as described in Section 7.
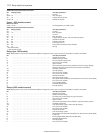
19 Release the bulb retainer, then remove the
bulb (see illustration).
20 Refitting is a reversal of the removal
procedure.
Rear light cluster (all models
except Courier)
21 Access to the rear light cluster bulbholder
is gained from the luggage compartment.
Disconnect the multi-plug from the
bulbholder, then press the retaining lugs on
Body electrical systems 12•7
5.2b . . . then unlock the headlight bulb
retaining spring and withdraw the bulb
5.2a Remove the protective cap . . .
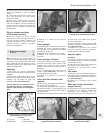
5.19 Releasing the auxiliary light bulb
retainer (XR2i models)
5.13 Removing the direction indicator side
repeater bulbholder assembly
5.8 Remove the front direction indicator
light bulbholder by turning it anti-
clockwise
A Light unit C Multi-plug
B Bulbholder D Retaining spring
12
1595Ford Fiesta Remake