


16 Windscreen wiper motor and
linkage - removal and refitting
2
Removal
Wiper motor
1 Operate the wiper motor, then switch it off
so that it returns to its rest position.
2 Disconnect the battery negative (earth) lead
(refer to Chapter 5A, Section 1).
3 Dependent on model, disconnect and
remove the air cleaner components as
necessary to allow access to remove the
bulkhead panel.
4 Remove the cooling system expansion tank
as described in Chapter 3.
5 Release the wiring loom, any connectors,
cable-ties and hoses from the right-hand half
of the bulkhead panel, then remove its rubber
seal.
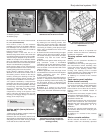
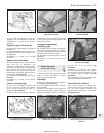
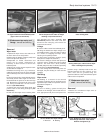
6 The right-hand half of the bulkhead panel is
secured by screws and a single nut. The nut is
located behind the panel at the bonnet hinge
end. Release the right-hand half of the panel
and, having ensured that it is free to move,
remove it (see illustrations).
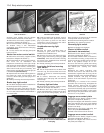
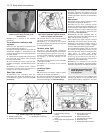
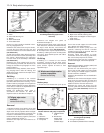
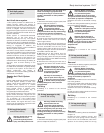
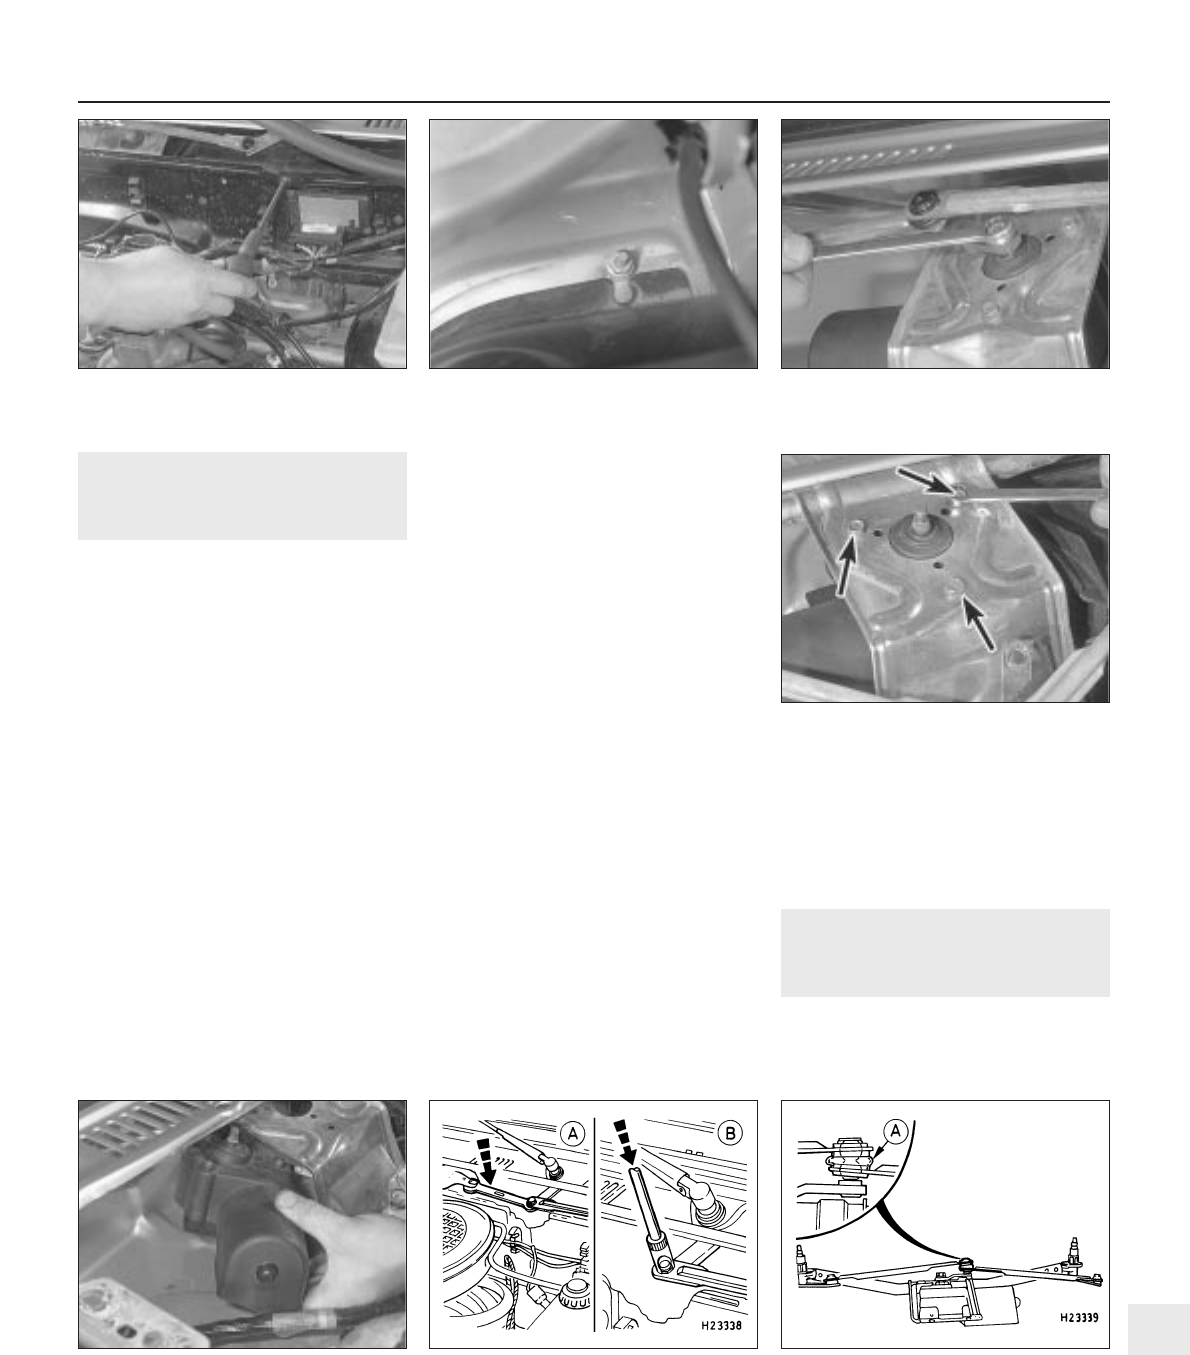
7 Unscrew the nut from the driving shaft, and
pull the crank off the driving shaft taper (see
illustration).
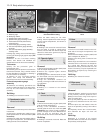
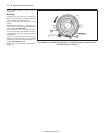
8 Undo the three wiper motor retaining bolts
and withdraw the motor assembly (see
illustrations). Remove the motor cover, then
disconnect the multi-plug and remove the
motor from the vehicle.
Linkage
9 Pull the rubber seal off the bulkhead panel.
10 Bring the windscreen wiper linkage to an
accessible position, using the ignition switch
as a means of stopping the wiper motor
returning to the parked position.
11 Disconnect the battery negative (earth)
lead (refer to Chapter 5A, Section 1).
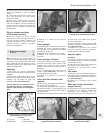
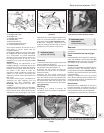
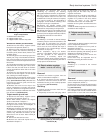
12 Prise the linkages off their ball pivots as
required, using a suitably-sized open-ended
spanner. The crank has a dual (vertically
stacked) ball pivot with a bellows separating
the two linkages (see illustrations).
13 If the running faces of the ball pivots are
damaged, the pivot shaft(s) or crank must be
renewed.
Refitting
Wiper motor
14 Refitting is a reversal of the removal
procedure, tightening all nuts and bolts to the
specified torque. Refit the expansion tank as
described in Chapter 3.
Linkage
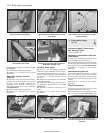
15 Prior to refitting, grease the ball pivot
sockets on the linkages, then locate them on
their appropriate ball pivots and press into
position using a suitably-sized socket. The
bellows between the two linkages on the
crank must also be greased using the
specified lubricant. Refit the bulkhead panel
rubber seal on completion.
17 Windscreen wiper pivot
shaft - removal and refitting
2
Removal
1 Remove the windscreen wiper arms as
described in Section 15.
Body electrical systems 12•13
16.7 Unscrew the nut from the wiper
motor driving shaft
16.6b . . . then disengage the right-hand
half of the panel from under its single
retaining nut (left-hand shown)
16.6a Remove all retaining screws from
the right-hand half of the bulkhead panel
(upper centre screw shown) . . .
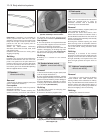
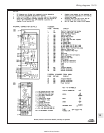
16.12b Windscreen wiper motor bracket
with linkage and motor. Inset shows
bellows arrangement (A)
16.8a With the crank removed from the
driving shaft taper, undo the three wiper
motor retaining bolts (arrowed)
16.12a Windscreen wiper linkage
A Removal B Refitting
16.8b . . . and withdraw the wiper motor
assembly
12
1595Ford Fiesta Remake