


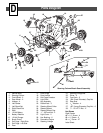

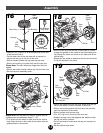

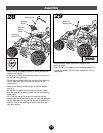
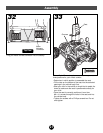
15
Rear
(Large)
Wheel
Hex
Bushing
Hubcap
Driver
Rear
Axle
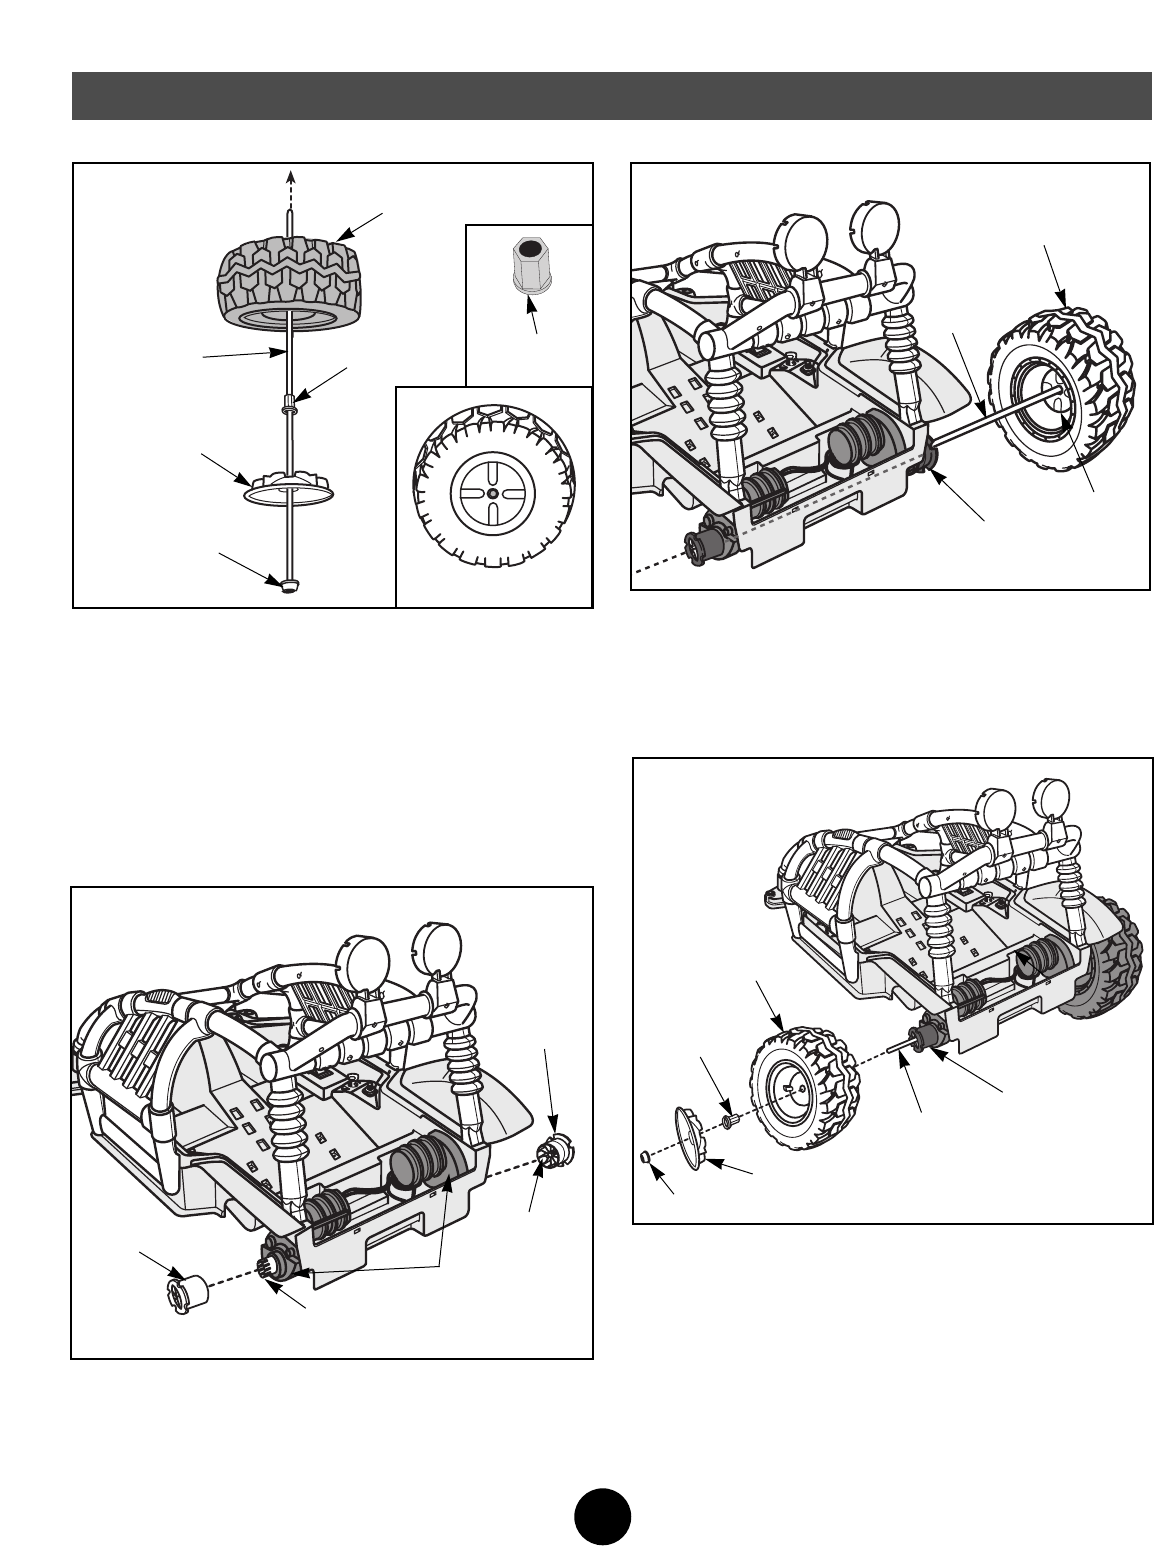
• Slide a rear wheel onto the rear axle. Make sure that the
ribs on the wheel fit into the notches in the driver.
• Slide a hex bushing (barrel side first) onto the rear axle
and into the center of the wheel.
• Slide a hubcap onto the rear axle.
• Fit a .437 cap nut on the end of the rear axle.
• Support the cap nut on the opposite rear wheel and tap
the cap nut with a hammer.
• Pull on the wheel to make sure the cap nut is secure on
the axle.
• Set the vehicle body aside.
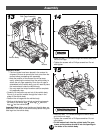
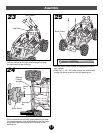
19
Assembly
Rear
Axle
Rear
(Large)
Wheel
Driver
Rib
• Slide the rear axle into the hole in the center of a driver,
through the guides on the inside of the vehicle body and
out through the motor and driver on the other side of the
vehicle body.
• Rotate the rear wheel to make sure the ribs on the wheel
fit into the notches in the driver.
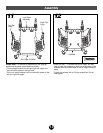
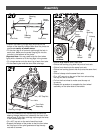
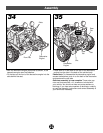
18
.437 Cap Nut
• Position a .437 cap nut on a flat surface and fit one end
of the rear axle into it.
• Tap the other end of the rear axle with a hammer to
secure the cap nut on the end of the axle.
• Slide a hubcap (ribbed side up) onto the rear axle.
• Slide a hex bushing (ring side first) onto the rear axle.
Please Note: The rear wheels are larger than the front
wheels.
• Slide a rear wheel (inside surface up) onto the rear axle.
• Set the rear axle assembly aside.
Rear Axle
Hubcap
Hex Bushing
.437
Cap
Nut
Rear
(Large)
Wheel
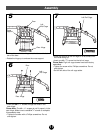
16
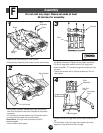
Helpful Hint: You may want the help of another adult to
complete rear axle assembly steps 17 - 20.
• Fit a driver onto the motor on each side of the vehicle
body. Align the ribs on the inside of the drivers with the
gearbox teeth on the motors.
Rear
Driver
Motor
Driver
Driver
Teeth
Ribs
17
Inside of Wheel
Hex Bushing
Ring Side