


Assembly
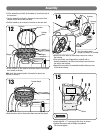
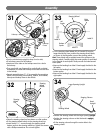
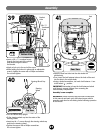
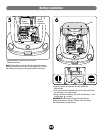
•Cut the steering wheel labels (#13, #14 and #15) from the
larger label sheet. Now, position the steering wheel labels,
as shown in the illustration, around the steering wheel.
Hint: These labels will be applied around the spokes on the
steering wheel. Carefully apply the center portion of each label
to the topside of each spoke. Gently smooth the label around
each spoke.
•Remove the backing from label 14 and apply the label to the
left spoke.
•Remove the backing from label 13 and apply the label to the
bottom spoke.
•Remove the backing from label 15 and apply the label to the
right spoke.
34
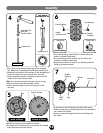
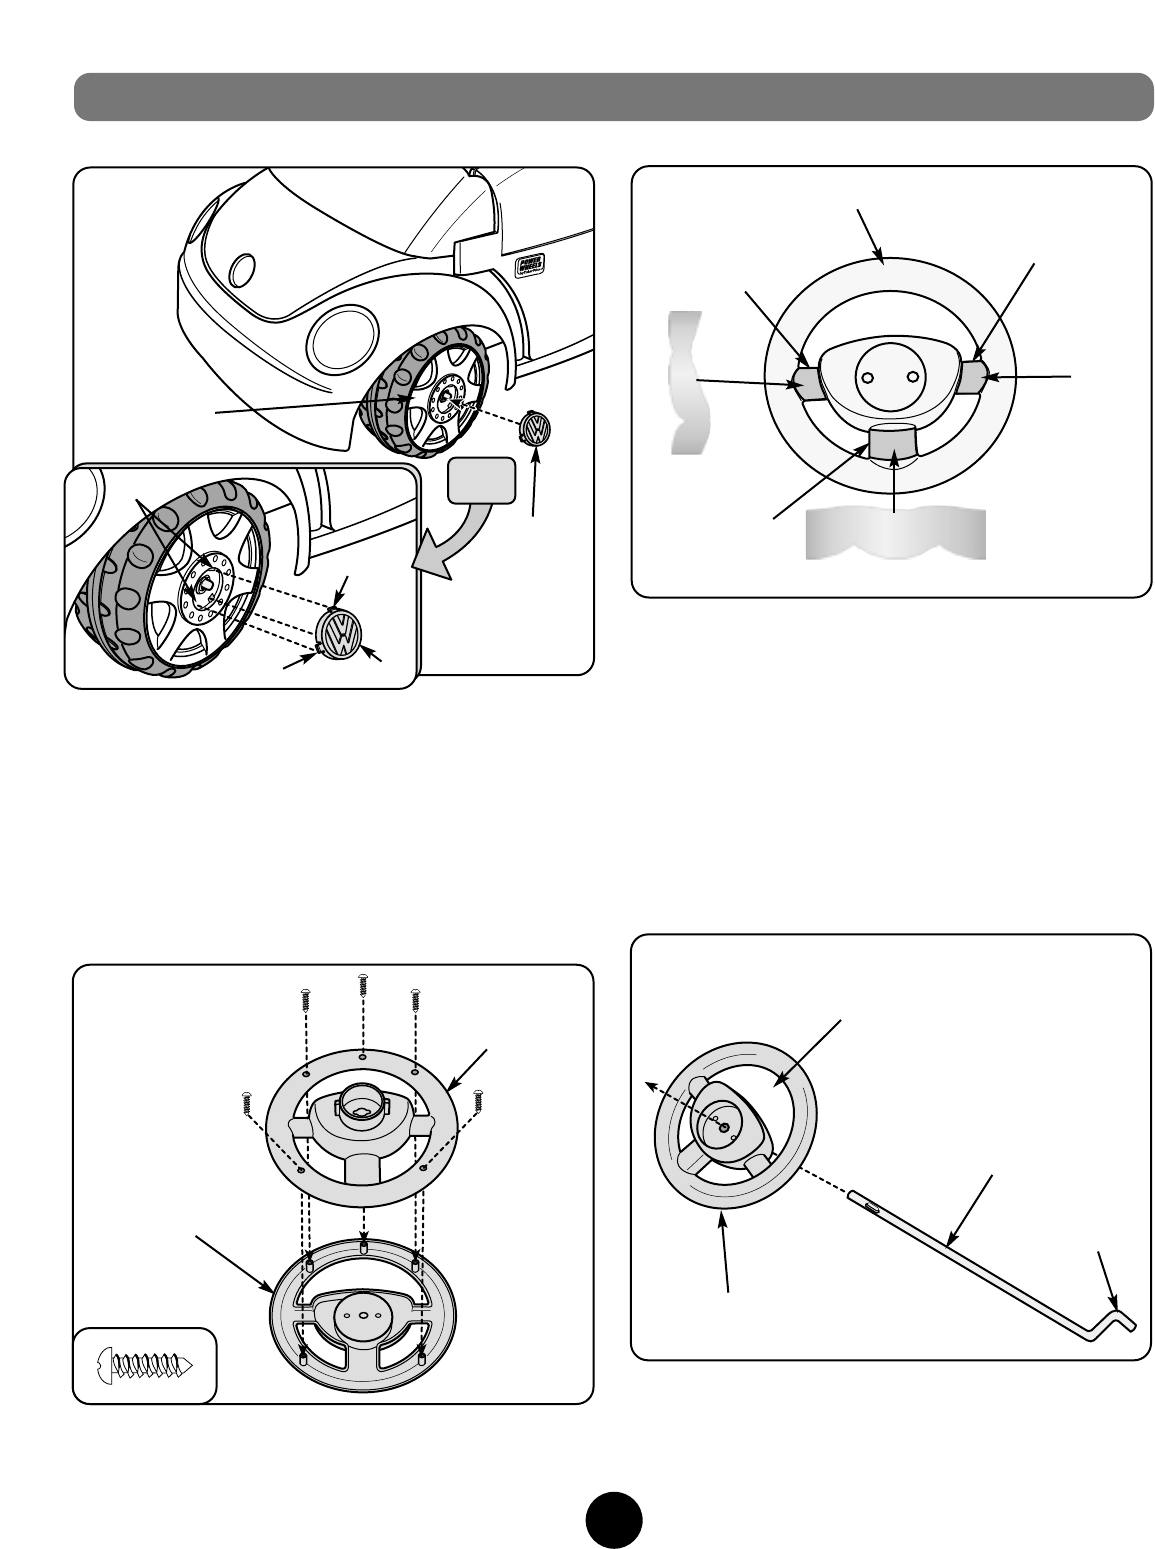
•Place the steering wheel top face down on a flat surface.
•Fit the steering wheel bottom to the steering wheel top.
•Insert five #6 x
1
/
2
" screws through the steering wheel
bottom and into the steering wheel top. Tighten the screws
with a Phillips screwdriver. Do not over-tighten.
32
T
M
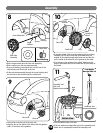
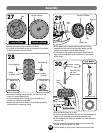
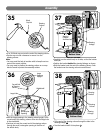
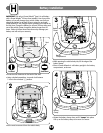
•Turn the vehicle body upright (or keep it on its side).
•Fit a hubcap cover into the hubcap.
•Insert one of the tabs on the hubcap cover into a slot in
the hubcap.
•Then, push with your fingernail (or carefully with a slotted
screwdriver), the other two hubcap cover tabs into the slots
in the hubcap.
•Repeat assembly steps 27 - 31 to assemble the remaining
wheel, round bushing, hex bushing, washer, lock washer,
hubcap and hubcap cover to the vehicle.
31
Hubcap
Hubcap
Cover
Tab
Tab
Tab
Slots
Steering
Wheel
Bottom
Steering
Wheel
Top
Steering Wheel
Left
Spoke
Bottom
Spoke
Right
Spoke
•Position the steering wheel with the large opening upright.
•Position the steering column so that the bend is upright,
as shown.
•Fit the steering column through the center hole in the
steering wheel.
Large Opening Upright
Steering Wheel
Steering Column
Bend
Upright
Label 13
Label 14
Label 15
33
19
See
Inset