L
BI-39077 BALANCE AND LEVEL
56
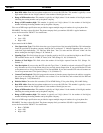
When hybrid balancing is complete, the lower case 'b' under the ADJ. COMPLETED column will become an upper case 'B'.
This feature allows you to identify which adjustment operations have been completed during this session.
DID Lines
As DID lines can't originate phone calls, they need a different procedure to balance the GTI unit's hybrid.
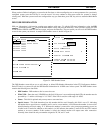
If the pop-up window is up, press the Esc key to return to the main screen.
If you have more than one DID line in a system and you wish to balance all DID lines in one session, you may need to leave
each balanced DID line off-hook before balancing the next line; this is to prevent the phone company's rotary from selecting
the same line. Some phone companies will cycle each incoming call to a new line, in which case you will need only one
phone. Determine how your phone company handles calls to the DID circuits and obtain the appropriate number of telephone
units. Make sure each telephone has its transmitter disabled (i.e. mouthpiece removed) so that the GTI unit can properly
detect quiet during the balance adjustment.
Call in to the system to a DID number that has been programmed into the database as a 'B' (Balance) type. If the number
dialed was successful, the line status will change to 'ADJUST' and the pop-up window will appear for that line.
The 'Balance' menu item should now be highlighted. Select 'Balance' and the GTI Configurator will instruct the GTI unit to
perform hybrid balance. If balancing succeeds, the hybrid 'R' and 'C' values will be displayed. These values do not correspond
to values of resistance or capacitance and are only relative indices.
When hybrid balancing is complete, the lower case 'b' under the ADJ. COMPLETED column will become an upper case 'B'.
This feature allows you to identify which adjustment operations have been completed during this session.
To balance additional DID lines, press 'ESC' to return to the main screen. The previous DID line will enter a 'READY' state
and will be unavailable for additional calls. If the phone company does not cycle incoming calls, keep the current phone off-
hook and dial the same DID balance number with another phone, otherwise hang up the phone and redial the DID balance
number for the next line. Proceed with the adjustment procedure given above. Repeat this process for all DID lines.
Remember to hang up all phones when you are done.
ADJUSTING AUDIO LEVEL TO PHONE
When configured for 2-Wire telephone lines (DID and End-to-End) all hardware gains in the GTI unit are set to
predetermined values, so level adjustments in the conventional sense, do not exist. However, as there are significant
differences in phone lines, the GTI unit does have a way to compensate for these variances (using DSP).
The Audio To Phone controls the software gain of the GTI for audio from the radio to the phone line. The GTI defaults to a
gain for an average phone line and the Audio to Ph. adjustment raises or lowers the audio gain in 1 dB steps. This is a
subjective adjustment and should only be adjusted if overall radio user voice levels are perceived to be soft (or loud). It
should be noted that if this adjustment is too high, background noise from the radio may become excessive.
Move the highlighted cursor to a desired line and press the Enter key to see available selections on the pop-up window. To
adjust the Audio Level to Phone, choose the 'Audio to Ph.' menu item. You may select this item for any line type at any time,
even in the middle of a call.
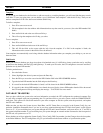
A bar graph will appear with the current level setting in the GTI unit. To adjust the levels, use the arrow keys to move the
settings bar graph up and down. For finer adjustments, press the Ctrl key along with the arrow keys to adjust in single
increments. Once the desired level has been set, wait one second for the new level to be registered by the GTI Configurator.
The GTI Configurator will send the new level to the GTI unit and receive a confirmation that the level was set. In the
intervening time the bar graph will dim until it receives the confirmation.
Press the Enter key to finish the adjustment and return to the menu. If you press the Enter key before the one second delay
time, any new setting will not be sent.


