


22
•
E-Maxx
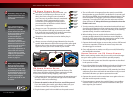
Tuning Adjustments
To achieve a good starting
point for the slipper clutch,
tighten the slipper clutch
adjusting nut clockwise until
the slipper clutch adjusting
spring fully collapses (do not
over tighten), and then turn
the slipper clutch nut counter-
clockwise ¼ to ½ turn.
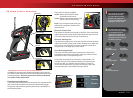
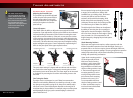
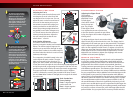
;gdcid[IgjX`
AZ[i=VcYI]gZVY
>cY^XVidg
;gdcid[IgjX`
AZ[i=VcYI]gZVY
>cY^XVidg
AZ[iH^YZ
G^\]iH^YZ
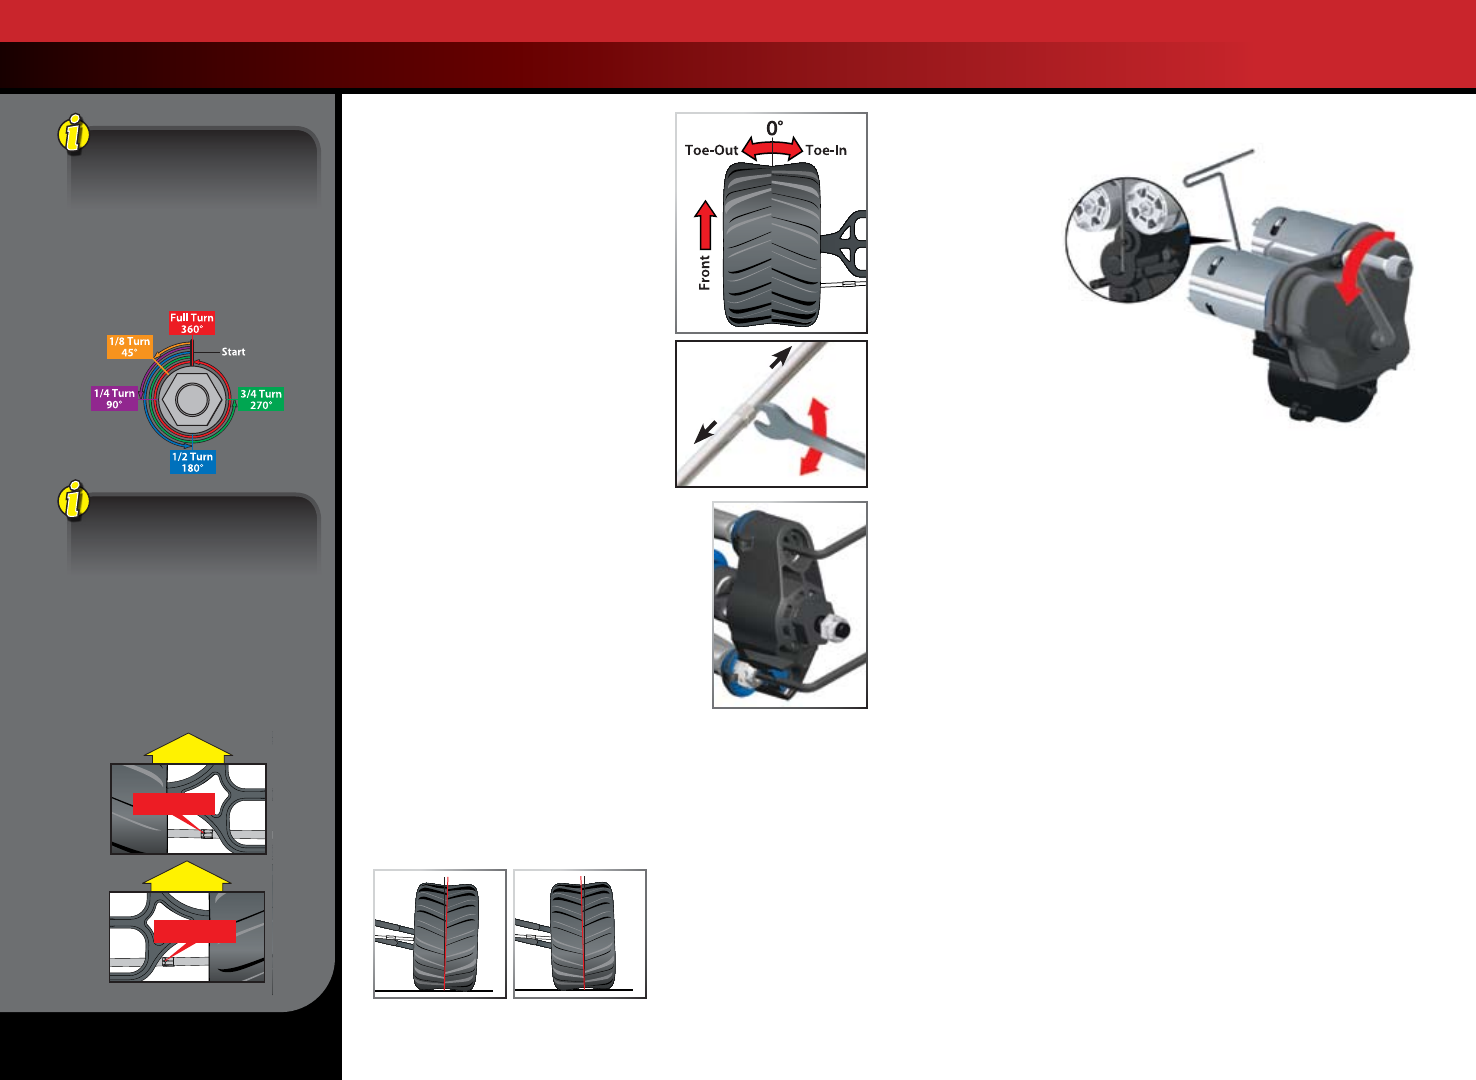
All of the toe links are installed
on the truck so that the left
hand thread indicators point
to the same direction. This
makes it easier to remember
which way to turn the wrench
to increase or decrease toe link
length (the direction is same
at all four corners). Note that
the groove in the hex indicates
the side of the toe link with the
left-hand threads.
Alignment Settings
Adjusting the Toe-in
Your E-Maxx comes from the factory with
zero degrees of toe-in in the front, and
one degree of toe-in in the rear. You can
adjust the toe-in on the front and rear of
the truck. Set the steering trim on your
transmitter to neutral. Next, adjust your
steering turnbuckles so that both front
wheels are pointing straight ahead and
are parallel to each other (0 degrees toe-
in). This will ensure the same amount of
steering in both directions. Adjust the
rear toe control links so that the rear
wheels have 1˚ of toe-in.
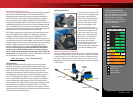
Static Camber Adjustment
The wheels can be set to have either
positive or negative camber (see illustration
below). The camber angle changes as the
wheel moves up and down through its range
of travel. Static camber is the camber angle at
the wheel when the vehicle is set at its normal,
stationary ride height.
The suspension pivot balls located in the axle
carriers adjust the static camber. The pivot
balls are protected by blue dust plugs. To
adjust your static camber, insert the supplied
2.5mm hex wrench through the slit in the dust plug and engage the
end of the pivot ball (compressing the suspension until the arms are
parallel to the ground will allow for easier hex wrench engagement).
The upper pivot ball is normally screwed all the way in. Negative
camber is achieved by screwing the pivot ball of the lower control
arm out. Note: When camber is changed, the toe angle of the wheel
has to be reset.
Static Camber Base
Factory Settings
Front: 1-degree negative
camber each side
Rear: 1-degree negative
camber each side
Transmission Tuning
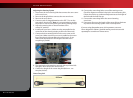
Adjusting the Slipper Clutch
The E-Maxx is
equipped with an
adjustable Torque
Control slipper
clutch which is built
into the large spur
gear. The purpose
of the slipper clutch
is to regulate the amount of power sent
to the rear wheels to prevent tire spin. When
it slips, the slipper clutch makes a high-pitch,
whining noise.
To adjust the slipper clutch, remove the rubber
slipper clutch plug on the transmission cover. The slipper clutch is
integrated into the main spur gear on the transmission. The slipper
clutch is adjusted using the spring-loaded locknut on the slipper
shaft. Use the supplied universal wrench. To tighten or loosen the
slipper nut, insert the 2.0mm hex wrench into the hole in the end
of the slipper shaft. This locks the shaft for adjustments. Turn the
adjustment nut clockwise to tighten (less slippage) and counter-
clockwise to loosen (more slippage).
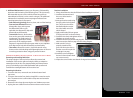
Wheels and Tires
Many types of aftermarket tires and wheels can be adapted for
use on your model. Most will affect the overall width and the
suspension geometry of the model. The offsets and dimensions
designed into the model’s wheels are intentional; therefore,
Traxxas cannot recommend the use of other non-Traxxas wheels
with different specications. The diameter of the wheels is an
innovative design, and there is a variety of different tires available
for you to experiment with in addition to the included tires on the
model (listed in your parts list). Experimentation with different
types of tires is recommended to see which ones work the best on
the terrain where the model is run. When selecting tires, consider
the overall diameter and the rubber compound (hard or soft). If
the overall diameter of the tire is signicantly increased, you will
need to use a smaller pinion gear to compensate for the larger tire.
Soft compound tires with many short spikes generally work better
on hard, dry surfaces. In loose dirt, a tire with large spikes should
perform better. See your parts list for accessory wheels and tires.
Positive Camber Negative Camber
Tighten
Loosen
Left Hand
Threads
Right Hand
(Normal) Threads
Decrease
Length
Increase
Length