


E-Maxx
•
21
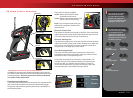
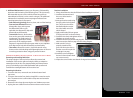
Lower Shock Mounting Positions
In the out-of-the-box configuration, the shocks are installed in
position (A) on the shock tower and position (2) on the lower
suspension arm. This setting allows for firm suspension and low
ride height, increasing the spring force (at the wheel). This setting
improves high-speed cornering on smoother terrain by lowering the
center of gravity. Body roll, brake dive, and squat are also reduced.
The inner pair of holes on the lower suspension arm should
be used to increase the ride height of the E-Maxx. The more vertical
position of the shocks will allow for lower shock progression and the
soft, plush feel that’s characteristic of a Traxxas Maxx Truck.
Spring rate (at the wheel) increases as the lower shock mounting
position is moved from position (1) to position (4). This is equivalent
to using stiffer springs. Use higher spring rate settings for flatter
terrain with smaller and fewer bumps, and lower spring rate settings
for bigger bumps.
Ride height decreases as the lower shock mounting position is
moved from position (1) to position (4). Each pair of lower shock
mounting holes (1,2 and 3,4) has equal ride height. Use lower ride
height for high-speed cornering and flat terrain, and when racing on
relatively smooth tracks. Increase the ride height for rougher terrain
and tracks.
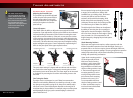
Upper Shock Mounting Positions
The upper shock mounting positions will have suspension effects
opposite from the lower shock mounting positions.
Spring rate (at the wheel), increases as the upper shock mounting
position is moved from position (A) to position (B).
Ride height is not affected by changes in the upper shock mounting
position.
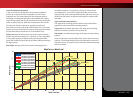
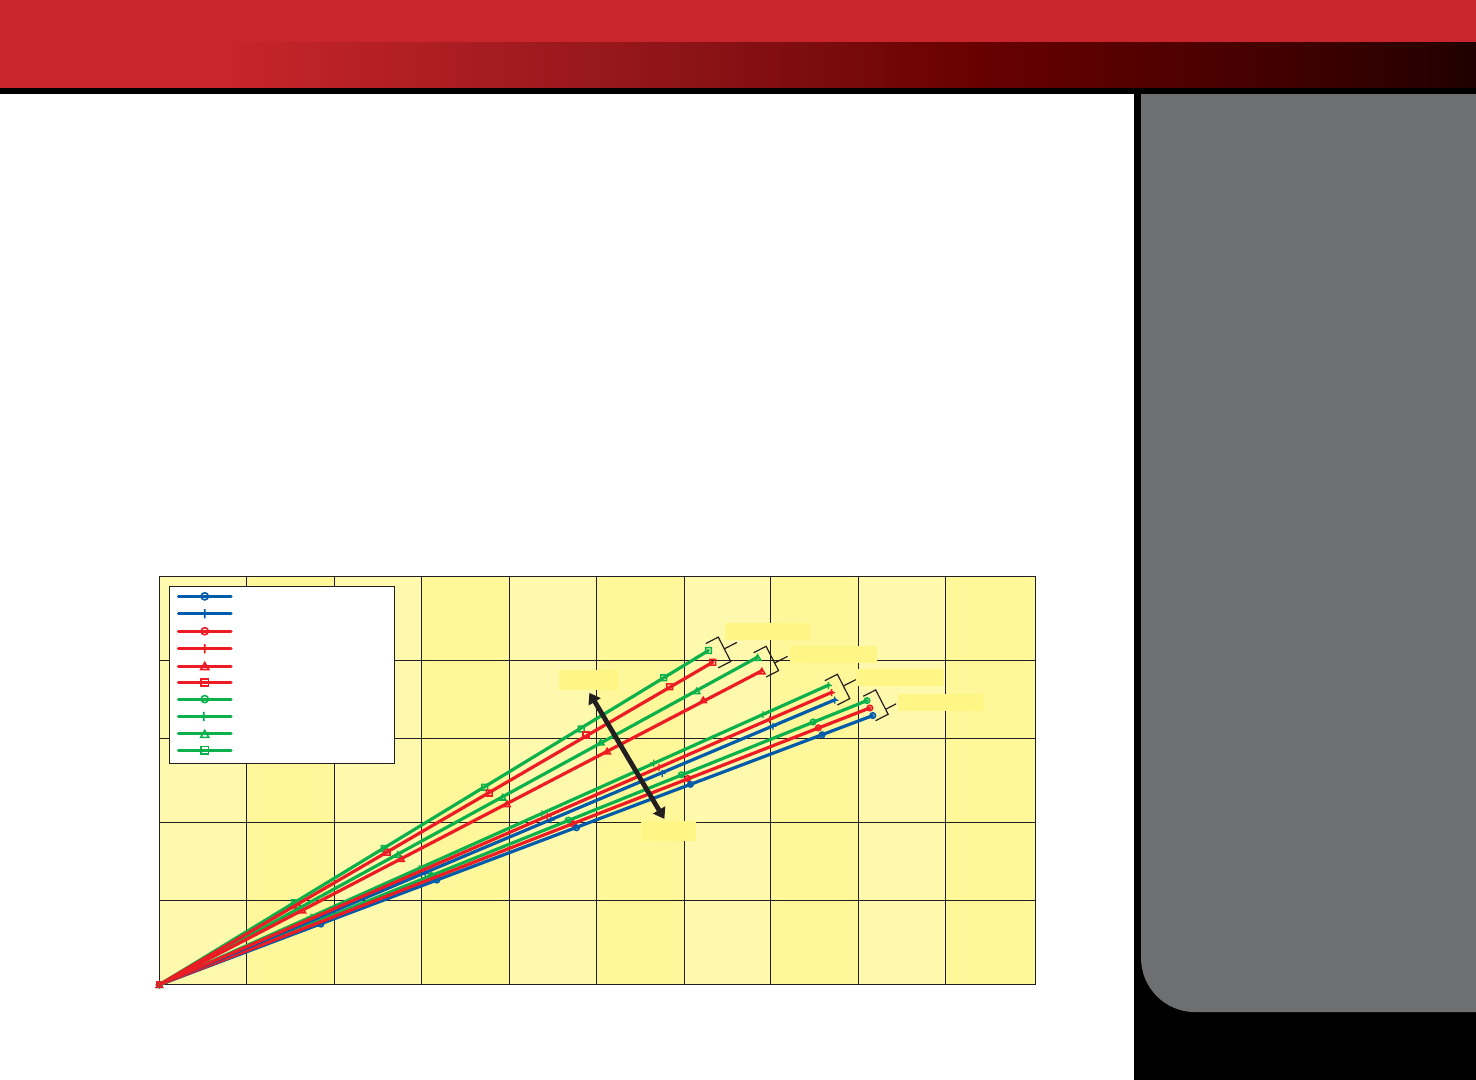
Use the chart below to see the effect of the various shock mounting
positions. The horizontal length of the lines indicates the amount of
suspension travel. The angle or slope of the lines indicates the spring
rate (at the wheel).
2.5
2
1.5
1
0.5
0
0102030406070809010
0
50
Wheel Force (lb)
Wheel Travel (mm)
Wheel Force vs. Wheel Travel
Lower Mount 1, Upper Mount 0
Lower Mount 2, Upper Mount 0
Lower Mount 1, Upper Mount A
Lower Mount 2, Upper Mount A
Lower Mount 3, Upper Mount A
Lower Mount 4, Upper Mount A
Lower Mount 1, Upper Mount B
Lower Mount 2, Upper Mount B
Lower Mount 3, Upper Mount B
Lower Mount 4, Upper Mount B
Less Firm
More Firm
Lower Mount 4
Lower Mount 3
Lower Mount 2
Lower Mount 1
Tuning Adjustments