


298
Controls in detail
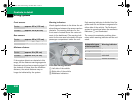
Loading
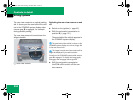
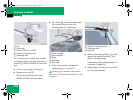
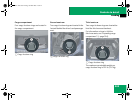
1 Key
2 Cover cap
3 Sticker FRONT (or REAR)
4 Screw for clamping claw
5 Clamping claw
The front and rear crossbars are of differ-
ent lengths. Please pay close attention to
stickers 3 FRONT and REAR on the cross-
bars.
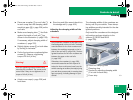
̈ Unlock cover cap 2 with key 1.
̈ Remove cover cap 2.
Sticker 3 indicating the location,
FRONT or REAR, becomes visible.
̈ Turn screw 4 counterclockwise with
the included Allen wrench until
clamping claw 5 is wide open.
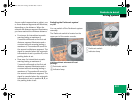
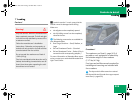
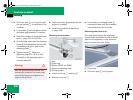
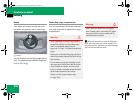
6 Front crossbar
7 Rear crossbar
8 Gaps
9 Markings
a Roof rails
̈ Place front crossbar 6 between
markings 9 on roof rails a.
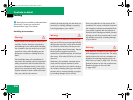
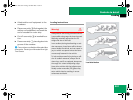
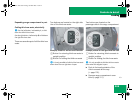
4 Screw for clamping claw
5 Clamping claw
a Roof rail
̈ Make sure clamping claw 5 lies flush
against the inside of roof rail a as
shown in the illustration.
If necessary, adjust clamping width of
crossbars (
୴ page 299).
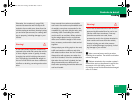
̈ Slightly tighten screw 4 on both sides
by turning it clockwise.
i
Markings 9 are located on the inside of
each roof rail, indicated by the white lines in the
illustration.
164.boo Seite 298 Freitag, 30. März 2007 12:54 12