Installation 4
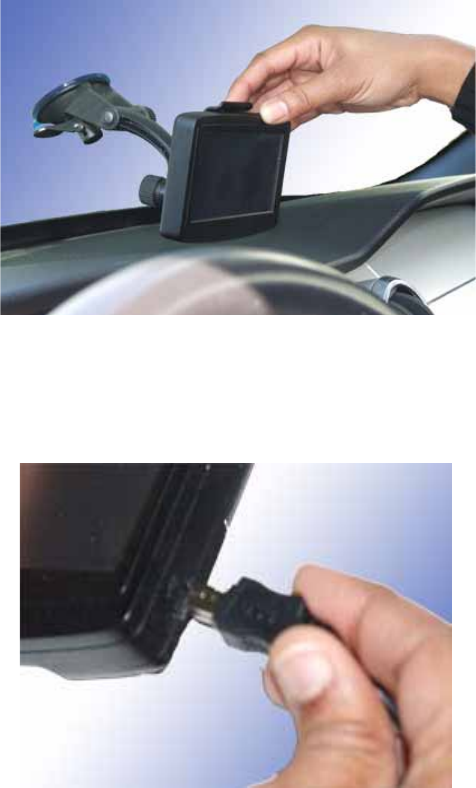
Align the tabs on the cradle to the indents on the
bottom of the Magellan RoadMate. Swivel the
cradle up so that it is flush against the back of the
receiver and snap it into place.
Adjust the Mount for Optimum Viewing
Loosen the adjustment locking knobs and position the Magellan RoadMate for optimum viewing.
Once set, tighten the locking knobs. (Never attempt to adjust the mount while driving.)
Connecting Power
Plug the end of the vehicle power adapter into a
12 VDC vehicle power receptacle. Connect the
other end of the cable to the Magellan RoadMate’s
USB connector as shown. If there is power at the
receptacle, the Magellan RoadMate will power on.
(Note: some vehicles apply power to the vehicle
power receptacle only when the ignition is on.)
Magellan RoadMate 1425 Users: Attach the FM
antenna connector to the receiver just above the
power connector.
Check Connection and Final Adjustments
If the power indicator light on the vehicle power cable connector is on, power is being supplied to the
Magellan RoadMate. If it is not on, check the cable connection to the vehicle power receptacle. If
the light is still not on, turn the vehicle’s ignition on.
Press the power button (located at the bottom right side of the RoadMate) and hold down for a few
seconds. The Magellan RoadMate will power on. Sit in a normal driving position and make any final
adjustments to the swivel mount for optimum viewing. Tighten the adjusting knobs on the swivel
mount to hold the Magellan RoadMate firmly in place.
Press the power button again to turn the Magellan RoadMate off and turn the ignition switch to the
vehicle to off. The Magellan RoadMate is connected and ready for use.
Security
It is recommended that the Magellan RoadMate is not left in plain view while unattended for reasons
of theft.
Please note that the Magellan RoadMate is a receiver only and does not transmit GPS location
signals. The receiver nor the vehicle can be tracked using the Magellan RoadMate.


