


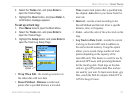


A Track Elevation Profile is created from Digital
Elevation Models (DEM) maps (MapSource
U.S.
Topo 24K), which include elevation data contained
in the map. When these types of maps are available, a
Use Map Data - Use Track Data option menu appears
when you select Profile. Refer to the Garmin web site
for more information about MapSource U.S. Topo 24K
maps.
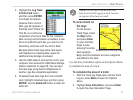
Navigating a Saved Track
You can save your track log to use later as a
TracBack. When initiated, a TracBack route takes you
back to the oldest stored track log point.
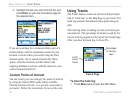
To use the TracBack feature:
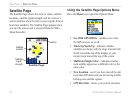
1. With the Saved Tracks Page for the track or
the Track Log open, highlight the TracBack
button, and press Enter to open the TracBack
Page showing the track. You can select the
point you want to TracBack to.
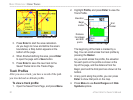
2. Use the Rocker to move the pointer to the
point on the map, and press Enter to start
navigating the TracBack.
3. Select either
Follow Road to route back to
the selected point using available roadways,
or select Follow Track to retrace your original
path of travel. Highlight the Don’t Ask Again
option, and press Enter if you want to use the
same option each time you use TracBack.
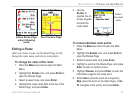
The Map Page opens with directions to the
first turn on the track at the top of the page.
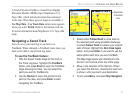
4. Move in the direction of the first turn. When
you reach the first turn, directions to each turn
is shown, until you reach your destination.
5. To exit, press Menu, and select Stop Navigation.
Directions
to the first
turn
eTrex Vista Cx Owner’s Manual 31
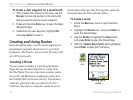
BASIC OPERATION > CREATING AND USING ROUTES