


15
ASSEMBLY
F
L1114pr-0920
19
16
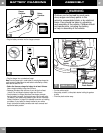
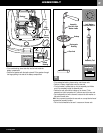
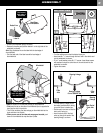
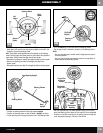
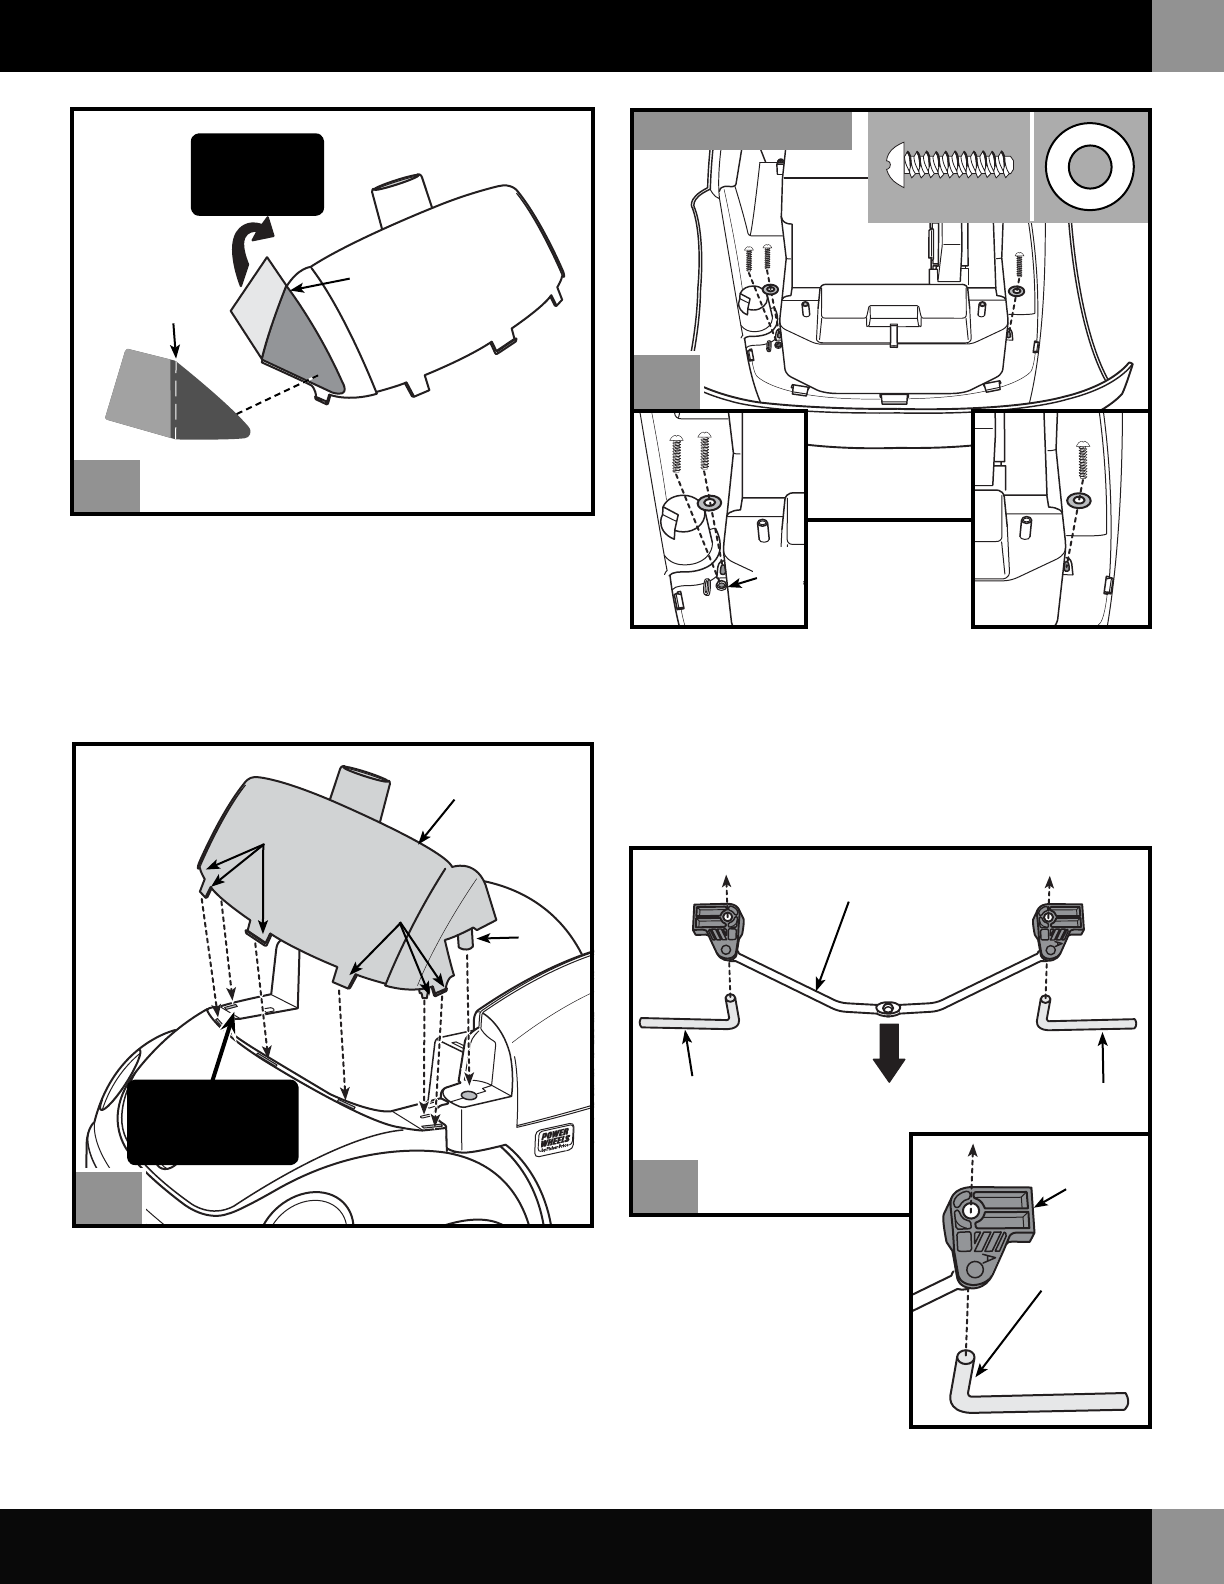
• Position the windshield upright, as shown.
• Remove the backing and position label #11 on the right side of the
windshield, as shown.
Hint: Align the dotted line on the label with the back edge of
the windshield.
• Fold the back end of the label around the back edge of
the windshield.
Fold around
back edge of
windshield
Label 11
Back Edge
of Windshield
Dotted Line
T
M
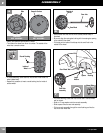
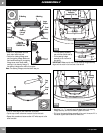
• Note the location of six tabs and one peg on the windshield.
• First insert the tab on the side of the windshield (that is opposite the
door) into the slot in the vehicle.
• Then fit the remaining five tabs and peg on the windshield into the
slots and hole in the vehicle.
• When you are sure all six tabs and one peg are inserted, push
down on the windshield to snap the tabs in place.
Peg
Windshield
Tabs
Tabs
IMPORTANT!
Insert side tab into
this slot FIRST
Tabs
Tabs
17
Tabs
Tabs
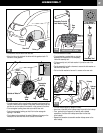
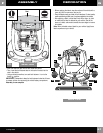
• Turn the vehicle over so that the bottom faces you.
• Insert one #8 x
3
/4" screw through the front hole in the vehicle and
into the windshield, as shown.
• Fit a ¼" small washer to two #8 x
3
/4" screws. Insert these screws
with washers through the other holes in the vehicle and into the
windshield, as shown.
• Tighten the screws.
BOTTOM VIEW
18
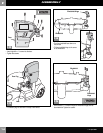
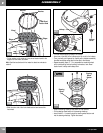
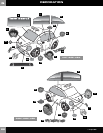
• Turn the steering linkage so that
the inside (grooved side) is facing
up and the curve is toward you.
• Position each front axle so that the
short end is facing up.
• Insert the short end of the front
axles up through the ends of the
steering linkage, as shown.
Short End of
Front Axle
Front
Axle
Front
Axle
Steering Linkage
Steering
Linkage
Steering Linkage
Curve TOWARD You
Front
Hole