


7
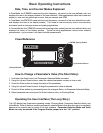
Running Mode is the default display of the unit when power is applied. In Running Mode, the display
shows the measured value in the appropriate user-defined format of rate, time, or count. As the input
signal changes, the display is continuously updated to show the latest measurement. In this display
mode, the Up and Down buttons serve no function other that to reset or silence alarms if configured
accordingly. Example displays for rate, time, and count operating modes are 13.60, 45:30, and 9301.
Parameter-Selection Mode can be entered by simply pressing and holding the Enter button down for
three seconds. Once in Parameter-Selection Mode, the far left of the display will be a P. The right side
of the display will indicate the currently selected parameter number for editing purposes. Pressing the
Up or Down button will increase or decrease the selected parameter number on the display. Although
the parameter numbers are in numerical order, some numbers are skipped. These numbers represent
reserved parameters that are not displayed. Once the desired parameter number is displayed, a press
of the Enter button will change the display to the Value Mode. When in Parameter-Selection Mode,
pressing the Enter button with parameter 0 selected will cause the unit to return to Running
Mode. Example displays for Parameter-Selection Mode are P 1, P 11, and P 54.
Value Mode is used to modify the value of the selected parameter. When in Value Mode, the two dots
which form the colon, between digits two and three, will alternately flash (one, then the other) to inform
the user that a parameters value is being edited. Pressing the Up or Down button increases or
decreases the selected parameters value. Value changes take effect immediately. For example, when
scrolling through the alarm output conditions, the relay will activate as the always-active selection is
passed. Once the desired value is showing in the display window, pressing the Enter button again will
return to Parameter-Selection Mode. The new value is not saved in permanent memory until the Enter
button is pressed. Removing power from the unit while in Value Mode may result in the specified new
value being lost.
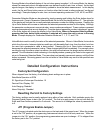
Detailed Configuration Instructions
Factory Set Configuration
When shipped from the factory, the following basic settings are in place:
Rate Mode Operation in RPM
S1 Signal Input Pulses-per-Revolution: 10
Decimal Point Display: Off
Auto-Ranging: Disabled
Alarm Output(s): Disabled
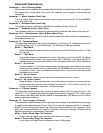
Resetting the Unit to Factory Settings
The factory settings can be easily restored using either of two methods. Both methods require the
Program Enable jumper to be in the On position. The first is to apply power to the unit with both the
Enter and Down buttons pressed for 3 seconds. The second is to change the value of parameter 95
to 5.
JP1 (Program Enable Jumper)
The JP1 jumper is located under the dust cover on the back end of the upper board. When the jumper
is set to the "Off" position, all programming features are locked out to the front panel user. When the
jumper is in the "On" position, the programming parameters are open to change. JP1 is shipped from
the factory set in the "On" position.