RS1000 OP 1/07
20
F. TEMPERATURE CHECK
You can monitor the present indoor temperature of the passenger compartment
through the OLED screen, before cooling or heating your vehicle.
Spin up the
switch to the page 4 and then press the “Monitor TEMP.” button; the
in-door temperature will be shown on the OLED screen. This reading may be higher
than actual ambient temperature due to the greenhouse effect and is relative only to
the inside vehicle temperature.
G. TO TURN OFF THE REMOTE START:
When the engine is running by remote start and you want to stop it,
1. Press
button on the remote transmitter while in remote start mode.
2. Move the optional remote start enable toggle switch to OFF position.(If installed)
3. Press the brake pedal.
The vehicle will shut down and turn off the parking light to indicate engine stopped.
H. SHUT-DOWN INPUT FOR REMOTE STARTER:
If any of the following conditions exist while the system is operating, the engine will not start or will shut
down immediately:
1. The hood is opened.
2. The brake pedal is pressed.
3. Engine is over-revved. {“Tachometer checking type” only}
4. The pre-programmed run time (5 /10 /20 / 30 minutes) has elapsed.
5. Press
button on the remote transmitter while in remote start mode.
6. Move the optional remote start enable toggle switch to OFF position. (If installed)
7. The vehicle refused to start running after {3} unsuccessful attempts.
I. DISABLING THE REMOTE START SYSTEM: (If installed)
This feature allows your system’s remote start unit to be temporarily disabled to prevent the vehicle from
being remote started accidentally. This feature is useful if the vehicle is being serviced or stored in an
enclosed area. To disable the remote start, move the optional remote start enable toggle switch to the
OFF position or place the unit in Valet Mode.
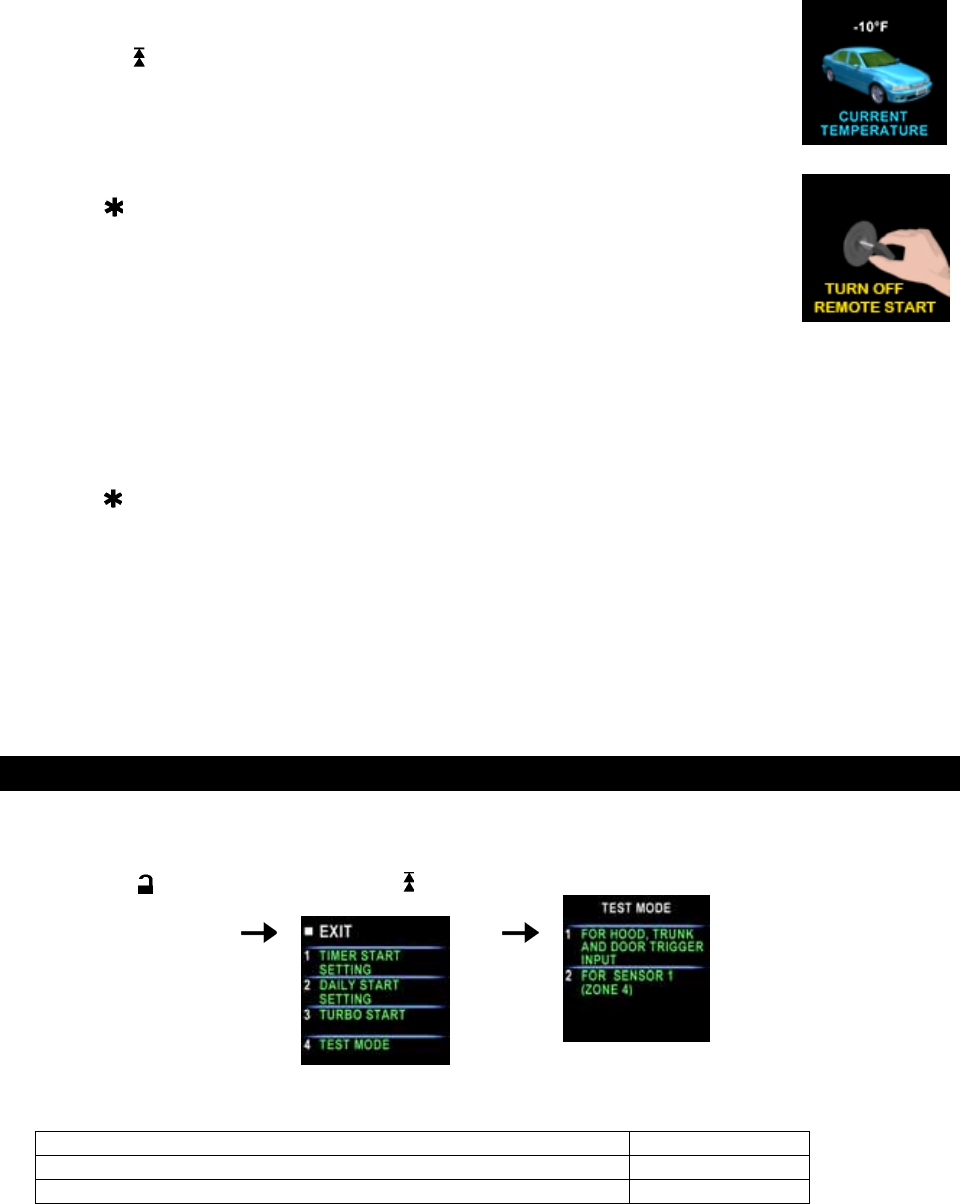
TEST MODE
In this test mode, the system can test the all of the trigger input. The installer can save time to test the
sensitivity of the 2-stage shock sensor and optional sensor and without using the traditional
arming/disarming procedures to test the sensors.
1. Press the
button
to disarm the system,
within 10 seconds
2.
Spin up the switch to
the page 5
3. Press button 4
4. Press button 1 to test the Trigger and Safety Shutdown Input: One chirp to indicate your are in test
mode
Trigger sensor Siren short chirps
Zone 2 / Trunk trigger (H3/1 Dark Blue wire) 2
Zone 3 / Door trigger (H3/2 Dark Green or H3/3 Violet wire) 3
5. Press button 2 to test the Two Stage Shock Sensor: Two chirps to indicate your are in the two-stage
shock sensor test mode.
1. Activate the warn-away (first stage of the shock sensor); system will emit a short chirp.
2. Activate the full alarm (second stage of the shock sensor); system will emit a long chirp.
3. Continue to test the shock sensor until you reach the proper sensitivity.


