April 1, 2006 32 Lit. No. B64090, Rev. 00
HEADLIGHT AIMING
Fully tighten headlight fasteners once correct visual
aim is achieved.
1. Place vehicle on a level surface 25 feet in front of
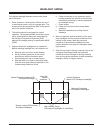
a matte-white screen, such as a garage door. The
screen should be perpendicular both to the ground
and to the vehicle centerline.
2. The vehicle should be equipped for normal
operation. The snowplow blade should be in place
and in raised position. Below are steps listed by
the Society of Automotive Engineers (SAE)
pertinent to headlight aiming in specification #SAE
J599d.
3. Prepare vehicle for headlight aim or inspection.
Before checking headlight aim, the inspector will:
a. Remove ice or mud from under fenders.
b. Set tire inflation pressures to the values
specified on vehicle information label.
c. Check springs for sag or broken leaves.
d. See that there is no load in the vehicle other
than the driver and ballast as specified in the
Undercarriage Selection Guide.
e. Check functioning of any automatic vehicle
leveling systems and specific manufacturer’s
instructions pertaining to vehicle preparation
for headlight aiming.
f. Clean lenses.
g. Check for bulb burnout and proper beam
switching.
h. Stabilize suspension by rocking vehicle
sideways.
4. Mark (or tape) the vertical centerline of the snow-
plow headlights and the vertical centerline of the
vehicle on the screen. Mark the horizontal
centerline of the snowplow headlights on the
screen (distance from ground to snowplow head-
light centers).
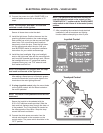
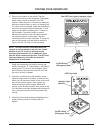
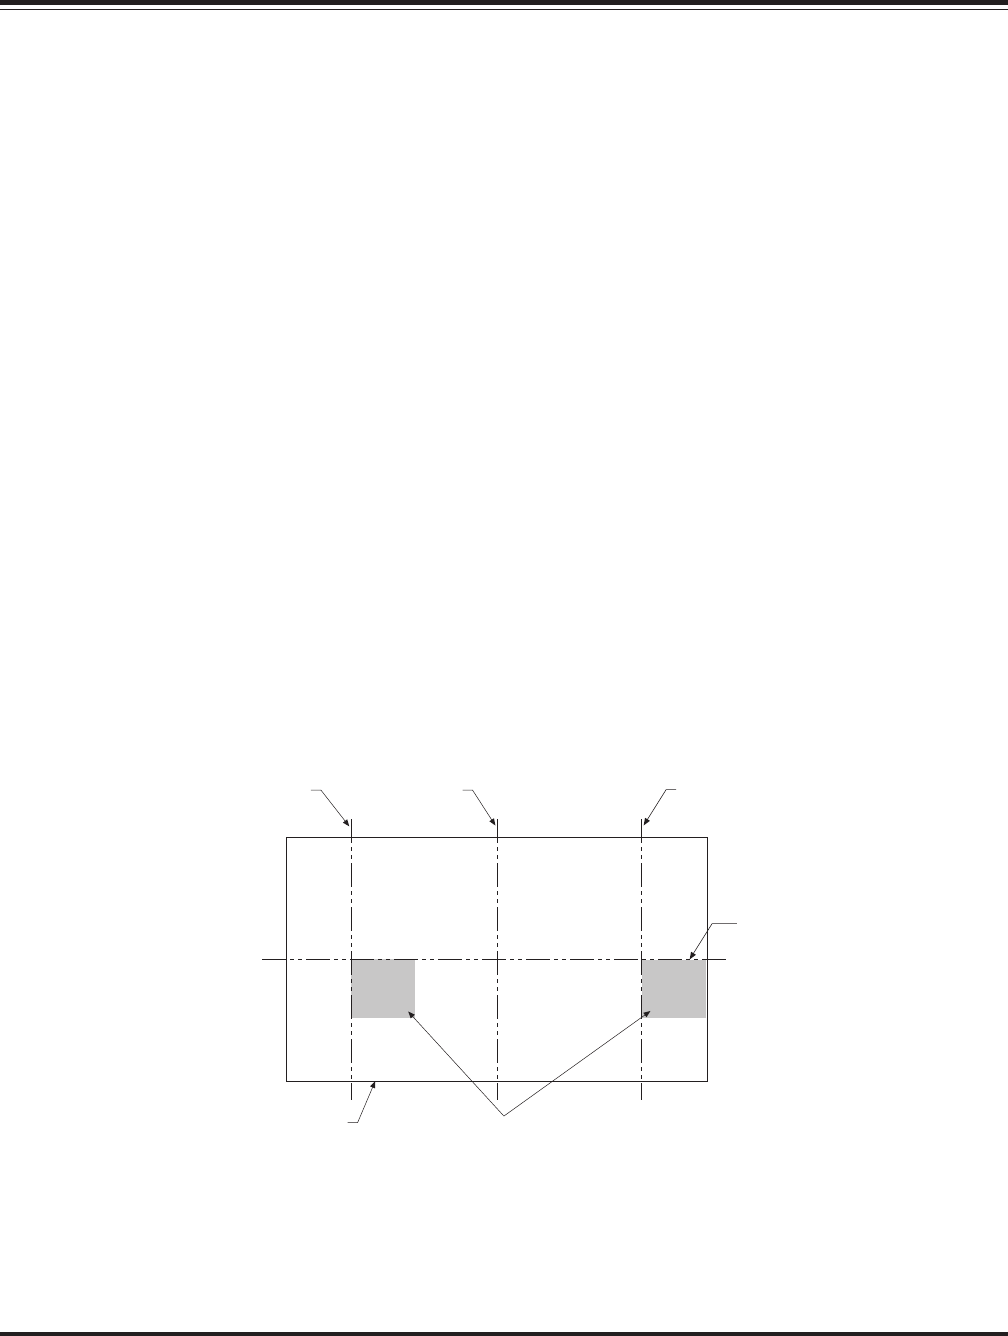
5. Align the top edge of the high intensity zone of the
snowplow lower beam below the horizontal
centerline and the left edge of the high intensity
zone on the vertical centerline for each snowplow
headlight. (Refer to diagram below.)
Vertical Centerline ahead of DS
Snowplow Headlight
Align with
vehicle
centerline.
Vertical Centerline
ahead of PS Snowplow Headlight
Screen Located 25 Feet from
Snowplow Headlights
Horizontal Centerline
of Snowplow Headlights
High Intensity Zones
of Snowplow Headlights on Low Beam


