3-35
MTPX Plus Twisted Pair Matrix Switchers • Operation
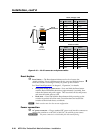
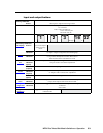
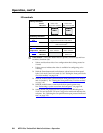
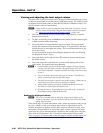
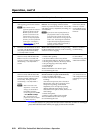
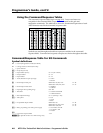
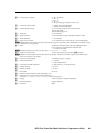
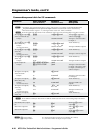
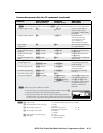
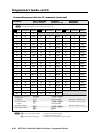
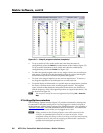
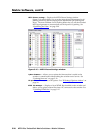
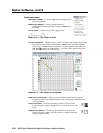
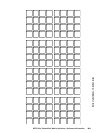
Audio gain and attenuation is displayed differently on different models.
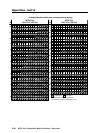
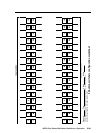
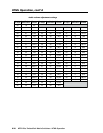
• Switcherswith32outputbuttons—Eachoutputbuttonindicates1dB
whenlitsteadily.Seethetableonpage3-36.
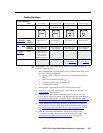
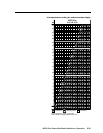
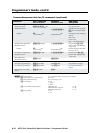
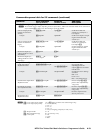
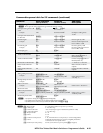
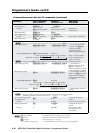
• Switcherswith16outputbuttons—Eachoutputbuttonindicates1dB
when blinking and 2 dB when lit steadily. See the table on page 3-37.
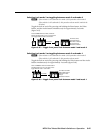
4. Press and release the Esc (
>
) and View (
<
) buttons to increase and decrease
the audio level.
5. Press and release the Audio button to exit the Audio mode. The Audio button
stops blinking.
N • PressingtheEnterorPresetbuttonalsoexitsAudio mode. Pressing the
Preset button changes to Recall Preset mode.
• Thereisoneaudiolevelsettingperinput.Theaudiolevelsettingisshared
by the left and right audio inputs.
• Theaudiolevelsettingsarestoredinnon-volatilememory.Whenpoweris
removed and restored, the audio level settings are retained.
• ExitingAudiomodebypressingtheAudiobuttonalwaysreturnstheI/O
configuration to video and audio selected for configuration (Video and Audio
buttons lit).
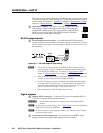
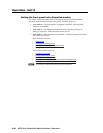
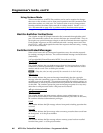
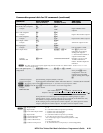
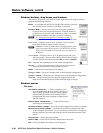
Example 9: Viewing and adjusting an input audio level
N
Thisprocedurecanonlybeperformediftheaudio/RS-232wirepairoftheinput
is defined as audio.
N
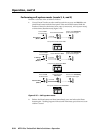
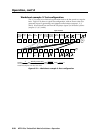
Becauseofthedifferentgainandattenuationdisplayschemes,theinputaudio
levels that result from the following example are shown twice: as displayed on a
32-outputbuttonswitcherandona16-outputbuttonswitcher.The32-button
displays show the actions that led up to the display. For simplicity, the figures
showing16-buttondisplaysshowthegainorattenuationdisplayonly,notthe
actions that lead up to it.
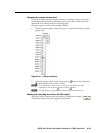
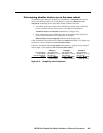
In the following example, an audio level is viewed and adjusted. The steps show
the front panel indications that result from your action.
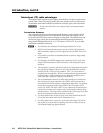
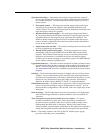
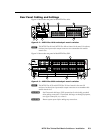
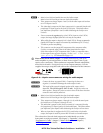
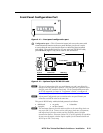
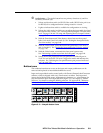
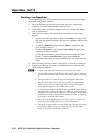
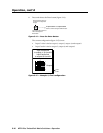
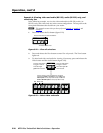
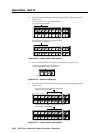
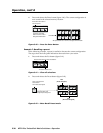
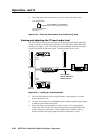
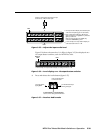
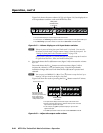
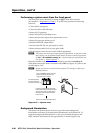
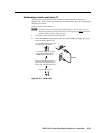
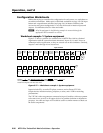
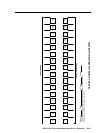
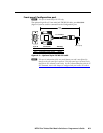
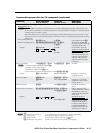
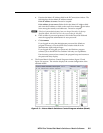
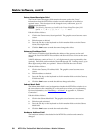
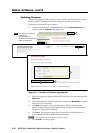
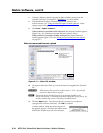
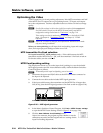
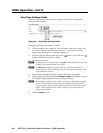
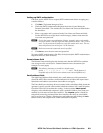
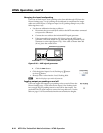
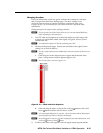
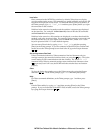
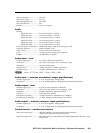
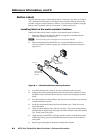
1. Press and release the Esc button (figure 3-51).
C O N T R O L
PRESET
ENTER
ESCVIEW
Press the Esc button to clear all selections.
The button flashes once.
Figure 3-51 — Clear all selections
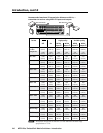
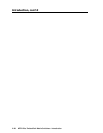
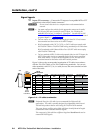
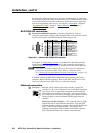
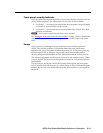
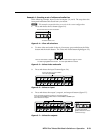
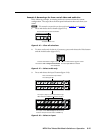
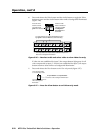
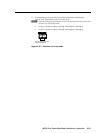
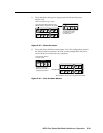
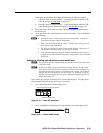
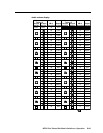
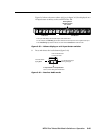
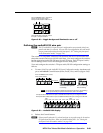
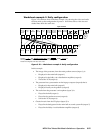
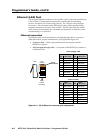
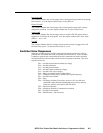
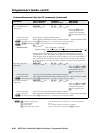
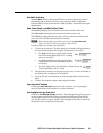
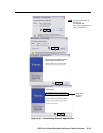
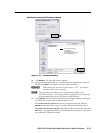
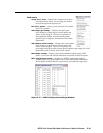
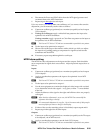
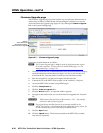
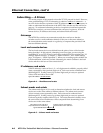
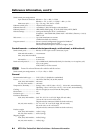
2. Press and hold the Audio button for approximately 2 seconds (figure 3-52).
AUDIO
AUDIO
Press and hold the Audio button until it blinks.
2 seconds
Figure 3-52 — Select Audio mode