


Chapter 3: Installation 7
Chapter 3: Installation
This chapter describes how to install the ST60 Rudder Angle Indicator instrument
and associated transducer.
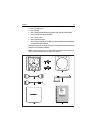
Rotary and linear Raymarine Rudder Angle Transducers are available for use with
the ST60 Rudder Angle Indicator instrument.
If the instrument is being installed as stand-alone, the transducer cable is
connected to the rear of the instrument. If being installed as part of a system
incorporating a SeaTalk Autopilot, the transducer is connected to the Autopilot.
For advice, or further information regarding the installation of this equipment,
please contact the Raymarine Product Support Department or your own National
Distributor.
3.1 Planning your installation
Before starting the installation, spend some time considering the best positions
for the instrument, such that the
Site requirements
and the
EMC installation
guidelines
are satisfied.
Site requirements
Transducer
The siting of the Rudder Reference Transducer depends on the type of vessel.
Fitting details and dimensions are given in the
Fitting transducers
section of this
chapter.
Instrument
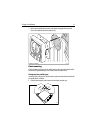
CAUTION:
The presence of moisture at the rear of the instrument could cause
damage either by entering the instrument through the breathing
hole or by coming into contact with the electrical connectors.
ST60 instruments can be fitted either above or below deck, provided that the rear
of the instrument is sited where it is protected from contact with water.
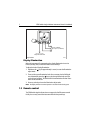
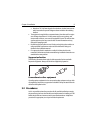
Each instrument must also be positioned where it is:
• Easily read by the helmsman.
• Protected against physical damage.
• At least 9 in (230 mm) from a compass.
• At least 20 in (500 mm) from radio receiving equipment.
• Reasonably accessible from the rear for installation and servicing.