


Issue: August 18 2004 Page 4
1DELIVERED WITH:
1.1 ARES-P II.
5 dry cells “AA”, 1 DIN connector 12 pin, 1 USB cable, 1 CDR with Ares Import, Digigram Import
software and manuals.
1.2 DELIVERED WITH ARES-P.
5 dry cells “AA”, 1 DIN connector 12 pin, 1 carrying strap, 1 CDR with Ares Import, Digigram Import
software and manuals.
1.3 DELIVERED WITH RCX220.
5 dry cells “AA”, 1 DIN connector 12 pin, 1 carrying strap, 1 USB cable, 1 CDR with Ares Import,
Digigram Import software and manuals.
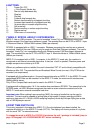
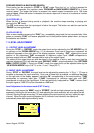
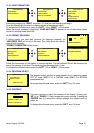
2 INSTALLING THE BATTERIES.
To open the machine, push the button on the right side. Inside the battery compartiment, push down
the black button and remove the inner cover.
Install the 5 “AA” cells observing the polarity and replace the inner cover.
Important note:
When using the external
power supply, check
that the switch inside
the battery
compartiment is set to
“OFF” before installing
dry cells.
In the OFF position, the charger circuitry is not activated and if an external power supply is connected,
the machine will run from external supply and not from the batteries.
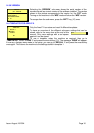
When an external power supply is connected to the Ares -P II, the green led turns on. During charge,
the yellow led turns on. The Ares -P II charges with approx. 300 mA. Charging stops automatically
(yellow led turns off). If the yellow led never turns off, it means that one ore more cells are defective. If
the charger switch is turned on and no batteries are installed while the machine receives external
power, the yellow led starts blinking fast.
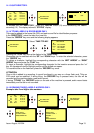
3 INSTALLING THE FLASHCARD.
Open the machine by pressing the button on the side. Insert the flashcard push it fully home (eject
button fully out). The software version, for Ares-P or RCX220, 1.20 and higher allows using linear flash
cards, ATA cards and compact flash cards. Compact flash cards must be installed using an adapter.
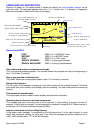
4 POWER ON, POWER OFF.
Press the “POWER ON” button (1) for 1 second and the machine switches on. To switch “OFF” the
machine push the same button again for 1 second.
Attention: the machine cannot be switched OFF during RECORD.
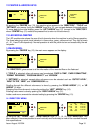
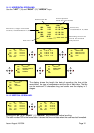
5 CONTRAST.
If the display contrast is not set properly at pow er on, switch off the machine, keep the “RIGHT” arrow
key (12) pressed while turning on the machine. This brings the machine directly to the contrast menu.
Adjust step-by -step with the “UP” (9) or “DOWN” (11) arrow keys to increase or decrease accordingly.
Once the correct contrast is found, press the “CENTER” key (13) to store the new setting in the
machine. Press the “LEFT” arrow key (10) to quit the menus. The factory setting has the value “32”.
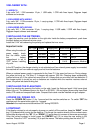
Batt. Type
Capacity Charging time
Record mode
Manufactory
NimH 1300 mAh
05h30 06h00 GP
NimH 2300 mAh
10h00 11h30 Sanyo
Dry cells x 11h10 Panasonic, Alkaline