


:
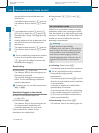
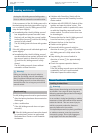
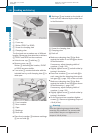
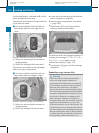
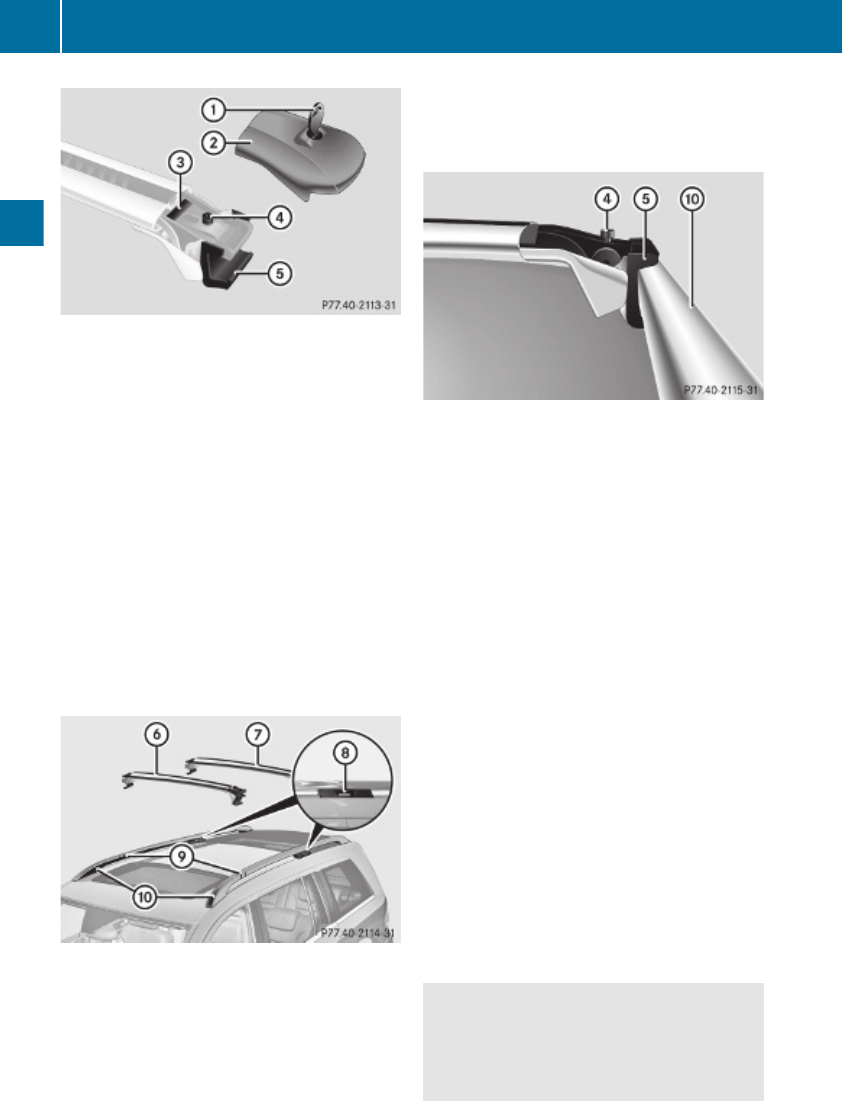
Key
;
Cover cap
=
Sticker FRONT (or REAR)
?
Screw for clamping claw
A
Clamping claw
The front and rear crossbars are of different
lengths. Please pay close attention to stickers
= FRONT and REAR on the crossbars.
X
Unlock cover cap ; with key :.
X
Remove cover cap ;.
Sticker = indicating the location, FRONT
or REAR, becomes visible.
X
Turn screw ? counterclockwise with the
included hex key until clamping claw A is
wide open.
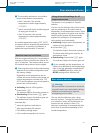
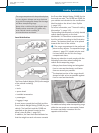
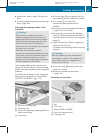
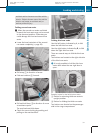
B
Front crossbar
C
Rear crossbar
D
Gaps
E
Markings
F
Roof rails
X
Place front crossbar B between markings
E on roof rails F.
i
Markings E are located on the inside of
each roof rail, indicated by the white lines
in the illustration.
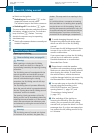
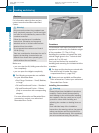
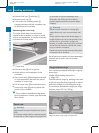
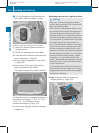
?
Screw for clamping claw
A
Clamping claw
F
Roof rail
X
Make sure clamping claw A lies flush
against the inside of roof rail F as shown
in the illustration.
If necessary, adjust clamping width of
crossbar (Y page 199).
X
Slightly tighten screw ? on both sides by
turning it clockwise.
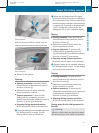
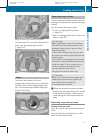
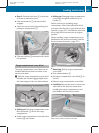
X
Place rear crossbar C on roof rails F in
such a way that the clamping claws reach
into gaps D (Y page 198) on the roof rails.
X
Make sure clamping claw A lies flush
against the inside of roof rail F as shown
in the illustration (Y page 198).
If necessary, adjust clamping width of
crossbar (Y page 199).
X
Slightly tighten screw ? on both sides by
turning it clockwise.
X
On the front and rear crossbars tighten
screws ?. Observe a tightening torque of
4 lb-ft (6 Nm).
G
Warning!
Have the tightening torque checked after
mounting the crossbars. The screws could
come loose if they are not tightened to a
torque of 4 lb-ft (6 Nm).
198
Loading and storing
Controls in detail
X164_AKB; 5; 31, en-US
d2ureepe, Version: 2.11.8.1
2009-09-11T12:30:16+02:00 - Seite 198