


49
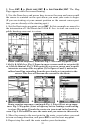
3. If the list is short, you can jump directly to the
FIND IN LIST box by
pressing
ENT. Use ↑ or ↓ to select the waypoint name, press ENT and the
waypoint information screen appears with the
GO TO command selected.
4. To begin navigating to the waypoint, press
ENT.
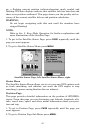
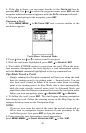
Navigate a Trail
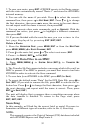
1. Press
MENU|MENU|↓ to MY TRAILS|ENT and a screen similar to the
one below appears.
Trails Menu, Advanced Mode.
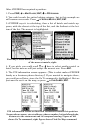
2. Press ↓ then use ↓ or ↑ to select a trail to navigate.
3. With the trail name highlighted, press
ENT|↓ to NAVIGATE|ENT.
4. Wait while iFINDER creates a route from the trail. When the prog-
ress message disappears, the unit displays a trail information screen,
with the
NAVIGATE command highlighted in the top command box.
Tip: Back Track a Trail
Simply running the Navigate command will lead you along the trail
from its starting point to its ending point — forward order. You can
also back track a trail, or follow it in reverse order (from its ending
point to its starting point.) In Easy Mode, this is done automatically
with the most recently created active trail. In Advanced Mode you
must first select the Reverse command to reverse the trail point order
before you start navigating: press → to
REVERSE|ENT|← to NAVIGATE.
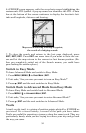
5. To follow the trail, press
ENT. The unit begins showing navigation
data along the trail. Follow the steering arrow on the Map Page or the
compass bearing arrow on the Navigation Page.
NOTE:
If you are at or near the start of the trail, the arrival alarm will go
off as soon as navigation begins because of your proximity to the
trail's first point. Just press
EXIT to clear the alarm.
6. Upon arrival at your destination, cancel navigation:
press
MENU|MENU|↓ to CANCEL NAVIGATION|ENT|← to YES |ENT.