4747
R
E
P
L
A
C
E
M
E
N
T
P
A
R
T
S
REPLACEMENT PARTS - PANTHER LX - 4 PROCEDURE 10
REPLACING TILLER CHARGER
PORT COVER (FIGURE 2)
NOTE: Save the two (2) mounting screws and self-
locking nuts for reuse when installing the NEW tiller
charger port cover.
1. Remove the two (2) mounting screws and self-
locking nuts securing the tiller charger port cover
to the tiller assembly.
2. Remove the tiller charger port from the tiller as-
sembly.
3. Align the mounting holes in the NEW tiller charger
port cover with the mounting holes in the tiller
assembly.
4. Secure the NEW tiller charger port cover to the
tiller assembly using the two (2) EXISTING mount-
ing screws and self-locking nuts. Securely tighten.
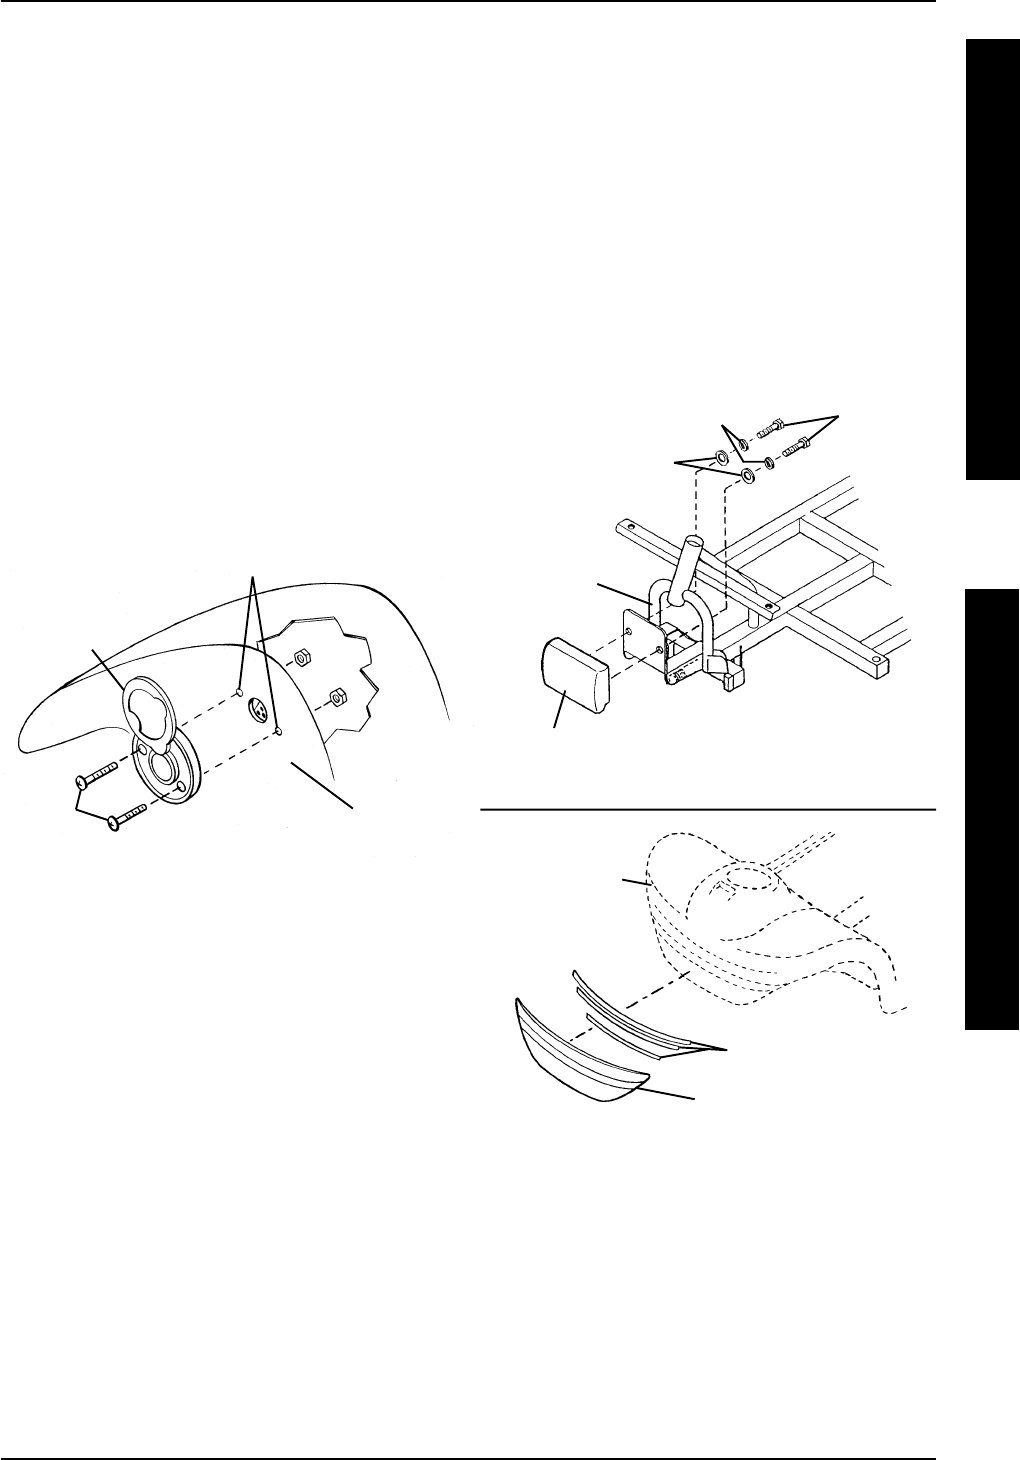
REPLACING CUSHION/FRONT
BUMPER ASSEMBLY (FIGURE 3)
Removing The Front Bumper Assembly
CUSHION (DETAIL “A”).
1. Position the scooter on its side.
2. Remove the two (2) mounting screws, spring
washers and washers securing the cushion to
the front frame assembly.
3. Remove the cushion from the front frame as-
sembly
4. Align the two (2) mounting holes in the NEW cush-
ion with the mounting holes in the front frame
assembly.
Mounting
Screws
Spring Washers
Washers
Cushion
Front
Frame
Assembly
Front Bumper
Front Shroud
Assembly
FIGURE 3 - REPLACING CUSHION/FRONT
BUMPER ASSEMBLY
Mounting Tape
FIGURE 2 - REPLACING TILLER CHARGE
PORT COVER
Mounting
Screws
Tiller
Charger
Port Cover
Tiller
Assembly
Mounting
Holes
P
A
N
T
H
E
R
L
X
4
5. Secure the NEW cushion to the front frame as-
sembly using the two (2) NEW mounting screws,
spring washers and washers. Securely tighten.
6. Return the scooter to the upright position.
FRONT BUMPER (DETAIL “B”).
1. Grasp the front bumper firmly and pull it away
from the front shroud assembly.
2. Position the mounting tape on the bottom of the
front shroud assembly.
3. Position the NEW bumper on the mounting tape
on the front shroud assembly.
DETAIL “A”
DETAIL “B”


