


Whereis® Navigator Installation Guide for HP iPaq with In-Built GPS - version 2.5 Page 6
2 SOFTWARE INSTALLATION
2.1 Quickstart for Activesync® Installation
This is a brief step-by-step process for the installation of Whereis® Navigator using
Microsoft Activesync®.
Step 1 Check your GPRS data communications settings are correct
and test it is working (consult your telecommunications
company for support to enable GPRS if you are unsure).
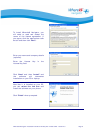
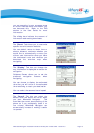
Step 2 Run the Whereis® Navigator installer with Activesync®
running and your phone connected.
Step 3 Follow the install screens and enter your name, company
and unique licence key provided (in your HP iPaq package on
a Whereis® Navigator CD or trial flyer).
Step 4 Select to install on your PocketPC.
Step 5 Run HP GPS Quick GPS Connection Utility (Ensure that your
HP iPaq is set for the correct time zone and time setting to
facilitate the correct data download of GPS information – this
may take up to 30 seconds to download the necessary GPS
information).
Step 6 Start Whereis® Navigator (Start -> Whereis Navigator)
Step 7 Verify GPS is active (orange or green satellite icon) and
has a fix (may take up to 1 minute and you should be
outdoors with a clear view of the sky).
Step 8 Commence using Whereis® Navigator.