


52 Quest Owner’s Manual
APPENDIX > CHANGING THE FUSE AND INSTALLING THE MOUNTING DISK
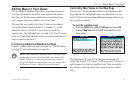
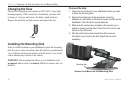
Changing the Fuse
The tip of the suction mount contains an AGC/3AG 1 Amp, high-
breaking capacity, 1500 A rated fuse. Periodically, you may need
to change it. Unscrew and remove the black, round end piece.
Remove the metal tip and then remove and replace the fuse.
Fuse
Installing the Mounting Disk
Select a suitable location on your dashboard to place the mounting
disk. Be sure to select a location where the unit has an unobstructed
view of the sky and does not interfere with the driver’s view of the
road or obstruct any controls in the vehicle.
WARNING: The mounting disk affixes to your dashboard with
permanent adhesive that is extremely difficult to remove after it is
installed.
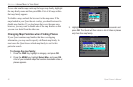
To mount the disk:
1. Clean and dry the area on your dashboard where you want
to place the mounting disk.
2. Remove the backing from the permanent mounting
adhesive on the bottom of the disk and place the disk on the
dashboard. Press firmly for several seconds.
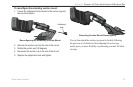
3. Make sure the suction lever located on the suction cup is
pulled up (away from the disk). Place the unit’s suction cup
mount on top of the disk.
4. Flip the suction lever down toward the disk to secure
the suction cup mount to the disk. Adjust the mount as
necessary.
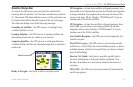
Suction Cup Mount on the Mounting Disk
Mounting disk