


6 Quest Owner’s Manual
UNIT OVERVIEW > VEHICLE INSTALLATION
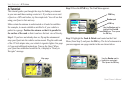
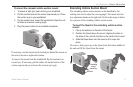
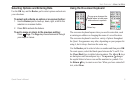
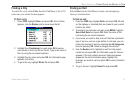
To mount the extending vehicle suction mount:
1. Loosen the two adjustment knobs on the right side of the
mount and extend the mount assembly as shown. Retighten
the knobs to keep the mount in place.
2. To ensure a tight grip, clean and dry your windshield and
the inside of the suction cup.
3. Flip the suction lever on the suction cup toward you.
4. Place the suction mount in the selected location on your
windshield.
5. Push the suction lever toward the windshield to tighten
the suction cup to the glass. Apply gentle pressure to the
suction mount to make certain the grip is secure.
Suction lever pushed down
toward the windshield
Mount
Adjustment
knobs
Suction cup
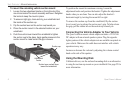
To position the mount for maximum viewing, loosen the
adjustment knobs and position the bracket. Tighten the adjustment
knobs when you are done. You can also adjust the bracket’s
horizontal angle by twisting the mount left or right.
To remove the suction cup from the windshield, flip the suction
lever toward you to release the suction cup’s grip. To help release
the grip, pull the rubber tab on the suction cup toward you.
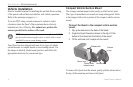
Connecting the Vehicle Adapter to Your Vehicle
The Quest’s suction mount vehicle adapter includes a 12/24-Volt
DC adapter with an external speaker system. Plug the cigarette
lighter portion of the vehicle adapter into an available receptacle in
your vehicle. Make sure the cable does not interfere with vehicle
operation in any way.
Increase or decrease the volume by adjusting the volume control
knob on the side of the speaker.
Using the Mounting Disk
California drivers, use the enclosed mounting disk as an alternative
to using the suction cup mount on your windshield. See page 52 for
more information