


Quest Owner’s Manual 5
UNIT OVERVIEW > VEHICLE INSTALLATION
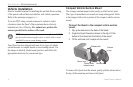
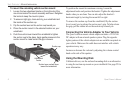
To mount the compact vehicle suction mount:
1. To ensure a tight grip, clean and dry your windshield.
2. Pull the suction lever on the suction cup toward you. Place
the suction cup on your windshield.
3. Flip the suction lever toward the windshield. Adjust the unit
to obtain a maximum viewing angle.
4. Plug the power cable into an available receptacle.
If necessary, use the tension knob (located just behind the mount on
the arm) to loosen or tighten the tension.
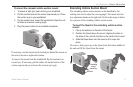
To remove the mount from the windshield, flip the suction lever
toward you. If necessary, pull the rubber tab on the bottom of the
suction cup toward you to loosen the suction cup’s grip.
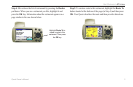
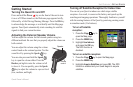
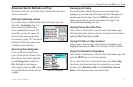
Extending Vehicle Suction Mount
The extending vehicle suction mount can be identified by the
rotating arm used to adjust the viewing angle. The mount also has
two adjustment knobs on the right side. Refer to the image to below
for a picture of the extending vehicle suction mount.
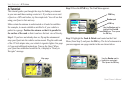
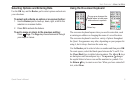
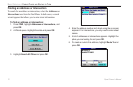
To insert the Quest in the extending vehicle suction
mount:
1. Flip up the antenna on the back of the Quest.
2. Position the Quest above the mount, aligning the slots on
the sides of the unit with the tabs on the inside of the mount.
3. Slide the Quest down into the mount until it snaps into
place.
To remove, firmly press up on the Quest from the bottom middle of
the unit and lift the Quest from the mount.
Mount
Extending
mount
assembly