


4 Quest Owner’s Manual
UNIT OVERVIEW > VEHICLE INSTALLATION
Vehicle Installation
Select a suitable location for installing the unit that allows routing
of the power cord and does not interfere with vehicle operation.
Refer to the warnings on pages iv–v.
If you are NOT using a remote antenna, be certain to select
a location where the Quest’s flip-up antenna has a relatively
unobstructed view of the sky. For optimal use, position the
antenna parallel to the surface of the road.
NOTE: An optional external remote antenna (Garmin GA 27C)
may be needed when using the unit in a vehicle with a coated
windshield or an in-screen heating system.
Your Quest has been shipped with one of two types of vehicle
suction mounts: a compact mount or an extending mount. Use
the images to identify which mount you have and follow the
appropriate directions for your mount type.
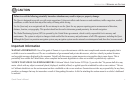
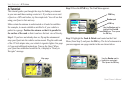
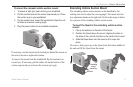
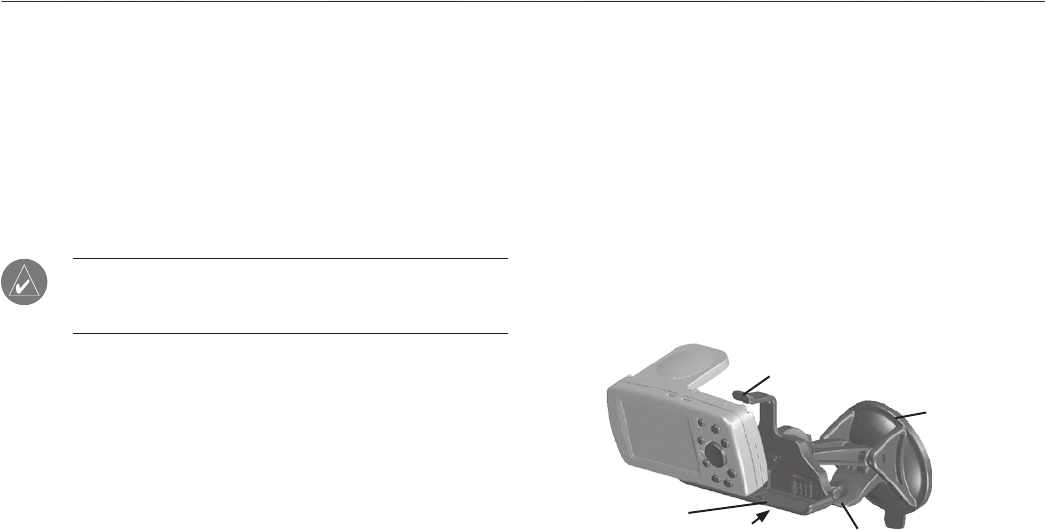
Compact Vehicle Suction Mount
The compact suction mount rotates easily on a ball-socket joint.
This type of mount does not extend out using rotating arms. Refer
to the image to below for a picture of the compact vehicle suction
mount.
To insert the Quest in the compact vehicle suction
mount:
1. Flip up the antenna on the back of the Quest.
2. Angle the Quest forward as shown to the right. Fit the
bottom of the Quest into the bottom of the mount.
3. Tilt the unit back until it snaps into the mount.
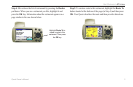
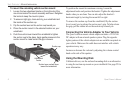
Suction
cup
Suction lever
Release tab
Mount
Tension knob
behind mount
To remove the Quest from the mount, gently pull the release tab on
the top of the mount up and remove the Quest.