


Quest Owner’s Manual 23
BASIC OPERATION > PLANNING AND MODIFYING ROUTES
Planning and Modifying Routes
Use the Quest’s Route Planner feature to plan your routes before
you even leave the house. The Route Planner allows you to select
a start point and a destination, and it automatically saves the route.
You can also modify the route to add extra stops (via points) or
avoid certain roads.
Planning a Route
Planning routes is fast and easy: simply pick a starting location and
an ending location.
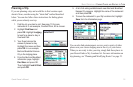
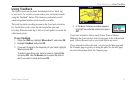
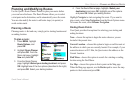
To plan a route:
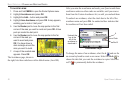
1. Press MENU, highlight
Route Options, and
press OK.
2. Highlight Route Planner
and press OK. From the
Route List page, highlight
New and press OK.
3. From the Route Planner
page, highlight <Select your starting location> and press
OK. Highlight one of the four options (described to the right)
and press OK. Select your starting location.
4. From the Route Planner page, highlight
<Select your
destination> and press OK. Highlight one of the options
and press OK. Select your ending location.
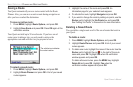
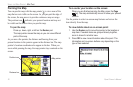
Highlight Navigate to start navigating this route. If you want to
stop a route, select Stop Navigation from the Route Options menu.
To resume the route, select Resume Navigation.
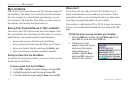
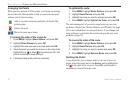
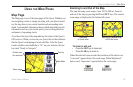
Finding Route Points
Your Quest provides four options for selecting your starting and
ending locations:
None—choose this option to begin the route wherever you are
located at the present time.
Current Location
—choose this option to begin or end the route at
the address at which you are currently located. For example, if your
current location is at 915 Elm, the Quest enters this address as the
Current Location.
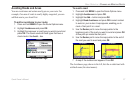
Find Menu—choose this option to search for a starting or ending
location using the Find Menu.
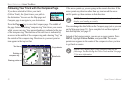
Use Map—choose this option to find a point on the Map page.
When the Map page appears, use the Rocker pad to move the map
pointer to the location and press OK.