


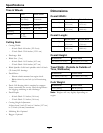
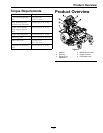
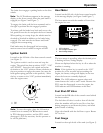

Operation
The fuel gauge monitors the amount of fuel in the
tank.
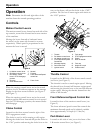
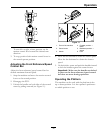
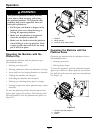
Drive Wheel Release Valves
Located on the left rear corner of the hydrostatic
pumps.
Drive wheel release valves are used to release the
hydrostatic drive system to allow the machine to be
moved by hand without the engine running.
With a 5/8 wrench, turn both valves one turn
counterclockwise to release the drive system.
Turn clockwise to reset the drive system. Do Not
overtighten. Do Not tow machine.
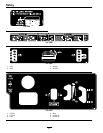
PTO Engagement Switch
Located on front control panel (see Figure 5).
Switch must be pulled out (up) to engage the blades.
Switch is pushed in to disengage the blades.
The LCD indicator will appear when the PTO switch
is engaged (see Figure 7).
Low Voltage Indicator
Located on the front control panel in the message
display (see Figure 5 and Figure 7).
A low voltage condition (less than 12.3 volts) exists
when the low voltage indicator light appears on the
message display while the engine is running.
If the ignition key is turned to the “ON” position for
a few seconds before cranking the engine, the battery
voltage will display in the area where the hours are
normally displayed.
Note: The indicator normally appears when the
engine is off and the key switch is turned to the
“ON” position.
Deck Lift Handle
Located on the RH of the front control panel.
Pull the handle rearward to raise the cutting deck.
Allow the handle to move forward to lower the
cutting deck to the cut height that has been set.
Pull the handle rearward and to the right to latch
the cutting deck into the raised transport position
(Figure 5).
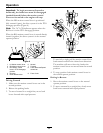
Pre-Start
Fill fuel tank on level ground. For best results use
only clean, fresh regular grade unleaded gasoline with
an octane rating of 87 or higher.
Important: Never use methanol, gasoline
containing methanol, gasohol containing more
than 10% ethanol, premium gasoline, or white
gas because the fuel system could be damaged.
Do Not add oil to gasoline.
Do Not use gasoline that has been stored since the
last mowing season or longer.
Do Not overll fuel tank. Fill the fuel tank to the
bottom of the ller neck. The empty space in the
tank allows gasoline to expand. Overlling may result
in fuel leakage or damage to the engine or emission
system (if equipped).
Make sure you understand the controls, their
locations, their functions, and their safety
requirements.
Refer to the Maintenance section and perform all the
necessary inspection and maintenance steps.
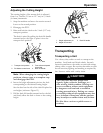
Operating Instructions
Open the Fuel Shut-Off Valve
Rotate the valve and align with the fuel line to open.
Starting the Engine
1. Leave the LH motion control lever in neutral and
the RH lever in the PTO disengage position (see
Figure 4).
2. Pull the parking brake rearward and over to the
right to engage the parking brake.
3. Push in (down) on the PTO switch to the
“disengage” position.
4. Place the throttle midway between the “SLOW”
and “FAST” positions.
5. On a cold engine, push the choke lever forward
into the “ON” position.
On a warm engine, leave the choke in the “OFF”
position.
6. Turn ignition switch to the “START” position.
Release the switch as soon as the engine starts.
18