


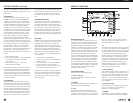
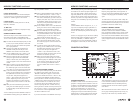
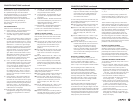
12 13
knob will be ineffective, and “LOCK” and “TUN LOCK“
will appear on the LCD display.To return to normal
operating mode, once again press the ‘CLEAR/LOCK’ key
for three seconds.This control can also be used when
the receiver is turned off. Press ‘CLEAR/LOCK’ for 3 sec-
onds. A message will appear confirming lock. If power is
then pressed, a “Press CLEAR/LOCK for 3 seconds to
unlock” message will appear.The user must perform this
action before the ‘POWER’ key will allow power up.
From either MEMORY or COUNTRY modes. Note that
VFO (Variable Frequency Oscillator) is a register used to
store the frequency to which the main ‘TUNING’ control
is set.Turning the ‘TUNING’ control will change this fre-
quency.
7. FM / LW / MW / SW Mode - Function Softkeys
The function of each of these softkeys is shown along
the bottom edge of the display when the receiver is in
the ON state. From left to right their functions when a
menu is not displayed are as follows:
MENU - Pressing this softkey displays the first of several
menus used for setting clocks, timers and various other
receiver functions. Each additional press advances to
another menu page.
AGC - Pressing this softkey will toggle the AGC decay
time between fast, slow, and auto in all modes but FM.
When in FM mode, there will be no display function
shown for this softkey.
BW - Press repeatedly to scroll through the three avail-
able IF bandwidths of 7.0, 4.0, and 2.3 kHz in all modes
but FM.When in the FM mode, there will be no display
function shown for this softkey.
PBT - Pressing this softkey enables/disables the function
of the PBT (passband tuning) knob in all modes except
FM.The displacement in kHz of the IF passband relative
to its nominal position is shown on the display directly
above the PBT softkey when it is enabled.When in FM
mode, there will be no display function shown for this
softkey.
AM - Press to select AM (amplitude modulation) mode.
WhenAM mode is selected, a second press of the soft-
key selects AM synchronous detection mode (AM SYNC).
Repeated depressions of this softkey will cycle the syn-
chronous detection mode on and off.When in FM mode,
there will be no display function shown for this softkey.
SSB - Press to select SSB (Single Sideband) mode. Once
SSB mode is selected, repeatedly pressing the SSB soft-
key will cycle between upper sideband (USB) and lower
E1 FRONT PANEL DESCRIPTION continued
E
1 MANUAL
sideband (LSB). When AM synchronous detection mode
is first selected using the ‘AM’ softkey, pressing the ‘SSB’
used to store the frequency to which the main ‘TUNING’
control is set.Turning the ‘TUNING’ control will change
this frequency.
Pressing ‘TUNE’ transfers the frequency last listened to
while in the MEMORY or COUNTRY modes to theVFO,
along with the current associated function parameters.
This allows for fine tuning of and around the transferred
frequency or modifying its parameters.When ‘TUNE’ is
pressed,“VFO STORED” will briefly appear on the dis-
play.This softkey is functional in MEMORY and COUN-
TRY modes only.
8. < SELECT >
In VFO mode, pressing the ‘<’ or ‘>’ ends of this key will
cause the frequency to increment or decrement in 5 kHz
steps on LF and SW bands, in either 9 or 10 kHz steps
on the MW (AM broadcast) band depending on a menu
setting, and in 100 kHz steps on the FM band.When in
MEMORY or COUNTRY modes, each press of the ‘<’ or
‘>’ ends of the key causes the display to decrement or
increment respectively one memory page.When in
MEMORY or COUNTRY modes, holding down the ‘<’ or
‘>’ will cause the unit to scroll through the MEMORY or
COUNTRY pages.When programming in MEMORY
mode, pressing ‘<’ or ‘>’ moves the curser left or right
respectively for entering the names for stored frequen-
cies.
9. STORE
This key is used to store various pieces of information
including setting the Local and GMT clocks, setting
parameters and labels in the 500 MEMORY channels,
and saving parameters in the 1200 COUNTRY channels.
10. DELETE
Use this key to delete entries in the 500 MEMORY or
1200 COUNTRY.
11.TAG
Pressing this key adds (or removes) a tag shown as a
“T” on MEMORY and COUNTRY displays from any
of the MEMORY and COUNTRY for selective scanning.
12.T. SCAN
Used to initiate or stop a scan of MEMORY or COUNTRY
channels marked with a “T” tag.
13. SEEK
Pressing the SEEK key will cause the frequency to incre-
ment in 5 kHz steps on LW, and SW modes, 9 or 10 kHz
steps in MW, depending on the setting of item 4 in the
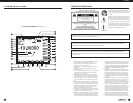
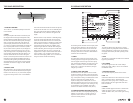
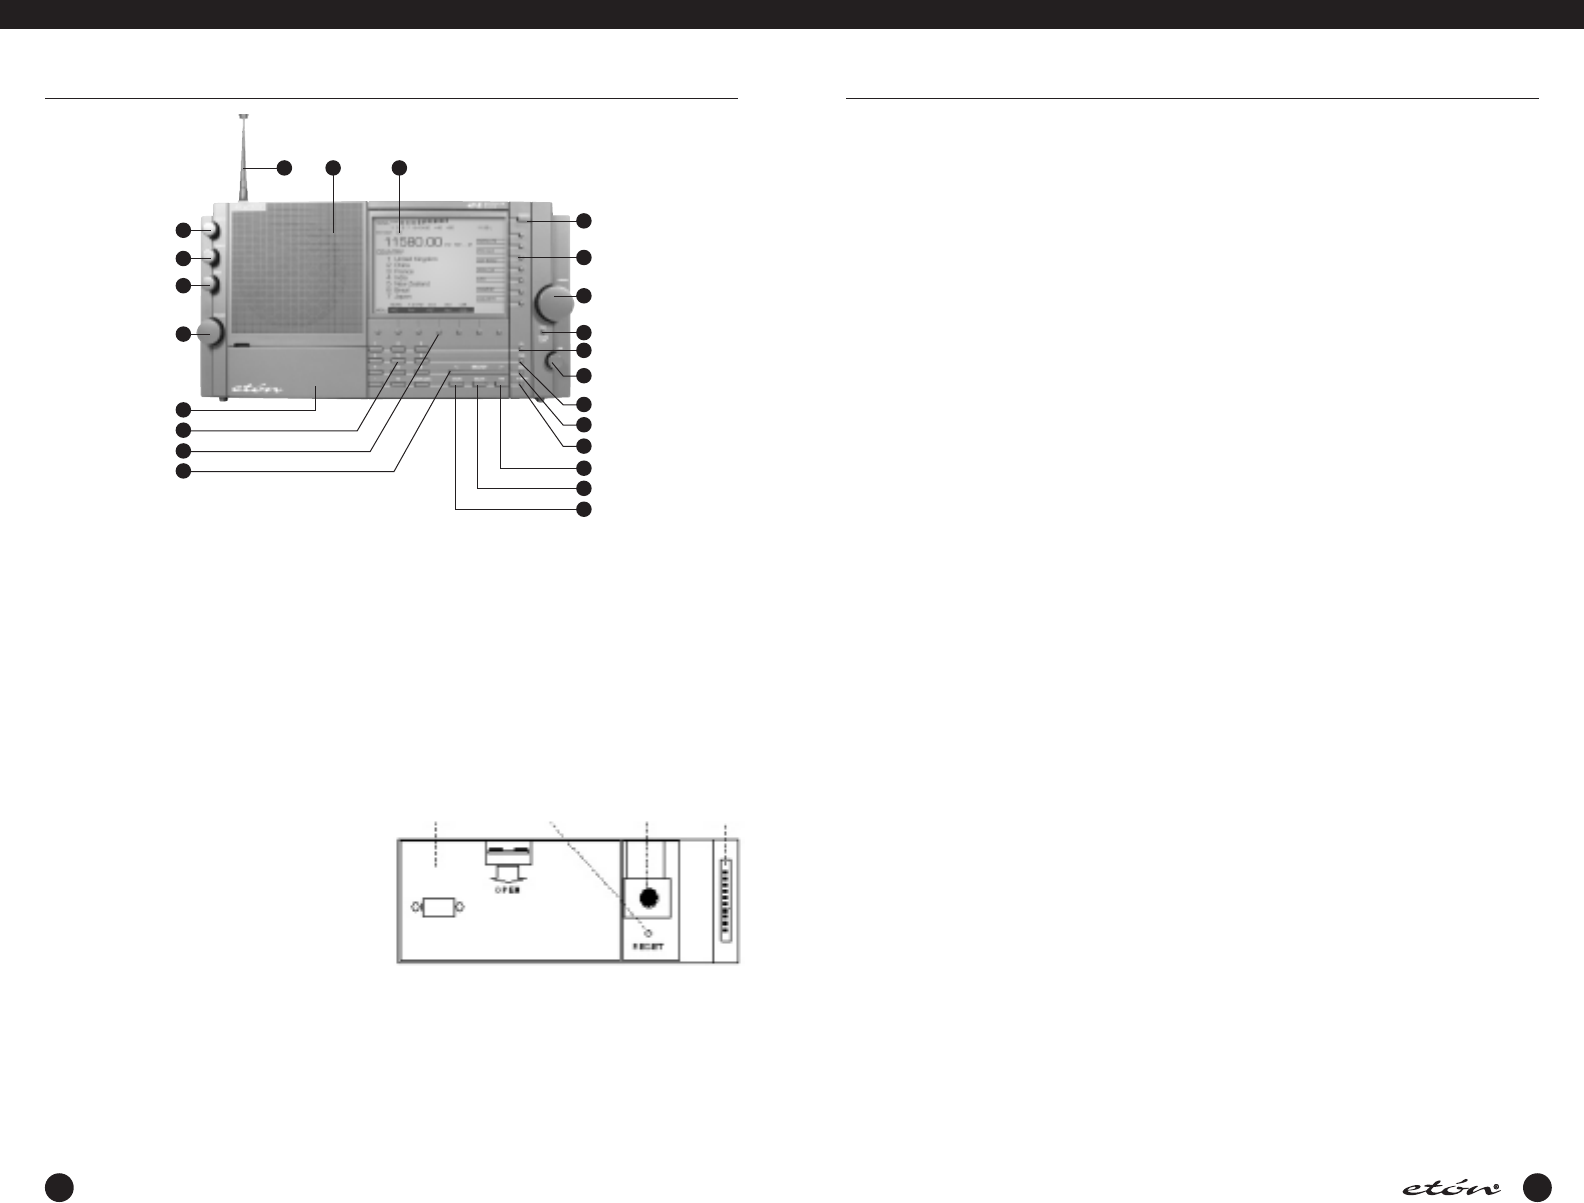
E1 FRONT PANEL DESCRIPTION
1
2
3
4
5
6
7
8
2
0
19
18
17
16
1
5
14
13
12
11
10
9
1. Squelch
This control allows muting of the receiver’s audio when
no signals are present.Adjust the control until back-
ground noise just disappears when no signal is being
received.An indicator is provided on the display directly
under the signal strength display to show how the
squelch is set relative to received signal strength. (See
the display description starting on page 18). Squelch
also sets the threshold for carrier scan stop. Muting can
be disabled in AUDIO SETTINGS menu, Item 4. However,
carrier stop threshold will be controlled by the Squelch
control regardless of whether or not muting has been
disabled.
2.Treble
This control adjusts the audio frequency response at the
high end of the audio spectrum.Adjust clockwise fo
more treble response.
3. Bass
This control adjusts the audio frequency response at the
low end of the audio spectrum.Adjust clockwise for
more bass response.
4.Volume
With the receiver on, adjust this control clockwise to
increase the audio level from the receiver’s speaker or
from headphones. Be certain to set the volume setting
at the desired level for TIMER use.
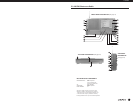
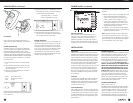
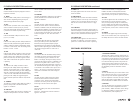
5.Access Door
Provides access to the battery access panel, to the
microprocessor Reset button access hole, to the Display
21
2223
Contrast Knob, and to the Factory Programming
Connector.The Factory Programming Connector should
be used only by a factory authorized service center.The
Display Contrast Knob should be adjusted for best dis-
play contrast from the normal viewing position.The
Reset button “reboots” the microprocessor and should
be pressed using a straightened paperclip in the unlikely
event that the receiver exhibits erratic operation,
“freezes”, or displays a flashing “UNLOCK” on the dis-
play. (See the following diagram for the location of
these items).
6. Direct- Key-Input
Numeric Keys - Keys 0 thru 9 plus the ‘.’ key are used to
make direct numeric entries of frequencies, memory
channel numbers, meter band designators, menu selec-
tions, and timer settings. CLEAR / LOCK - Press this key
to clear an incorrectly entered frequency or other value.
Pressing and holding this key for three seconds will
cause the receiver to be locked in its present configura-
tion. All front panel key controls as well as the ‘TUNING’
Battery
Access
Panel
Reset
Button
Display
Contrast
Knob
Factory
Programming
Connector