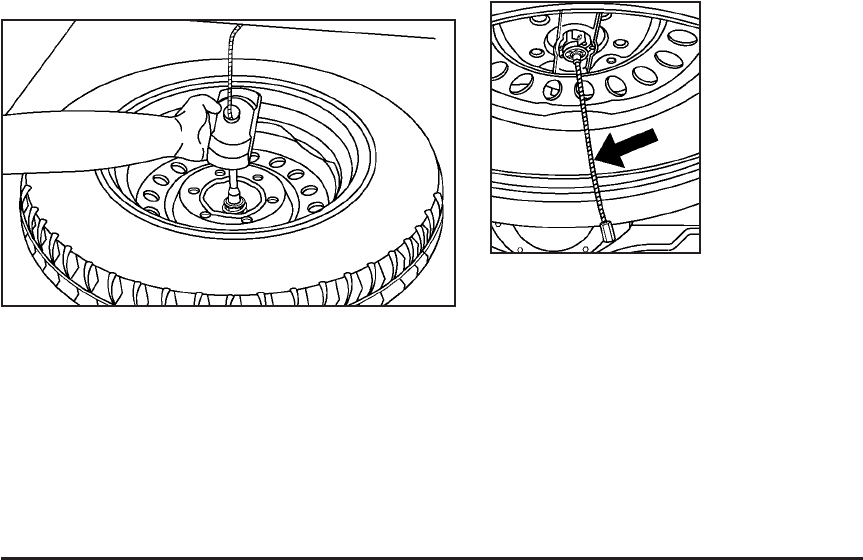
4. Turn the wheel wrench counterclockwise to lower
the spare tire to the ground. Continue turning the
wrench until the spare tire (D) can be pulled
out from under the vehicle.
5. Tilt the retainer (C) and slip it through the wheel
opening to remove the spare tire from the cable (B).
6. Turn the wrench clockwise until you feel two slips
or hear two clicks after removing the spare tire to
raise the cable back up.
Do not store a full-size or a flat road tire under
the vehicle. See Storing a Flat or Spare Tire and
Tools on page 5-83.
To continue changing the flat tire, see Removing the
Flat Tire and Installing the Spare Tire on page 5-76.
If the spare tire will not lower, the secondary latch
may be engaged causing the tire not to lower.
Do the following to check the cable:
1. Check under the
vehicle to see if
the cable is visible.
If it is not visible,
see Secondary Latch
System on page 5-81.
2. If it is visible, first try to tighten the cable by
turning the wheel wrench clockwise until you
hear two clicks or feel it skip twice. You cannot
over-tighten the cable.
3. Loosen the cable then by turning the wrench
counterclockwise three or four turns.
4. Tighten the cable all the way and then loosen it at
least two times, if the spare tire has not lowered.
If the spare tire did lower to the ground, continue
with Step 4 under Removing the Spare Tire
and Tools on page 5-74.
If you still cannot lower the spare tire to the ground,
see Secondary Latch System on page 5-81.
5-75


