


20 9
For wiring charts please visit our website,
www.jbstech.com.
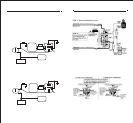
CONSTANT POWER (+12V, key in any position including off)
Make all connections as close to the ignition switch harness as possible.
These wire(s) are in your vehicle’s main ignition harness, usually located
on the steering column coming from the ignition switch. Probe each wire
with your test light. The correct wire(s) will show +12V when the ignition
switch is in these 5 positions (ACC-LOCK-OFF-RUN-CRANK).
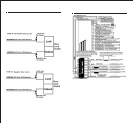
1. If your vehicle has only (1) constant power wire, attach
the RED wire from the 18-pin harness and both large RED
wires from the 4-relay harness to the constant power
wire in the vehicle.
2. If your vehicle has (2) constant power wires, attach the
RED wire from the 18-pin harness and (1) large RED wire
from the 4-relay harness to one of these constant power
wires. Then connect the other large RED wire from the 4-
relay harness to the second constant power wire in the
vehicle.
Make sure to wrap electrical tape around all (3) fuse holders to prevent
shorting to ground.
IGNITION WIRE(S) (+12V in run, crank and sometimes in the accessory position
only) Make all connections as close to the ignition switch harness as
possible.
The ignition wire(s) are also located in the main harness coming from
the ignition switch. Probe each wire with your test light, the correct
ignition wire(s) will show +12V when the ignition switch is in the RUN,
CRANK and sometimes in the ACCESSORY (newer GMs) position. The correct
wires will not show +12V when in the OFF or ACCESSORY position (other
than some GMs). Most Ford, GM, and Chrysler vehicles have at least (2)
ignition wires. Most foreign vehicles have only (1).
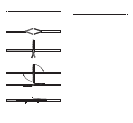
1. Strip back the YELLOW wire from the 18-pin harness and
then strip back (1) of the (2) WHITE wires from the
4-relay harness and twist both of these wires together.
2. Connect the YELLOW wire and the WHITE wire from step (1)
to the Ignition #1 wire in the ignition switch harness.
If your vehicle has only (1) ignition wire, tape off the
end of the second WHITE wire from the 4-relay harness and
do not use.
3. If your vehicle has a second ignition wire (Ignition #2),
connect the YELLOW and WHITE as stated in step 2, to
Ignition #1, and also attach the second WHITE wire from
the 4-relay harness to the Ignition #2 wire at the ignition
switch harness.
4. If your vehicle has (3) ignition wires (some GMs) connect
the first WHITE wire from the 4-relay harness (the WHITE
and YELLOW) from step 1,to the Ignition 1 wire and the
Ignition #3 wire in the ignition switch harnes.
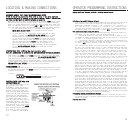
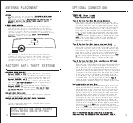
LOCATING & MAKING CONNECTIONS
IGNITION HARNESS
UNDER DASH
Dome Light Option
The remote starter includes an optional output that can be used to
illuminate the dome light when pressing button #2 and unlocking your power
door locks. The dome light will remain on for one minute or until you
turn the ignition on or press the brake.
Trunk Release Output
The remote car starter includes an optional output that can be used to
do one of the following: open the trunk (optional part #775 required),
roll up the windows (optional module part #WRU-B), close the sun roof
(optional part #775 required) etc. This output will pulse .75 seconds
when pressed and released. In instances where a continuous signal is needed
such as sun roof and power windows, hold down button #3 (trunk) as long
as the signal is needed to complete the task. The parking lights will
remain on as long as this button is being pressed.
Runtime Confirmation (Engine Not Running)
To check programmed runtime, press and release button #4 (stop), the
parking lights will flash for the programmed length of time. Each flash
will equal 5 minutes of runtime.
Pit Stop: Exiting the Car with the Engine Running
Make sure the transmission is in park and press button #1 (start) before
turning the ignition switch off. (The engine will remain running for the
preset time.)
Keyless Entry Operation
Press button #2 (lock/unlock), the parking lights will flash once and
the doors will lock. Press button #2 again, the parking lights will flash
twice, the doors will unlock, and the parking lights will remain on for
one minute or until you turn the ignition on or press the brake.
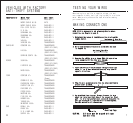
HOW TO USE YOUR REMOTE TRANSMITTER
Starting the Vehicle with the Remote Transmitter
Press and release button #1 (start). The parking lights will flash once,
confirming the car starter received the signal. The car will then start
and the parking lights will turn on and remain on while the vehicle is
running. To shut off the engine before the preset time, press button #4
(stop) or press the brake pedal. NOTE: If your car does not start on the
first crank it will automatically attempt to start up to 2 more times.
(only in tachless mode) In tachless mode, parking lights will wait
approximately 10 seconds before turning on.
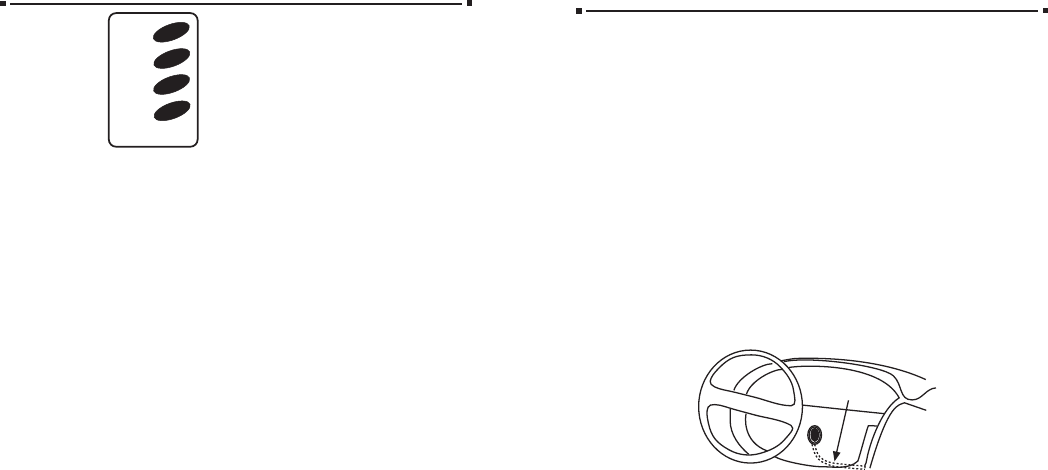
BUTTON #1
Starts your vehicle from 400 feet away.
(E-Model, up to 800 feet)
BUTTON #2
Locks and unlocks your power door locks.
BUTTON #3
Pops your trunk
BUTTON #4
Shuts engine off and programs runtime.
Start
Lock
Unlock
Trunk
Stop