


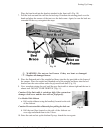

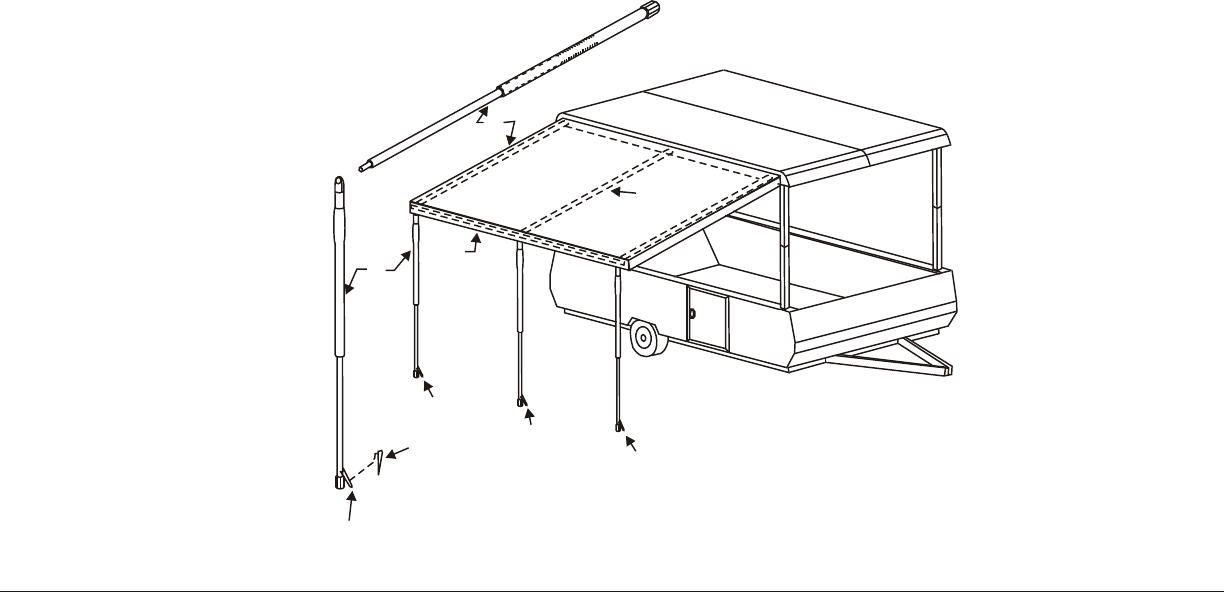
Canopy Set Up
Your canopy has been designed and built with quality material to give you years of trouble
free service with low maintenance. Read these instructions fully before beginning the
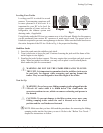
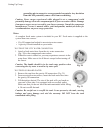
setup. Become familiar with each pole, its description and where it belongs. (Fig. 19)
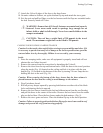
One person can do the setup, but two people will make it easier.
1. Open the zipper and unroll the canopy fabric.
2. Insert the two end divider bars “C” (with gray caps) and the center spacer bar “D”
(7/8" tube) into the front pocket of the canopy. These bars may be left in the canopy
during travel or storage, but make sure they are removed during winter storage to
avoid corrosion.
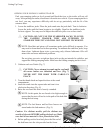
3. Assemble the two parts of a tension rafter, Pole “A.” Insert the peg through the “eye”
of the snap button pole “B” and then through the hole in the middle of the center
spacer bar “D.” Compress the tension rafter and place it in the center of the roof side
board, as pictured. The metal tip from the tension rafter will rest against the roof
metal or the canopy bag.
4. If no screen room is being installed, repeat step #3 on the front and rear tension rafter,
inserting the end of the tension rafter through the snap button poles “B” and the end
divider bars “C.” Position the tension rafter as in step #3.
5. After all the poles are installed:
a. Adjust the canopy to fit properly.
b. Adjust the height of the canopy with the snap button poles.
c. Install the three stakes to anchor the canopy in case of strong winds.
Caution: Always install the stakes to avoid wind damage to the poles and the fabric.
In severe wind it is best to remove the canopy. Wind and rain damage are not
covered by the Jayco Limited Warranty.
Jay Series/Baja/Select Folding Camping Trailer 49
Setting Up Camp...
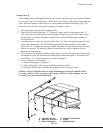
A
B
C
D
E
F
F
F
F
A -- TENSION RAFTER
B -- SNAP BUTTON POLE
C -- END DIVIDER BAR
D -- CENTER SPACER BAR
E -- STAKE
F -- ANCHOR HOOK
Fig. 19