H
ELECTRICAL SYSTEM
H - 2
12-Volt Operation
The only thing you have to do is make sure the coach batteries don’t run down. In
normal usage there isn’t any problem, since you would normally drive part of the day
and be plugged into a campground at night. The alternator charges the batteries when
you drive and when you’re plugged into city power the converter charges the batteries
and carries much of the load.
Some nights you may not find a place to plug into city power. No problem, the stan-
dard battery system gives you about 400 amp-hours so you can comfortably run your
lights and vents in a normal fashion without depleting the batteries.
If you are not plugged into city power and you’re not driving, you’ll want to conserve
your batteries by using as few lights and appliances as possible. If you notice the lights
becoming dim, it’s much easier on the batteries if you go ahead and start the engine or
generator before the batteries run down.
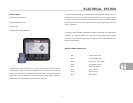
Your motorhome is equipped with a 53-watt solar panel. Its contrller is located on
the wall between the galley and sofa.
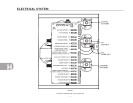
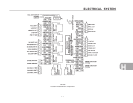
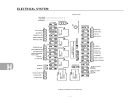
There are two sets of 12-volt fuses and breakers in your motorhome. The main interior
circuit fuses are in Power Cord Compartment. The brightly colored fuses pull straight
out from the face of the panel. Replacement fuses are available at automotive stores
and most service stations. On the panel covering the fuses is a diagram showing the
function of each fuse or circuit breaker. The chassis manufacturer provides the second
set of fuses. Freightliner fuses are located in the lower compartment forward of the
roadside front wheel.
Many interior lights have been included in your motorhome to give you almost infinite
variable light intensity. Just inside the main door are switches for the step, patio light,
aux. Batt (390 only), and forward ceiling lights. The forward ceiling lights must have
their switches on before the remote switch on the panel will control them.
The reading lamps above the sofa, dinette, recliners, galley indirect lighting, are oper
-
ated by the two gang switches located on the wall above the deluxe sofa and on the
wall forward of the dinette. The wall and hanging lamps are operated by the dimmer
switches on the wall.
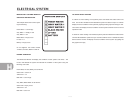
The two-gang switch on the galley slide-out panel below the monitor system operates
the china cabinet light above the galley and the ceiling lights.
In the bathroom the water heater switch supplies power to the igniter and gas valve.
When turned on, it will flash red until flame is sensed, then the red light will be extin-
guished. The other switches above the lavatory operate the shower, lower medicine
cabinet, bath mirror lights and water pump.
The switch in front of the bed wardrobe and a switch above the bed headboard on
the curbside operate the bedroom ceiling lights. The switch besides the ceiling light
switch operates beds reading lights. Individual switches located on the wall lamps are
used for these lights.
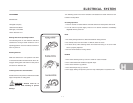
The bulbs in the interior lights are all easily replaced if they burn out. Round, exposed
bulbs, such as those around the bathroom mirror and reading lights, are replaced by
depressing them into their base, then turning to the left about 1/4 turn. This will allow
them to “pop” out part way, so they can be removed. Twelve-volt bulbs with flat bases
pull straight out of their socket. To change the bulb in the round ceiling light, first
remove the lens assembly. The lens assembly is spring loaded and pops out of the
fixture at its chrome ring. A small screwdriver may be used, be careful not to scratch
the chrome and be sure the bulb is cool before attempting replacement. The bulb
inserts into the ballast by two wire prongs. Grasp the bulb with a piece of cloth and pull
it gently straight out from its ballast. Insert the new bulb, and replace the lens. The lens
assembly has two grooves that must be aligned to the light fixture before snapping the
lens back into place.


