63
Using Traffic information
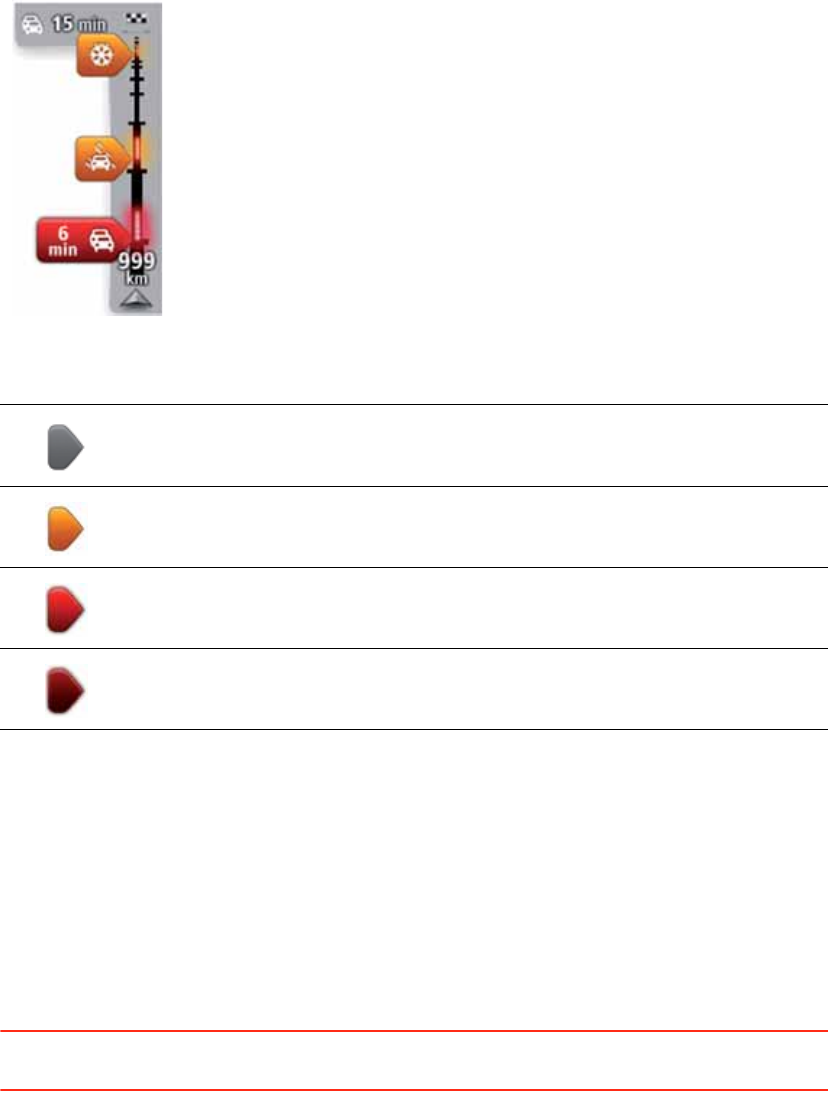
The traffic sidebar is shown on the right side of the Driving view. The sidebar informs you
about traffic delays while you drive, using glowing dots to show you where each traffic
incident is located on your route.
The top of the traffic sidebar represents your destination and shows the
total time delay due to traffic jams and other incidents on your route.
The central section of the traffic sidebar shows individual traffic inci-
dents in the order they occur on your route.
The bottom of the traffic sidebar represents your current location and
shows the distance to the next incident on your route.
To make the traffic sidebar more readable some incidents may not be
shown. These incidents will always be of minor importance and only
cause short delays.
The colour of the pointers, as shown below, gives you an instant indication of the type of
incident:
Taking the fastest route
Your GO regularly looks for a faster route to your destination. If the traffic situation
changes and a faster route is found, your GO will offer to replan your journey so you can
use the faster route.
You can also set your GO to automatically replan your journey whenever a faster route is
found. To apply this setting, tap Traffic settings in the Traffic menu.
To manually find and replan the fastest route to your destination, do the following:
1. Tap the traffic sidebar.
Tip: If you find that tapping the sidebar opens the Main menu instead of the traffic menu,
try tapping the sidebar with your finger resting on the edge of the screen.
2. Tap Minimise delays.
Your GO searches for the fastest route to your destination.
The new route may include traffic delays. You can replan the route to avoid all traffic
delays, but a route which avoids all delays will usually take longer than the fastest route.
3. Tap Done.
Unknown or undetermined situation.
Slow traffic.
Queueing traffic.
Stationary traffic or road closure.


