13
OPERATION
2. Remove any trapped air from the tool by squeezing the
trigger 4 or 5 times to advance and retract the piston nearly
a full stroke.
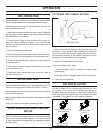
3. Position the tool to make the crimp.
Failure to center the connector between the dies will
damage the dies and/or die holders.
4. Hook the stationary (retainer die yoke or C-frame) die on the
connector being crimped to ensure the connector is centered
between the dies.
5. Squeeze the trigger to advance the piston and crimp the
connector.
6. Release the trigger to retract the piston.
7. Slide the tool into position for the next crimp. Some sleeves
and connectors have special crimping requirements. Refer to
the tting manufacturer’s requirements.
8. Remove the tool by lifting it free of the connector.
SHUTDOWN
1. Move the hydraulic system control valve to the off posi-
tion.
2. Disconnect the hydraulic hoses from the tool—rst the input
(supply) hose, then the output (return) hose.
3. Insert plugs in the hose ends, couplers or tool ports, as
applicable.
4. Wipe the tool thoroughly with a clean dry cloth.
5. Clean any foreign matter or joint compound from the die
holder surfaces.
COLD WEATHER OPERATION
If the tools is to be used during cold weather, preheat the hy-
draulic uid at low engine speed. When uysing the normally
recommended uids, uid temperature should be at or above
50°F/10°C (400 ssu/82 centistokes) before use.
Damage to the hydraulic system or compression tool can
result from use with uid that is too viscous or too thick.
IMPORTANT
STORAGE
Replace any damaged or missing safety labels and tags
before storing the tool. Clean, dry and lubricate moving parts
before storage. Store in a clean, dry place.


