


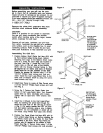
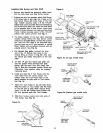
Installing Cooking Components
Important: Before cooking on your griU the first
time, wash the cooking grids and cooking rack
with warm, soapy water. Rinse and dry thoroughly.
Season with cooking oil regularly. After cooking is
completed, turn grill to HIGH setting for about five
minutes to burn off excess grease or food residue.
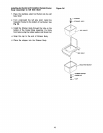
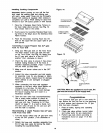
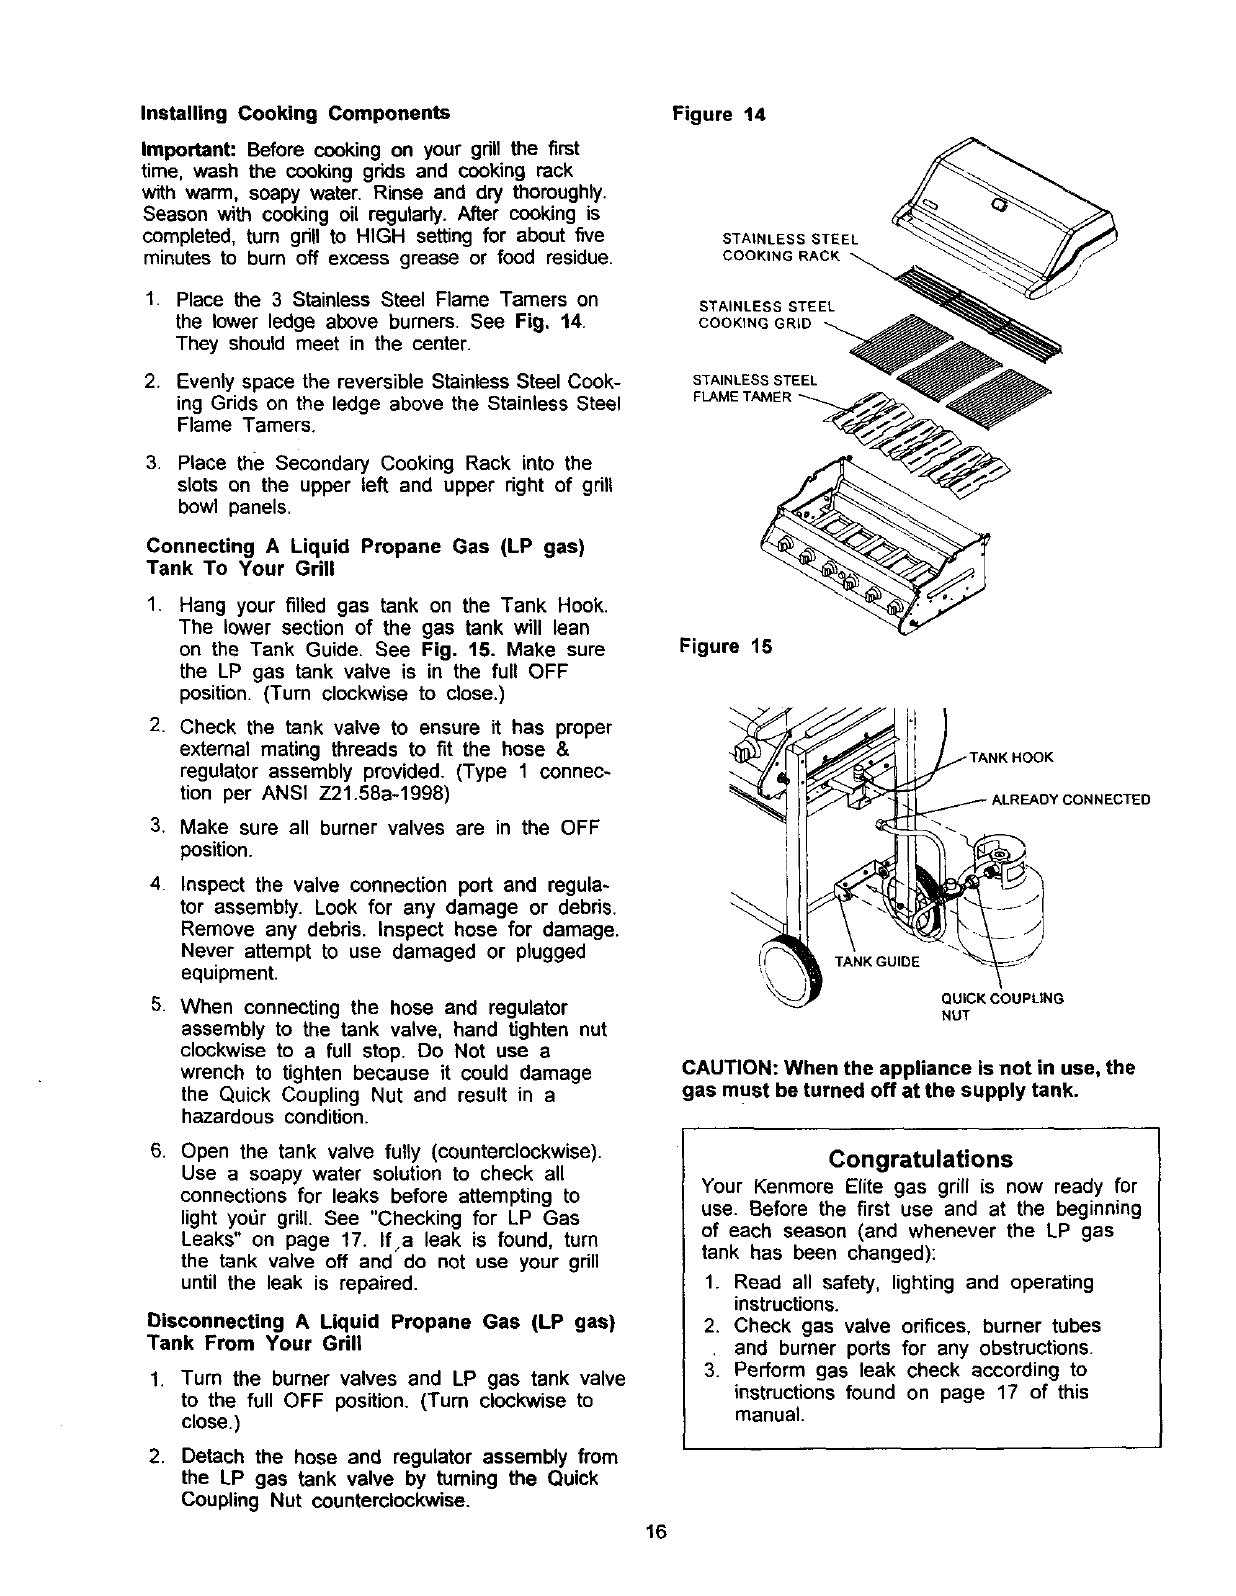
Figure 14
STAINLESS STEEL
COOKING RACK
1. Place the 3 Stainless Steel Flame Tamers on
the lower ledge above burners. See Fig. 14.
They should meet in the center.
2. Evenly space the reversible Stainless Steel Cook-
ing Grids on the ledge above the Stainless Steel
Flame Tamers.
3. Place the Secondary Cooking Rack into the
slots on the upper left and upper right of grill
bowl panels.
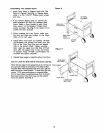
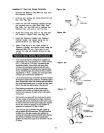
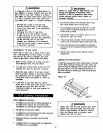
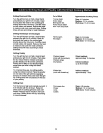
Connecting A Liquid Propane Gas (LP gas)
Tank To Your Grill
,
Hang your filled gas tank on the Tank Hook.
The lower section of the gas tank will lean
on the Tank Guide. See Fig. 15. Make sure
the LP gas tank valve is in the full OFF
position. (Turn clockwise to close.)
2. Check the tank valve to ensure it has proper
external mating threads to fit the hose &
regulator assembly provided. (Type 1 connec-
tion per ANSI Z21.58a-1998)
3. Make sure all burner valves are in the OFF
position.
4. Inspect the valve connection port and regula-
tor assembly. Look for any damage or debris.
Remove any debris. Inspect hose for damage.
Never attempt to use damaged or plugged
equipment.
5. When connecting the hose and regulator
assembly to the tank valve, hand tighten nut
clockwise to a full stop. Do Not use a
wrench to tighten because it could damage
the Quick Coupling Nut and result in a
hazardous condition.
6. Open the tank valve fully (countemlockwise).
Use a soapy water solution to check all
connections for leaks before attempting to
light yoSr grill. See "Checking for LP Gas
Leaks" on page 17. If a leak is found, turn
the tank valve off and do not use your grill
until the leak is repaired.
Disconnecting A Liquid Propane Gas (LP gas)
Tank From Your Grill
1. Turn the burner valves and LP gas tank valve
to the full OFF position. (Turn clockwise to
close.)
2. Detach the hose and regulator assembly from
the LP gas tank valve by tuming the Quick
Coupling Nut counterclockwise.
STAINLESS STEEL
COOKING GRID
STAINLESS STEEL
Figure 15
TA_IK GUIDE
QUICK COUPLING
NUT
CAUTION: When the appliance is not in use, the
gas must be turned off at the supply tank.
Congratulations
Your Kenmore Elite gas grill is now ready for
use. Before the first use and at the beginning
of each season (and whenever the LP gas
tank has been changed):
1. Read all safety, lighting and operating
instructions.
2. Check gas valve orifices, burner tubes
. and burner ports for any obstructions.
3. Perform gas leak check according to
instructions found on page 17 of this
manual.
16