


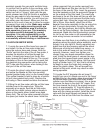
4.0 FUEL MANAGEMENT
4.1From the kit,
locate Jackson
Racing “PowerCard”
Digital Fuel
Management Module
(DFMM), it will
appear as a small
black plastic box with
6 wires coming out of
it. Using Velcro pro-
vided, you will be
attaching the
Jackson Racing
PowerCard to the
side of the factory
Engine Computer
Unit (ECU). The ECU is located directly above
the brake/clutch pedals.
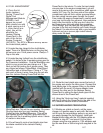
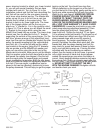
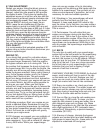
4.2 Locate the plug closest to the clutch/brake
pedal. There is a White/Red wire on this plug that
will serve as your 12volt power source. Clamp a T-
Tap on this wire.
4.3 Locate the plug furthest from the clutch/brake
pedals. It is home to the 5 remaining wires used for
the Powercard installation. Find the Black/Blue wire
which is your ground wire and clamp on a T-Tap.
Next you will be locating the 4 injector wires. They
are colored as follows: Yellow/Black, Violet/Green,
Yellow/Red and a Yellow/Green. Clamp a “T” Tap
onto each of these 4 wires. Now plug the red wire
from the Jackson Racing PowerCard into the
White/Red wire. This will be your system 12v power.
Plug the black wire from your Jackson Racing
PowerCard into the Black/Blue wire. This will be
your system ground. Plug the 3 grey wires and 1
blue wire into the 4 remaining injector wires. It does-
n’t matter in what order.
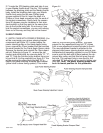
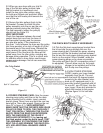
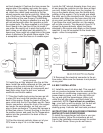
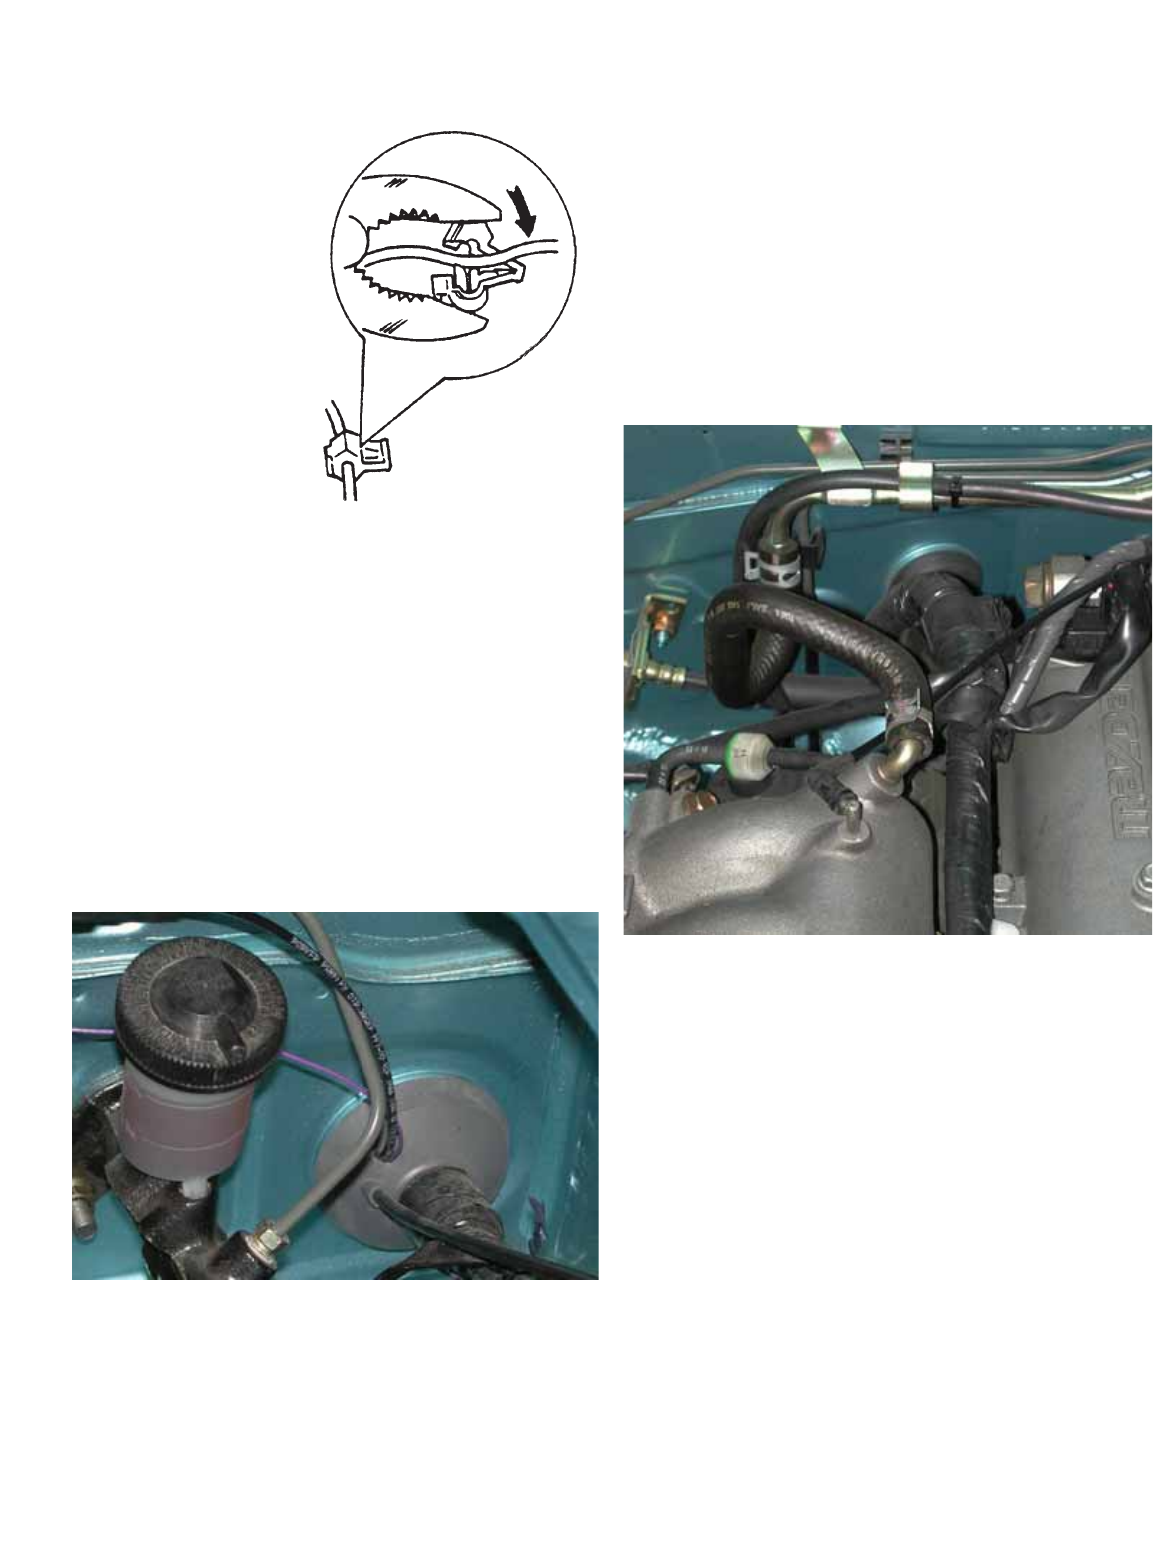
4.4 You will need to route a hard plastic pipe from
the intake manifold to the Jackson Racing
PowerCard in the interior. To route the hard plastic
vacuum pipe to the engine compartment, you will
need a long narrow rod or screwdriver shaft approxi-
mately 24+” long. On the driver side of the engine
compartment you will find a rubber grommet where
the main wiring harness goes through the firewall.
From inside the engine compartment, carefully push
your long tool through the grommet. Have someone
watch from the interior so that you don’t drive the
tool through any vital parts other than insulation.
Once through, you can tape the hard plastic vacu-
um pipe to the tool and carefully pull it back through
the firewall. You should end up with a good weather
tight seal and your vacuum pipe tucked cleanly
away under the dash.
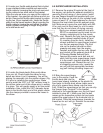
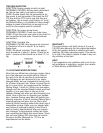
4.5. Route the hard plastic pipe across the back of
the engine and across the valve cover. Connect this
hard plastic pipe to the vacuum fitting on the intake
manifold with the small, 90-degree adapter hose.
Connect the other end to the Jackson Racing
PowerCard by sliding the hard plastic pipe into the
silicone hose of the PowerCard.
4.6. Using the “Hook and Loop” material supplied
with the kit, attach the PowerCard to the side of the
ECU once the vacuum hose is connected.
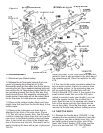
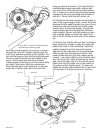
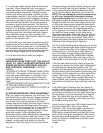
5.0 SUPERCHARGER PREPARATION
5.1 Working on a table or bench, set the super-
charger in a position easy to work with. Be careful
not to bump the supercharger pulley in any way as it
can easily damage the front bearing. Install your
Mazda throttle body with the ICS blanking plate as
installed in step #2.7 and mount it to the super-
charger using the new gasket or 1104 adhesive and
the two new 8mm x 35mm long bolts supplied in the
kit.
1/07999-200
6