


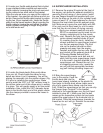
2.7 Locate the ICS blanking plate and take it over
to your Mazda throttle body. Use the 1104 sealant
between the blanking plate and the Mazda throttle
body. Install the blanking plate onto your Mazda
throttle body using the two new Phillips head
screws supplied in the kit. Insert the shaft of a
Phillips or cross head screwdriver into the ends of
the coolant connections. Gently twist the connec-
tions 90 degrees counter clockwise to their stan-
dard position so that they point in the same direc-
tion as the throttle body inlet. Do not worry if you
kink the coolant connections, you are only moving
them out of the way and they will not be reused.
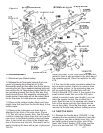
3.0 BELT DRIVES
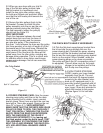
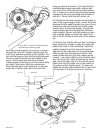
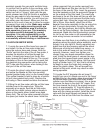
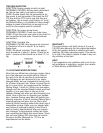
3.1 NOTE: CARS WITH POWER STEERING: You
will be re-arranging your power steering bracket
components per figure 3.2. Located above the
power steering pump on the black plastic timing
cover, remove the 10mm headed bolt that secures
the small bracket for the Crank Angle Sensor cable.
Remove the bracket and reinstall the 10mm-head-
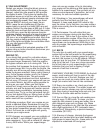
ed bolt. Referring to figure 3.1, remove the slot
bracket and pillow block by removing bolts “A”, “C”,
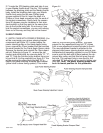
and “D”. Take the flat idler pulley bracket from your
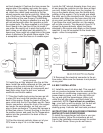
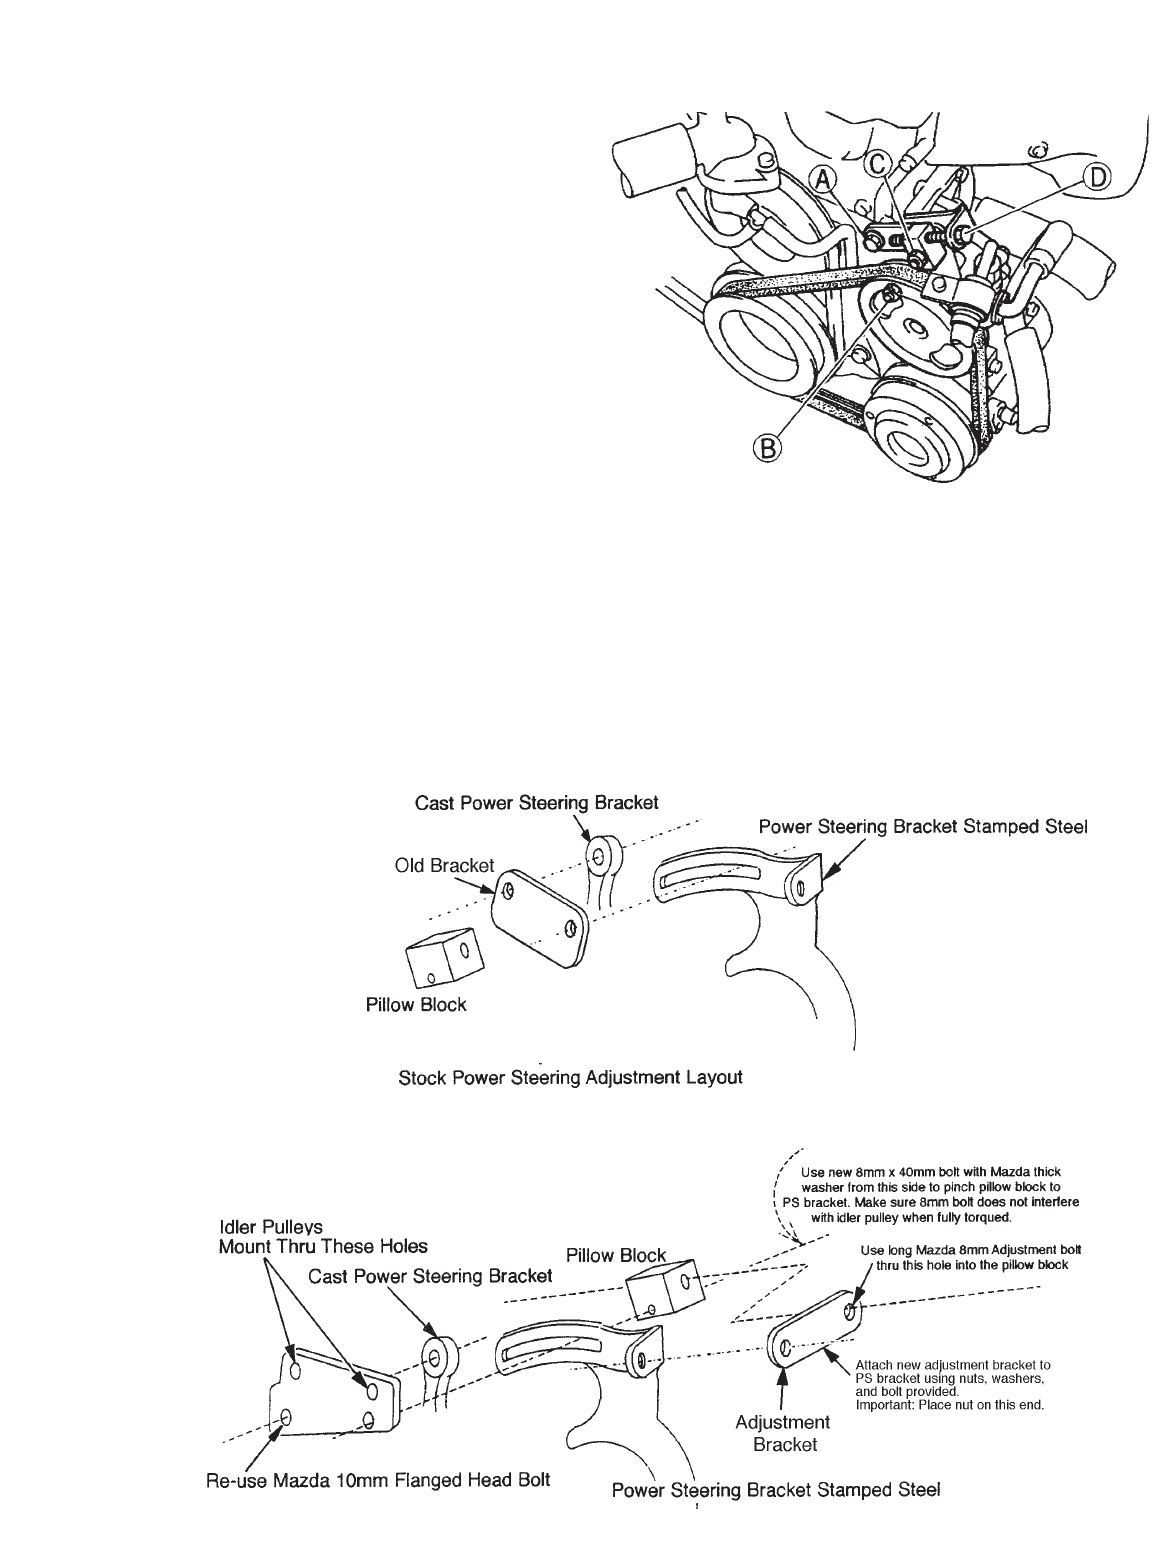
kit and trial fit it to the assembly per figure 3.2. You
will be moving the pillow block and bolt “D” to
behind the power steering stamped steel bracket
(pillow block’s dome facing upward). This makes
4
room for the flat idler pulley bracket. The upper
support for the repositioned long bolt “D” comes
from a new adjustment bracket included in the kit.
The new adjustment bracket is attached to the
stamped steel power steering bracket using a new
bolt/washer/nut assembly supplied in your kit. Make
sure to point this bolt with its head nearest the alu-
minum idler pulley and that this bolt goes through
the hole. The rearward hole is now used for the
relocated “D” bolt, which will be used to tighten your
drive belt. Note: The power steering pump must
be in its lowest position for this procedure.
Figure 3.1
1/07999-200