


Assembly
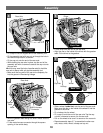
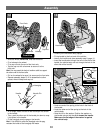
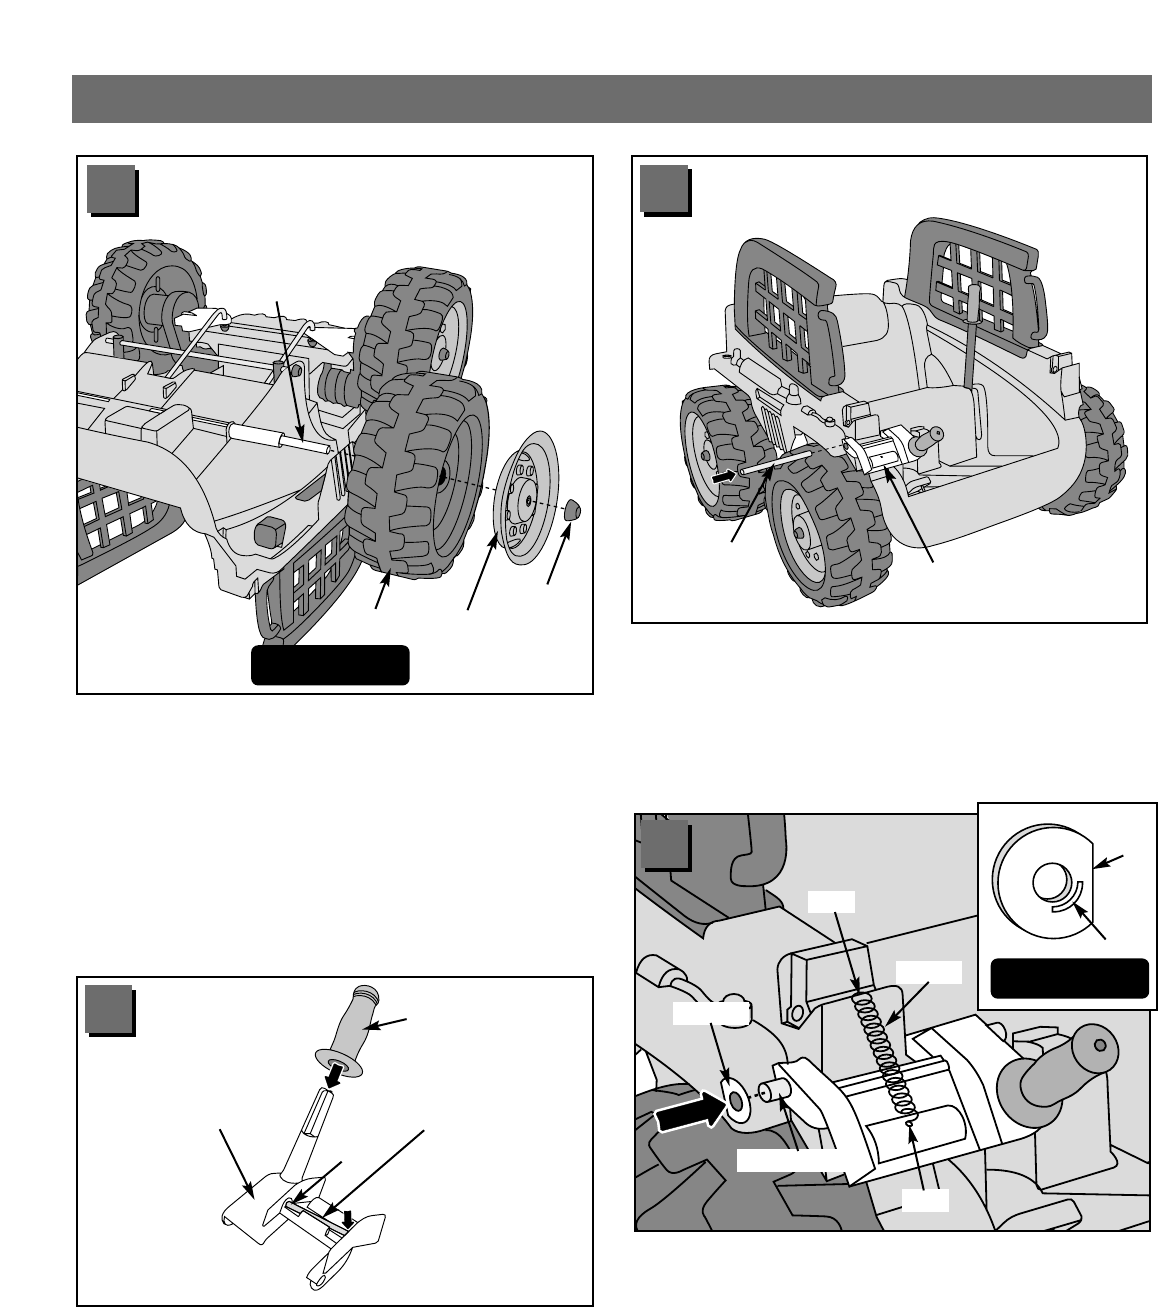
• At an angle, insert one end of the handle pin into a hole
in the handle.
• Then, push the other end of the handle pin down to snap
it into place in the handle.
• Fit the handgrip onto the peg on the handle.
Hint: If it is difficult to slide the handgrip onto the peg,
moisten the inside of the handgrip with water.
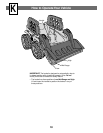
• Carefully turn the vehicle body upright.
• Fit the handle to the front end of the vehicle.
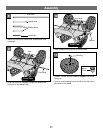
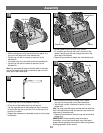
• Identify the handle axle (see assembly step 8, page 11).
• Insert the handle axle through the hole in the side of the
handle, the vehicle body and out through the hole in the
other side of the handle.
• Hook one end of the spring to the hole in the front of
the handle.
• Hook the other end of the spring to the hole in the
vehicle body.
• Note the rib on the washer. Position the washer on
the handle axle so that the rib is toward the handle.
Make sure the flat edge of the washer is against
the vehicle body.
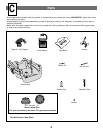
Handle
Handle Pin
Handgrip
Hole
Handle
Handle Axle
Spring
Hole
Hole
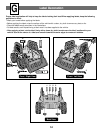
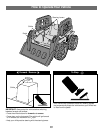
• Slide the wheel, inside first, onto the front axle.
• Fit a hubcap to the wheel.
• Fit a cap nut onto the end of the front axle.
• Tap the cap nut with a hammer to secure it to the
front axle.
Hint: You may need the help of another adult to support
the other end of the front axle.
• Pull on the wheel to be sure it is secure on the front axle.
• Repeat assembly steps 10-12 to assemble the other
spacer, wheel hubcap and cap nut.
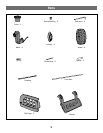
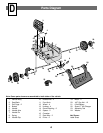
Front Axle
Cap Nut
Hubcap
Wheel
Front View
12
12
14
13
15
Washer
Rib
Washer
Flat
Edge
Handle Axle