


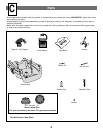
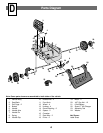
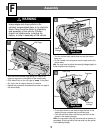
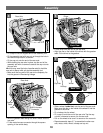
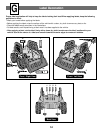
Assembly
• Fit the driver onto the end of the rear axle.
• Align the ribs on the inside of the driver with the gearbox
teeth. Fit the driver to the gearbox.
Driver
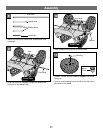
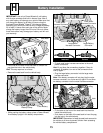
• Fit a cap nut into the cupped end of the assembly tool.
• Fit the assembly tool with cap nut up through the hole in
the vehicle body bottom, as shown.
• Fit the cap nut onto the end of the rear axle.
• While holding the rear axle in place, tap the end of the
assembly tool with a hammer to secure the cap nut onto
the rear axle.
Hint:You may need the help of another adult to hold the
rear axle in place, while you tap the assembly tool.
• Make sure the long end of the rear axle completely fits
into the groove in the steering linkage.
Rear Axle
Assembly
Tool
Back View
Back View
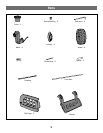
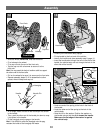
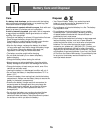
• With the gearbox teeth facing out, slide a motor onto the
rear axle.
• Fit the motor harness connector through the square
opening in the vehicle body.
Wire Harness
Connector
Gearbox
Teeth
Motor
Back View
Rear Axle
10
4
5
6
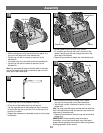
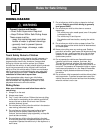
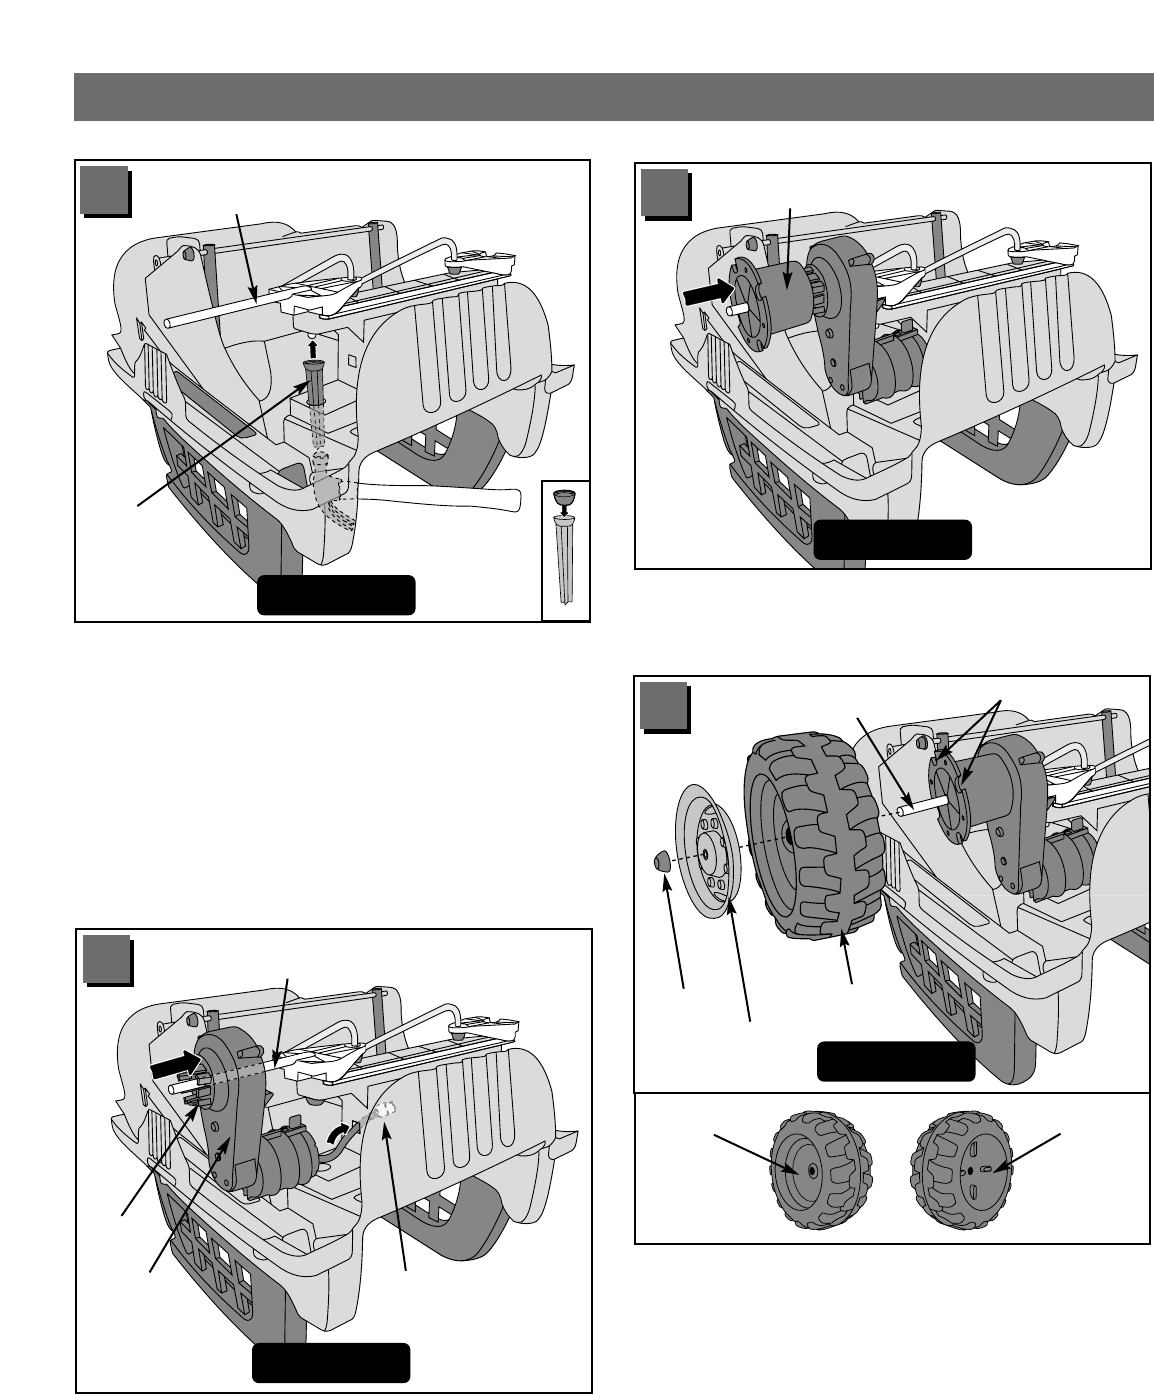
• Slide a wheel, inside first, onto the end of the rear axle.
Make sure the ribs on the inside of the wheel fit into the
grooves in the driver.
• Fit a hubcap into the wheel.
• Fit a cap nut onto the end of the rear axle. Tap the cap
nut with a hammer to secure it to the rear axle.
• Pull on the wheel to be sure it is secure on the rear axle.
• Repeat assembly steps 3-7 to assemble the other rear
axle, motor, driver, wheel, hubcap and cap nut.
Wheel
Hubcap
Cap Nut
Rear Axle
Back View
Outside
Inside
Grooves
7