


12 13
Figure 36
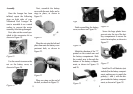
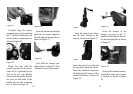
Repeat the same steps on the
other side of your Motorized
Pool Lounger, as shown in
Figure 37.
Figure 37
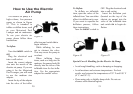
After you’ve finished assem-
bly the Motorized Pool Lounger,
you can store the wrench on the
right cup holder, as shown in
Figure 38.
Figure 38
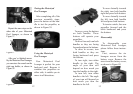
Testing the Motorized
Pool Lounger
After completing all of the
previous assembly steps,
press the button on the han-
dle to test the propeller, as
shown in Figure 38.
Figure 38
Using the Motorized
Pool Lounger
Your Motorized Pool
Lounger is perfect for your
backyard pool. Because it
contains two propellers on
either side, it enables you to
move in all directions.
Figure 39
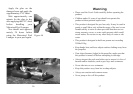
To move, press the buttons
on both handles. These
buttons will operate your
propellers.
To drive forward, turn both
handles so they are facing
forward and press the buttons.
To drive in reverse, turn
both handles so they are
facing backward and press
the buttons.
To turn right, turn either
handle to the right. The
angle of your turn will
depend on how much you
turn the handles to the right.
To turn left, turn either
handle to the left. The angle
of your turn will depend on
how much you turn the
handles to the left.
To move laterally towards
the right, turn both handles
right and press both buttons.
To move laterally towards
the left, turn both handles
left and press both buttons.
To turn in a circle, face one
propeller forward and the
other backward and press
the buttons.
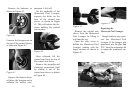
Disassembly
To disassemble your
Motorized Pool Lounger,
please follow these instruc-
tions.
First, unscrew the six
hexagon screws from the
battery cover. Remove the
screws and the battery cover,
as shown in Figure 40.
Figure 40