


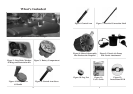


How to Use
Setting up the Motorized
Pool Lounger
Your Motorized Pool
Lounger requires some
assembly. Please carefully
follow these instructions. In
addition, Excalibur has
included an instructional
DVD to help you assemble
your Motorized Pool
Lounger.
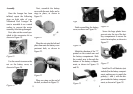
Inflation
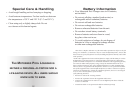
Figure 13
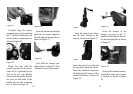
Use the electric air pump
to inflate the Motorized Pool
Lounger (included) as shown
in Figure 13. Be sure to read
the instructions for the elec-
tric air pump on page 20.
Insert the medium-size
valve into the electric air
pump, as shown in Figure
14.
Figure 14
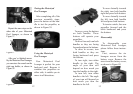
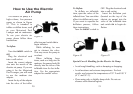
There are three points of
inflation. It is generally best
to start at the lounger’s back-
rest (as shown as ‘A’ in
Figure 15) and then proceed
forward in the following
sequence, shown in Figures
15 and 16.
Figure 15
1. The armrests (shown as
‘B’ in Figure 15).
2. The body of the lounger
(shown as ‘C’ in Figure 16).
Figure 16
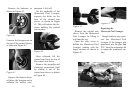
Remove the valve cover,
as shown in Figure 17.
Figure 17
Insert the electric air pump
nozzle into the points of
inflation and turn it on until
that cavity is fully inflated,
as shown in Figure 18.
Figure 18
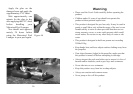
After finishing with each
section, be sure to securely
close each valve cover.
67