


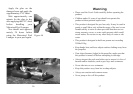

Assembly
Once the lounger has been
inflated, repeat the following
steps on both sides of your
Motorized Pool Lounger. Be
sure to assemble it on a raised
surface to prevent the motor
assembly from being damaged.
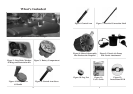
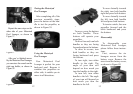
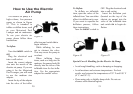
First, take out the wrench pro-
vided in the accessories kit as
shown in Figure 19.
Figure 19
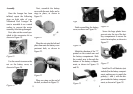
Use the wrench to unscrew the
nut on the battery cover, as
shown in Figure 20.
Figure 20
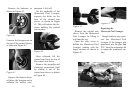
Next, assemble the battery
cover with the nuts, bolts, and o-
rings in place, as shown in
Figure 21.
Figure 21
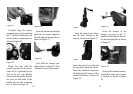
Place the nut onto the bolt and
place them onto the battery com-
partment hole, as shown in
Figure 22.
Figure 22
Place an o-ring on the end of
the bolt, as shown in Figure 23.
Figure 23
Finish assembling the battery
cover, as shown on Figure 24.
Figure 24
Match the direction of the “2”
printed on the control arm and
the battery compartment. Slide
the control arm in through the
bottom of the battery compart-
ment, as shown in Figures 25
and 26.
Figure 25
Figure 26
Screw the large plastic hexa-
gon nut onto the top of the bat-
tery compartment to secure the
control arm in place, as shown in
Figure 27.
Figure 27
Install six D-cell batteries (not
included) in the battery compart-
ment, making sure to match the
polarity (+ and -) with the dia-
gram inside the battery compart-
ment, as shown in Figure 28.
89