


64
64
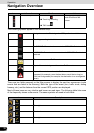
Navigation Overview
Operation
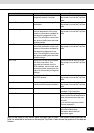
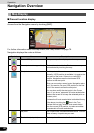
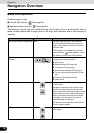
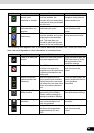
[Info] Opens a new screen showing the address of the Cursor and nearby
POIs.
[More Options] Opens the full-screen Cursor menu with all the available options.
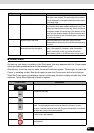
[Set as Destination] Creates a new route with the Cursor as the destination. The previous
route (if one exists) is deleted.
[Remove Destination] When the cursor is at the destination or nearby, this switch replaces the
previous switch, and the present location disappears from the route.
The last via point is promoted as destination, or if there are no via
points, the route is deleted.
[Insert as Via] The Cursor is added to the active route as an intermediate route point,
a point to be reached before the destination. If the route already
includes via points, the Edit route screen will open. This screen shows
where on the route the via point will be displayed.
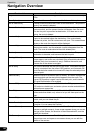
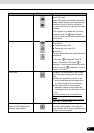
[Remove Via] When the cursor is at or near one of the via points, this switch replaces
the previous switch, and the selected via point disappears from the
route. The route is recalculated without the deleted point.
[Continue] Adds Cursor to the end of the route as new destination. The previous
destination is demoted, and becomes the last via point.
[Routing Methods] This switch resembles [Set as Destination]. Here, however, a new
screen opens, and routes are calculated using all available calculation
methods (fast, short, economical, easy). Observe the results, and
choose one of the routes to navigate.
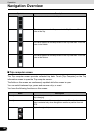
[Set as Start] The Cursor becomes the start point of the route. This means that the
route is not started from the current GPS position, and Automatic Off-
route Recalculation needs to be turned off to keep the selected point as
the start point.
[Remove Start] When the cursor is at the start point or nearby, this switch replaces the
previous switch and the start point disappears from the route. The
current GPS position is again used as the start point, and Automatic
Off-route Recalculation is re-enabled.
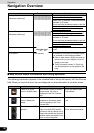
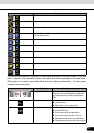
[Save as POI] The Cursor is saved as a user POI. Select the POI group, name the
POI, select a suitable icon, and enter a phone number and additional
information as appropriate.
[Place Pin] Map locations can be marked with Pins. Unlike POIs, Pins have no
names and other details, only colors to let you tell them apart on the
map.
[Remove Pin] When the cursor is at or near a pin, this switch replaces the previous
switch, and you can delete the pin.
[Add to Favorites] Adds Cursor location to list of frequently visited destinations, or
Favorites. You can name the Favorite.
[Save as Camera] The Cursor is saved as the location of a Road Safety Camera (speed
camera or red light camera). A new screen appears where you can set
the type of the camera, the direction of the measured traffic, and the
speed limit checked.
[Edit Camera] If the Cursor is at or near a Road Safety Camera, this switch replaces
the previous one, and opens a new screen where you can edit the
details of the camera.
Touch switch Description