9
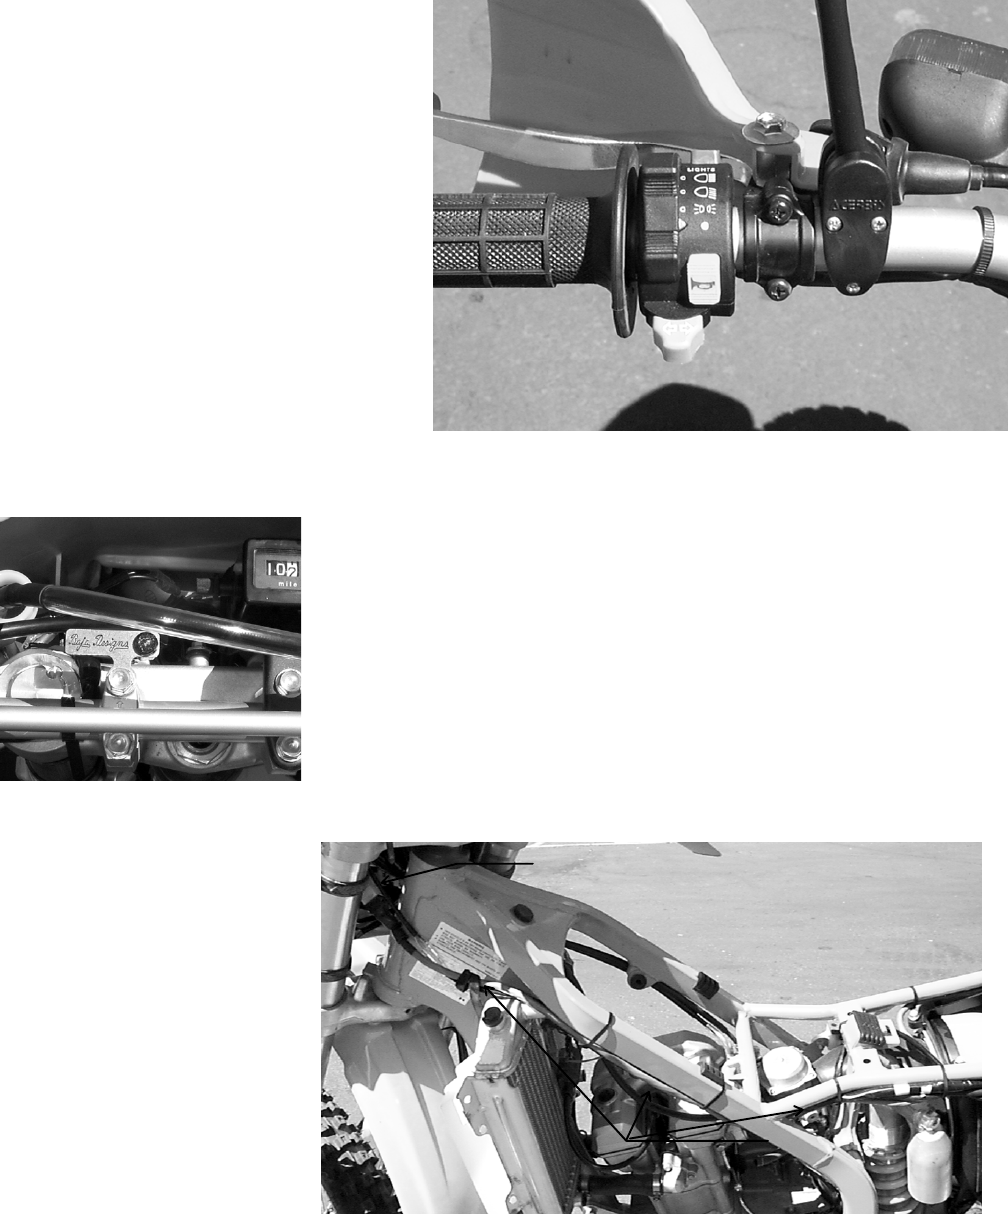
14. Turn Signal Switch Installation:
Install the turn signal switch on the left
handlebar next to the grip as shown in
Photo 11. The switch has a single screw
that pinches it together on one side. Two
tabs secure the switch halves on the other
side. Remove the screw to separate the
halves so that it can be installed on the
handlebar. When installing the switch to
the handle bar, make sure the tabs are
seated in their locating holes and then
tighten the pinch screw. DO NOT OVER
TIGHTEN THIS SCREW, as too much
force can strip the body of the switch. The
clutch perch will have to be moved to the right to make room for the switch. Run the wires along
the backside of the handlebar and down over the front of the triple clamps.
Photo 11
Photo 12
15. Hi Beam Indicator and Bracket: Install the high beam
indicator bracket under the left hand handlebar pinch clamp
bolt as shown it Photo 12.
16. Wiring Harness Installation: Locate the long multi-conductor cable with the nylon multi-
pin connector at one end.
Gently plug this connector
together with the one in the
front wiring harness. Do not
force. If you have trouble
plugging the two together,
realign the male pins with a
small screwdriver to get a good
match. Note that dielectric
grease has been applied to the
female terminals to help
prevent corrosion. This grease
can be purchased at any
automotive parts store. With
the handlebars fully turned to the right to make sure there is enough slack in the cable, run the
Cable
Routing
Multi-Pin
Connector
Photo 13


