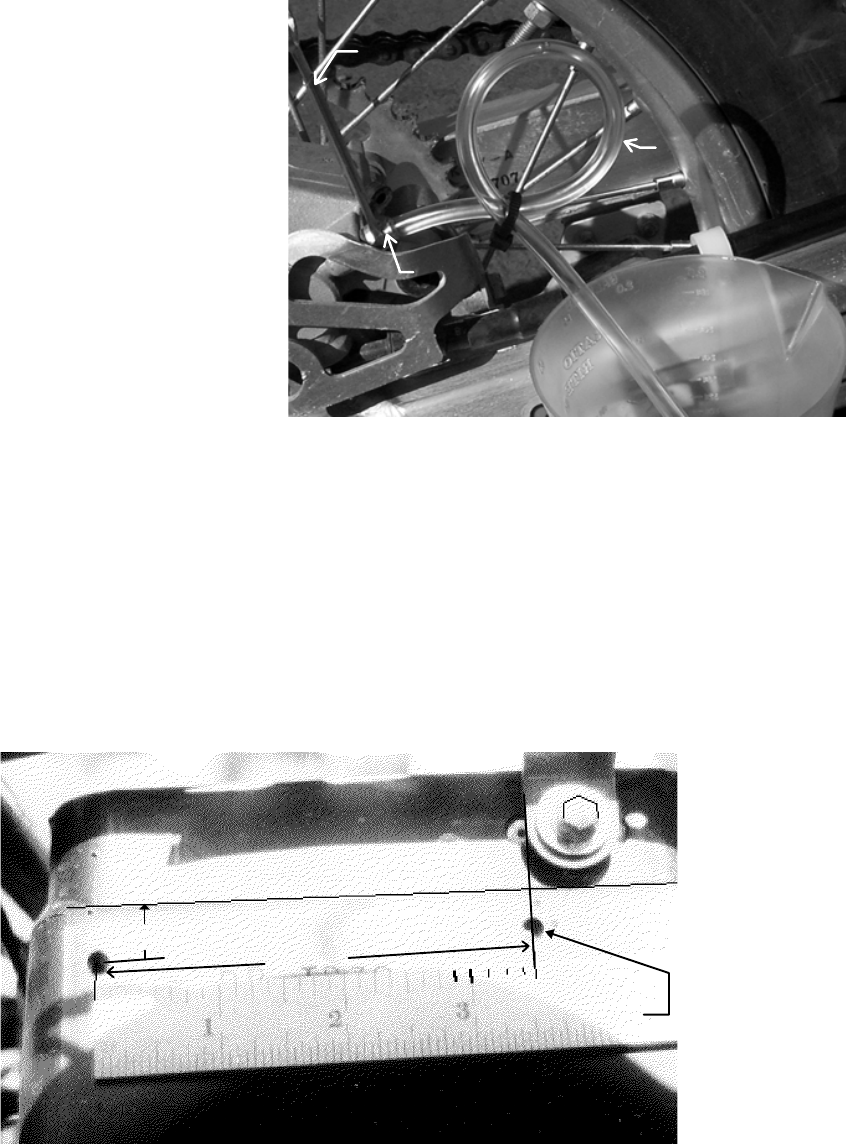
Bleeding the Brakes: (Do not begin this process unless you have a fresh can of brake fluid)
Remove the lid from the brake fluid reservoir. Put the box end of 8mm wrench over the brake
bleed nipple and install the bleed hose (supplied) tightly over the nipple. Position the loop on
the hose above the nipple as shown
in Photo 7 with the other end of the
hose in a container to catch the fluid.
Crack the bleed nipple open about
1/8 to a quarter turn keeping the loop
in the hose vertical. Slowly depress
the brake pedal to fill the hose with
fluid. Pump slowly until you have
brake fluid extending up into the
loop, then you can pump the pedal
fairly aggressively to drive air out of
the system - The fluid above the
bleed nipple will prevent air from re-
entering the system. DO NOT LET
THE RESERVOIR GO DRY -
ADD FLUID AS NEEDED. Pump
the pedal until there is no more bubbles, then close the nipple with the wrench. Double check
that the pedal is firm and the brake works properly.
Photo 7
Bleed Nipple
Container
Bleed Hose
8mm
Wrench
Attach the brake switch leads to the spade terminals at the top of the switch and run the brake
switch wires up the rear subframe triangle to the area behind the airbox cross-member.
11. Battery Mounting Holes: Remove the four bolts that secure the lower fender skirt on the
KLX 250/300. You are going to drill two mounting holes for the battery. The holes will be
drilled through the back of the airbox as shown in the photo below. Exact positioning of the
holes is non-critical. Mount battery using one 11” zip tie supplied in small parts bag.
3 1/ 2"
1/ 2"
Back Side of Airbox
Top Back Edge of Airbox
Right Hand Airbox Mount
From Mold Line
Align hole vertically with inside edge of mount
Photo 8
7


