


Periodic maintenance and adjustment
107
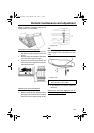
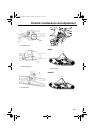
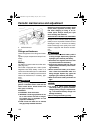
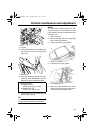
10. Fit the weatherstrip on the headlight unit
into the recess in the top of the air filter
case cover.
11. Install the headlight unit bolts and wind-
shield stay bolts, and then tighten them to
their specified torques.
12. Install the top cover and the shroud.
ESU14150
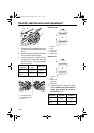
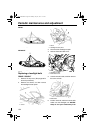
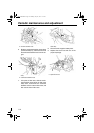
Adjusting the headlight beams
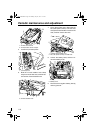
RS90P / RS90PLT / RST90PGT
1. Remove the top cover. (See page 63 for
removal procedures.)
2. Use a Phillips screwdriver to turn the
headlight beam adjusting screw and ad-
just the headlight beams. To lower the
headlight beams, turn the headlight
beam adjusting screw in direction (a). To
raise the headlight beams, turn the head-
light beam adjusting screw in direction
(b).
3. Install the top cover.
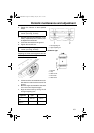
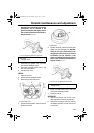
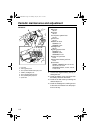
RST90
1. Open the shroud.
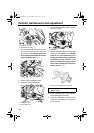
2. Insert a Phillips screwdriver into the hole
under the shroud to turn the headlight
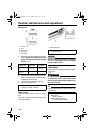
beam adjusting screw. To lower the
headlight beams, turn the Phillips screw-
driver in direction (a). To raise the head-
light beams, turn the Phillips screwdriver
in direction (b).
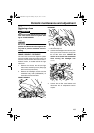
1. Slot
2. Projection
1. Weatherstrip
Tightening torques:
Headlight unit bolt:
3.0 Nm (0.30 m·kgf, 2.2 ft·lbf)
Windshield stay bolt:
14 Nm (1.4 m·kgf, 10 ft·lbf)
1
2
1
1. Headlight beam adjusting screw
1. Headlight beam adjusting screw
1
(b)
(a)
U8HV10E0.book Page 107 Monday, May 16, 2011 1:15 PM