


12
Changing Travel - FLOAT Forx
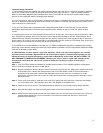
FOX FORX travel can be changed by rearranging the travel spacers as shown in the drawings below. After changing
travel check the fork for proper operation before riding. If there is free movement in the fork or if it makes strange
noises disassemble the fork and check for complete number and correct orientation of spacers.
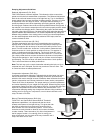
Step 1 - Remove the blue air cap from the top of the left fork leg. Let the air out of the fork. Refer to Pump Instructions
for details about letting the air out with a pump. Remove left top cap with a 26mm socket 6-point socket
wrench.
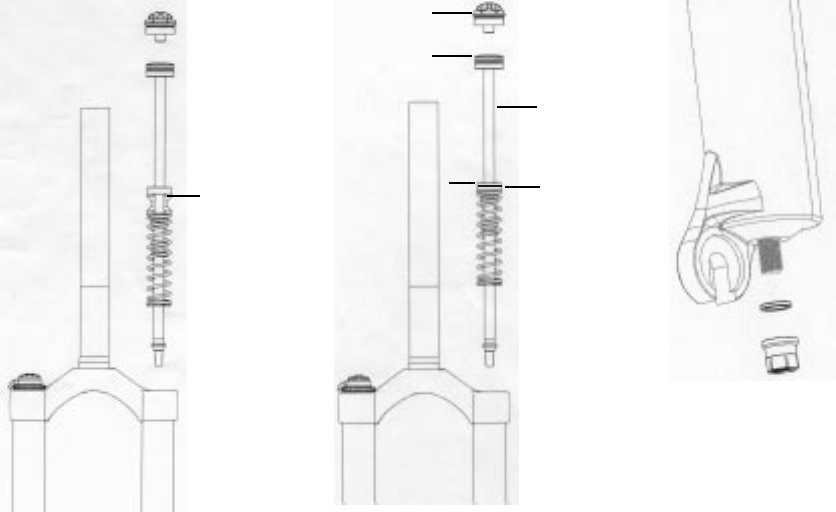
Step 2 - Loosen the bottom nut 3-4 turns with a 10mm wrench. With a plastic mallet, gently tap the bottom of the shaft
to disengage it from the lower leg. Allow oil to drain into a bucket. Remove the bottom nut and crush washer.
Step 3 - Compress the fork as much as possible. The air piston will be visible about one inch below the top of the
upper tube. Push the bottom of the shaft upwards to push the air piston out of the top of the upper tube. If
necessary, use a small screwdriver to push the bottom of the shaft up through the hole in the bottom of the
lower leg.
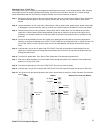
Step 4 - Pull the air-shaft assembly from the fork. Refer to the drawings below and add or remove the appropriate
spacer(s) to achieve the desired travel. NOTE: FLOAT FORX can be configured for 80 or 100mm of travel. Do
not exceed 100mm of travel. Spacers snap on to the air shaft between the Spring Guide and the Topout
Plate.
Step 5 - Lubricate the o-ring on the air piston with FOX FLOAT Fluid and re-install the air shaft assembly into the
upper tube. Push the shaft until it approaches the bottom hole of the fork. Do not push the shaft all the way
through the bottom hole.
Step 6 - Turn the fork upside down. Pour 30cc of FOX Suspension Fluid through the bottom hole.
Step 7 - Push the air shaft assembly up until the shaft comes through the bottom hole. Install the crush washer and
bottom nut. Torque to 50 in-lbs.
Step 8 - Turn the fork right side up. Pour 5cc of FOX FLOAT Fluid on top of the air piston.
Step 9 - Lubricate the o-ring on the air topcap with FOX FLOAT Fluid. Re-install the topcap and torque to 165 in-lbs.
Step 10 - Air up the fork to the desired pressure and cycle it several times to check for proper operation. Re-install the
blue air cap.
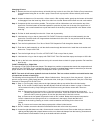
20mm Travel
Spacer
80mm
100mm
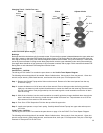
Bottom Nut and Crush Washer
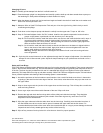
Air topcap
Air piston
Air Shaft
Assembly
Negative
Spring
Retainer
Negative
Spring
Plate
FLOAT Forx Travel Spacer Diagram