


OPERATION
13
OPERATION
12
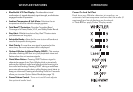
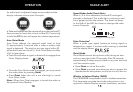
11th time Ka BAND ON B/L = ON Turns Ka Band ON
C = OFF Turns Ka Band OFF
12th time Laser ON
B/L = ON Turns Laser ON
C = OFF Turns Laser OFF
13th time Voice OFF
B/L = ON Real Voice
®
ON
C = OFF Real Voice
®
OFF
14th time Tone Off
B/L = ON Turns Tone ON
C = OFF Turns Tone OFF
15th time LED On
B/L = ON Turns LED ON
C = OFF Turns LED OFF
*Factory settings.
Press and hold P/V twice anytime to exit. NOTE: Turning
POP
™
Mode off, turns on VG-2.
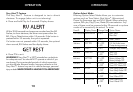
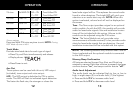
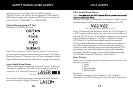
Teach Mode
Provides simulated alerts for each type of signal
• Press City and Quiet simultaneously and release.
• Display shows:
• Press Power to exit.
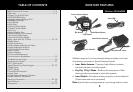
Aux Out
Three options can be used with this unit; LED output
(included), tone output and voice output.
LED - The LED output is defaulted to ON in option
mode. The LED will flash to indicated signal detection.
The faster the flash rate, the stronger or closer the
laser/radar signal will be. This replaces the normal audio
found in other detectors. The bright LED will catch your
attention as an audio alert may not.
NOTE: When this
option is selected, volume level will not be displayed on
the screen.
Tone - The Tone output provides a signal to an optional
audio module. As with the LED, this module will provide
audio for laser/radar signals. Use and installation instruc-
tions will be included with this option. Volume to this
module can be adjusted using the P/V button.
Voice - The Voice Module not only provides voice
announcements of bands received, it also provides audio
alerts for laser/radar signals that are detection. Use and
installation instructions will be included with this option.
NOTE: The following sections only function when Tone or
Voice is selected and the optional module is connected
to the AUX output.
Memory/Beep Confirmation
All features selected (except Stay Alert and Quiet) are
retained in memory. Each time a button is pressed; one beep
confirms feature
“on”, two beeps confirm feature “off”.
Audio Level Adjustment
The audio levels can be adjusted high to low, or low to
high, in eight steps: (0) is no audio level, (7) the highest.
• Press and hold
P/V to increase audio level.
• Press and hold P/V to decrease audio level.