


18
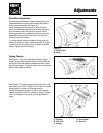
Removing & Attaching
Removing & Attaching Hitch
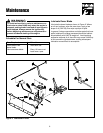
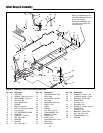
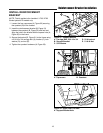
1. Remove the safety clip (A, Figure 26) and remove the
hitch pin (D).
2. Lift the hitch bar (B) off the tractor brackets (C).
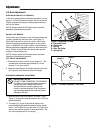
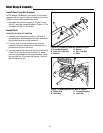
3. Remove the spring clips (A, Figures 28 & 29) secur-
ing the rear hitch bracket (C) to the lift pivot rod (B).
4. Hydraulic/Electric Lift Models: Slide the lift pivot
rod (B, Figure 28) out and remove the rear hitch
bracket (C). Remove the lift lever extension.
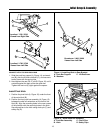
5. Manual Lift Models: See Figure 30. Remove the
capscrew from location (A). Depress the lift lever
release button and rotate the lever forward until the
lever latch clears the mounting bracket. Slide the
lever and rod assembly out of the hitch bracket and
mounting bracket.
Install in reverse order of removal.
2
3
1
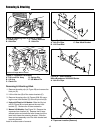
Figure 30. Lift Lever Removal
A. Capscrew Location (Remove)
A
A
A
A
B
A
C
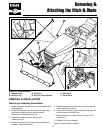
Figure 28. Hitch Removal - Landlord/1700/2700
A. Hair Pin Clips C. Rear Hitch Bracket
B. Lift Pivot Rod
Figure 29. Hitch Removal -
Baron/Broadmoor/1600/2600 Series
A. Hair Pin Clips
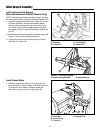
Figure 26. Installing Hitch to Front of Tractor
A Safety Clip C. Tractor Brackets
B. Hitch Bar D. Hitch Pin
D
A
B
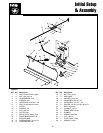
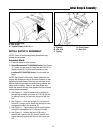
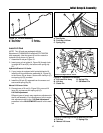
Figure 27. Hydraulic Lift Bracket
A. Lift Lever Ext. Assy D. Spring Clip
B. Lift Arm E. 3/8 Mower Pin
C. Clevis Pin
Viewed from Right Side of Tractor
A
B
C
D
E
C