


To set the daily start feature:
1. Press and hold Buttons 2 and 3 until the remote beeps four times.
· The fan and clock will be shown indicating daily start mode is entered.
2. Press Button 2 until the desired hour is displayed.
3. Press Button 3 until the desired minute is displayed. The button may be held down to scroll faster.
4. When the desired time is displayed, press Button 5 to store.
· The remote will beep 3 times to indicate the daily start function has been set.
To disable the daily start feature:
1. Press and hold Buttons 2 and 3 until the remote beeps four times.
· The fan and clock will be shown indicating daily start mode is entered.
2. Press Button 1 to disable the daily start function.
· The remote will beep 3 times to indicate the daily start function has been disabled.
Setting The Automatic Cold Start Temperature
(
2 step procedure, for second step see page 7 under
c
o
)
The Automatic Cold Start setting sets the temperature threshold. If automatic start is set to cold temperature setting,the
starter will activate every 2 or 4 hours if the temperature drops bellow the set value.
1. Press and hold Buttons 2 and 3 until the remote beeps five times.
·
c
o
will be shown indicating automatic cold start temperature set mode is entered.
2. Press Button 2 to increase the temerature.
3. Press Button 3 to decrease the temperature.
4. When the desired temperature is displayed, press Button 1 to store the value.
· The remote will display the temperature and beep 3 times then 4 times to indicate the set temperature.
Setting The Automatic Hot Start Temperature
(
2 step procedure, for second step see page 7 under
h
o
)
The Automatic Hot Start setting sets the temperature threshold. If automatic start is set to hot temperature setting, the
starter will activate every 2 or 4 hours if the temperature rises above the set value.
1. Press and hold Buttons 2 and 3 until the remote beeps six times.
·
h
o
will be shown indicating automatic hot start temperature set mode is entered.
2. Press Button 2 to increase the temerature.
3. Press Button 3 to decrease the temperature.
4. When the desired temperature is displayed, press Button 1 to store the value.
· The remote will display the set temperature and beep 3 times then 4 times to indicate the set temperature.
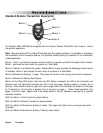
LCD Backlight
Transmitter Button 5 is used for confirmation, transmitter programming, as well as activation of the LCD
backlighting for use in the dark. Press and release button 5 momentarily to activate the LCD backlight.
System Confirmation
The 2-way transmitter's confirmation feature allows the current vehicle status to be displayed at any time.
To display system status:
1. Press and hold Button 5 until the display shows CON.
· The transmitter will beep once.
2. Release Button 5.
· The transmitter will beep once.
· The LCD panel will display the current system status.
Programmable Functions using the LCD Transmitter
Pressing and holding transmitter button 5 will scroll through several transmitter programmable options -
dEG, CHP, snd, PSV, VAL,
C
O
and
h
O
.
dEG Check the temperature inside the vehicle
1. Press and hold Button 5 until the display shows DEG
·The transmitter will beep twice.
2. Release Button 5.
· The transmitter will beep four times.
· The LCD panel will display the temperature inside the vehicle
Page 6 - Precision